How to Add a Text Title Widget to Your LeadDec Dashboard

Master the process of enhancing your LeadDec dashboard by adding a text title widget. This article offers a step-by-step guide on incorporating text title widgets, helping you clearly label sections and improve the organization of your dashboard. Ideal for users looking to create a more intuitive and visually structured workspace.


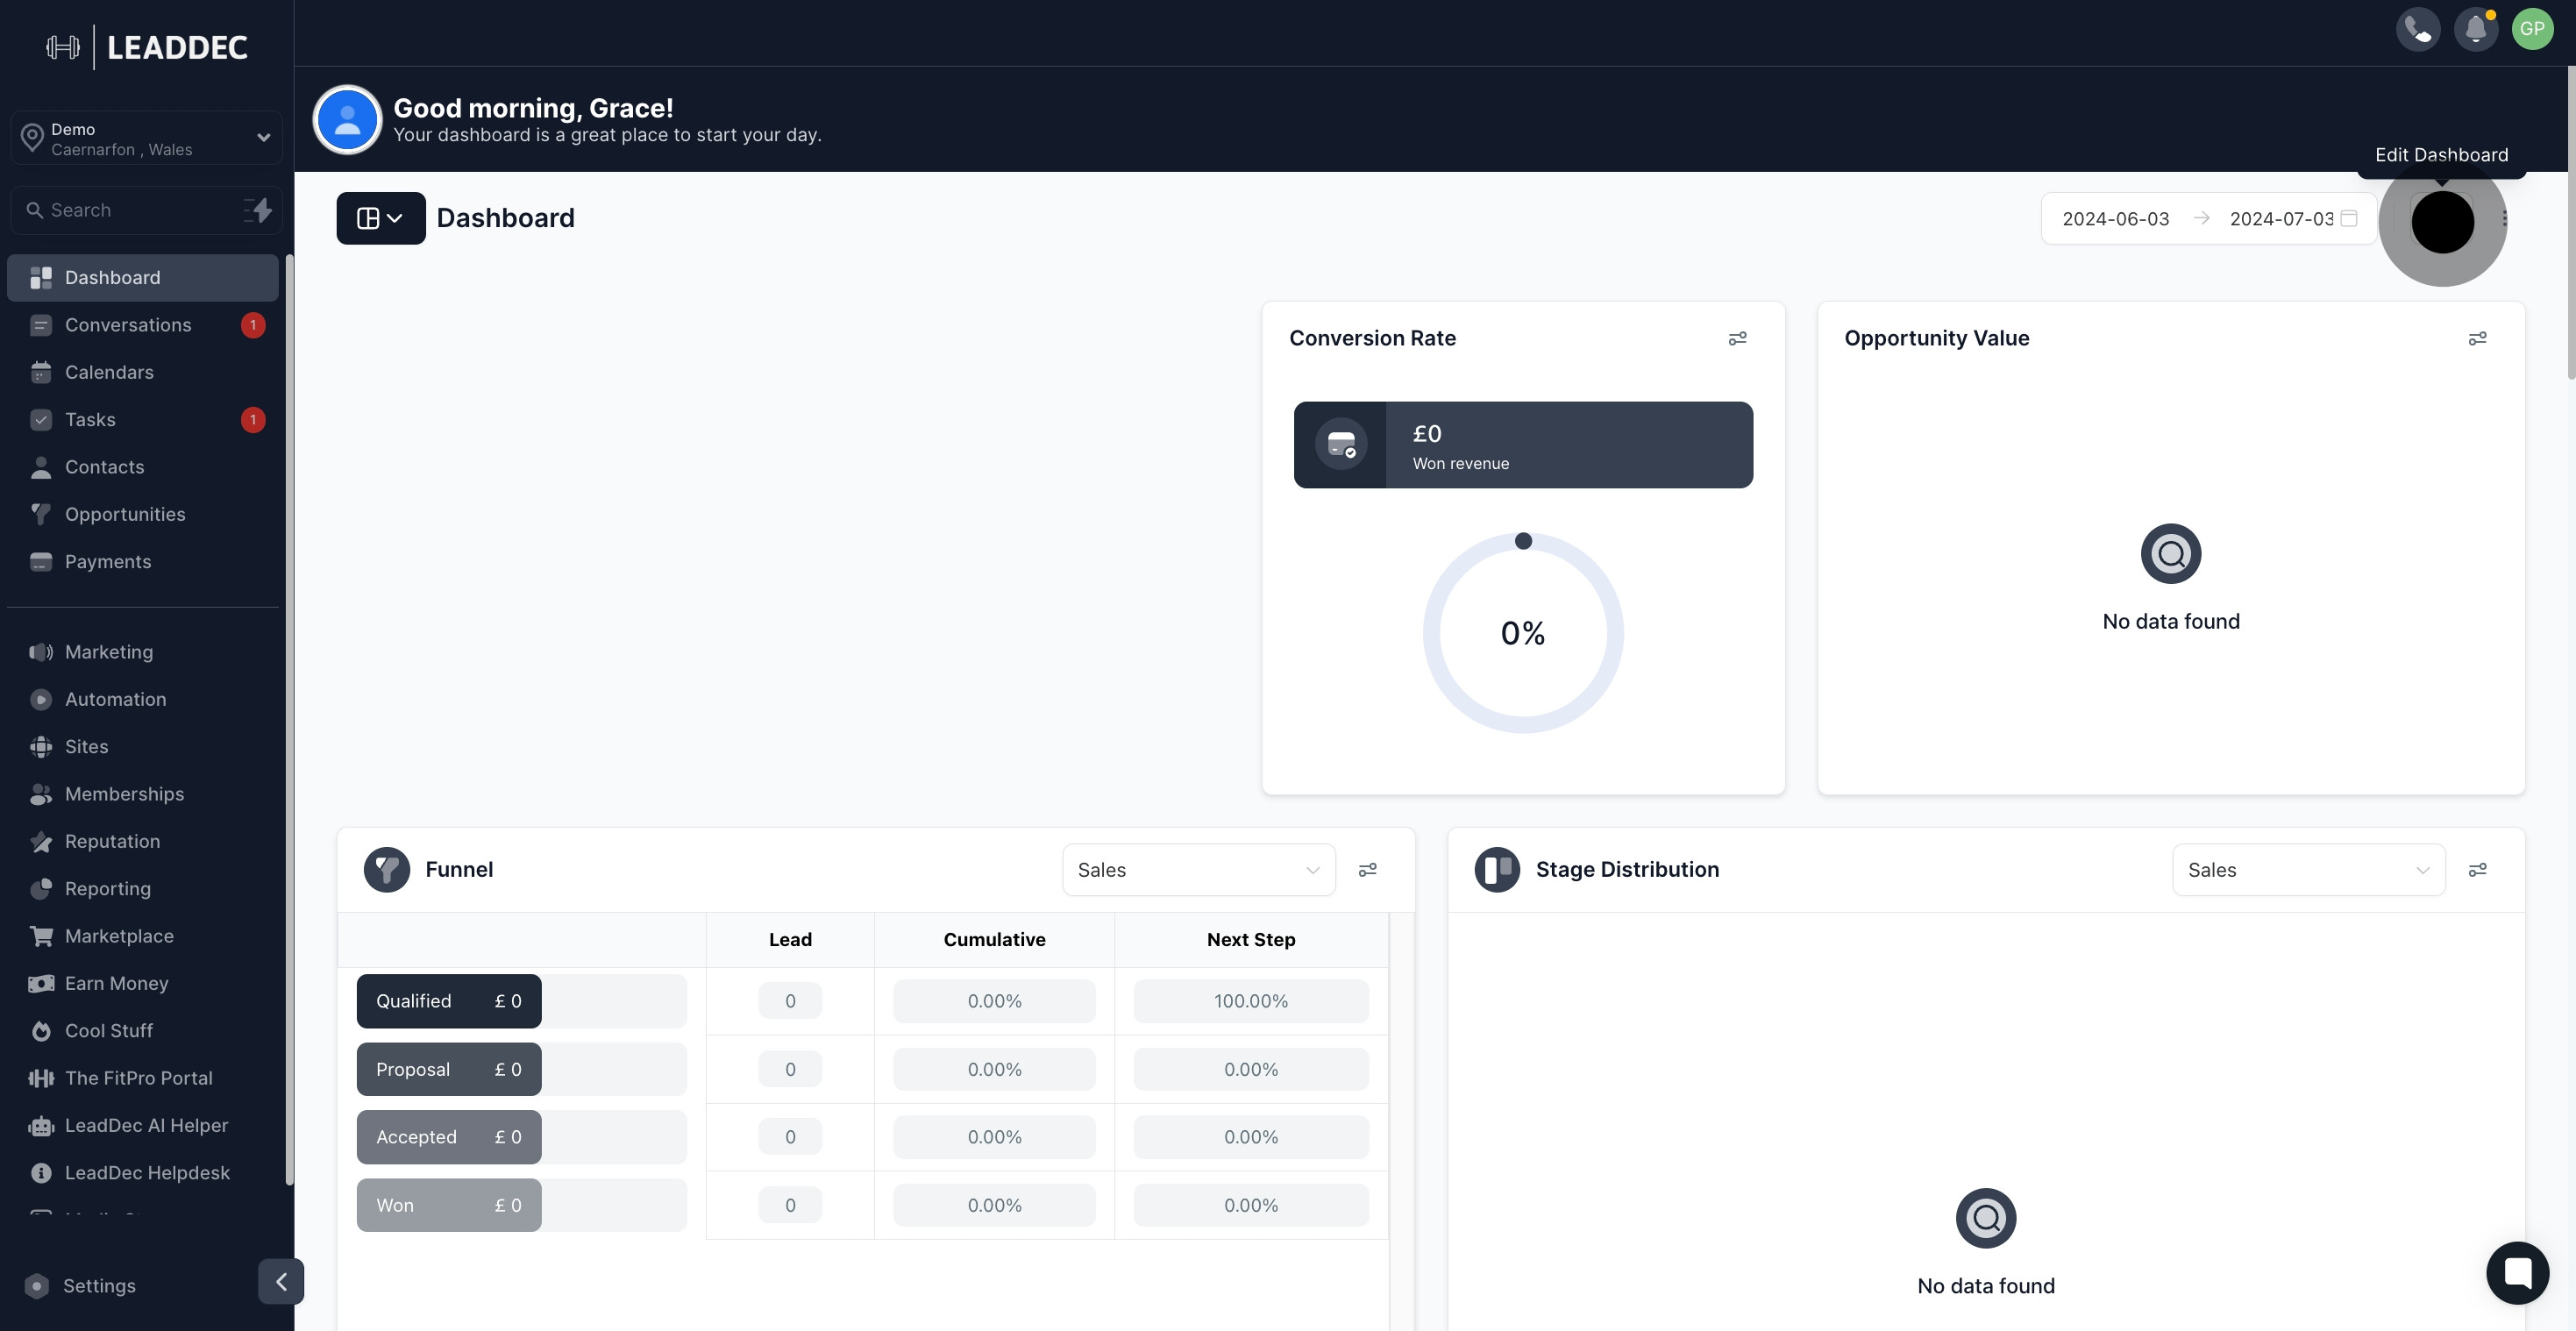
1. Start by navigating to your Dashboard.

1 Click here.

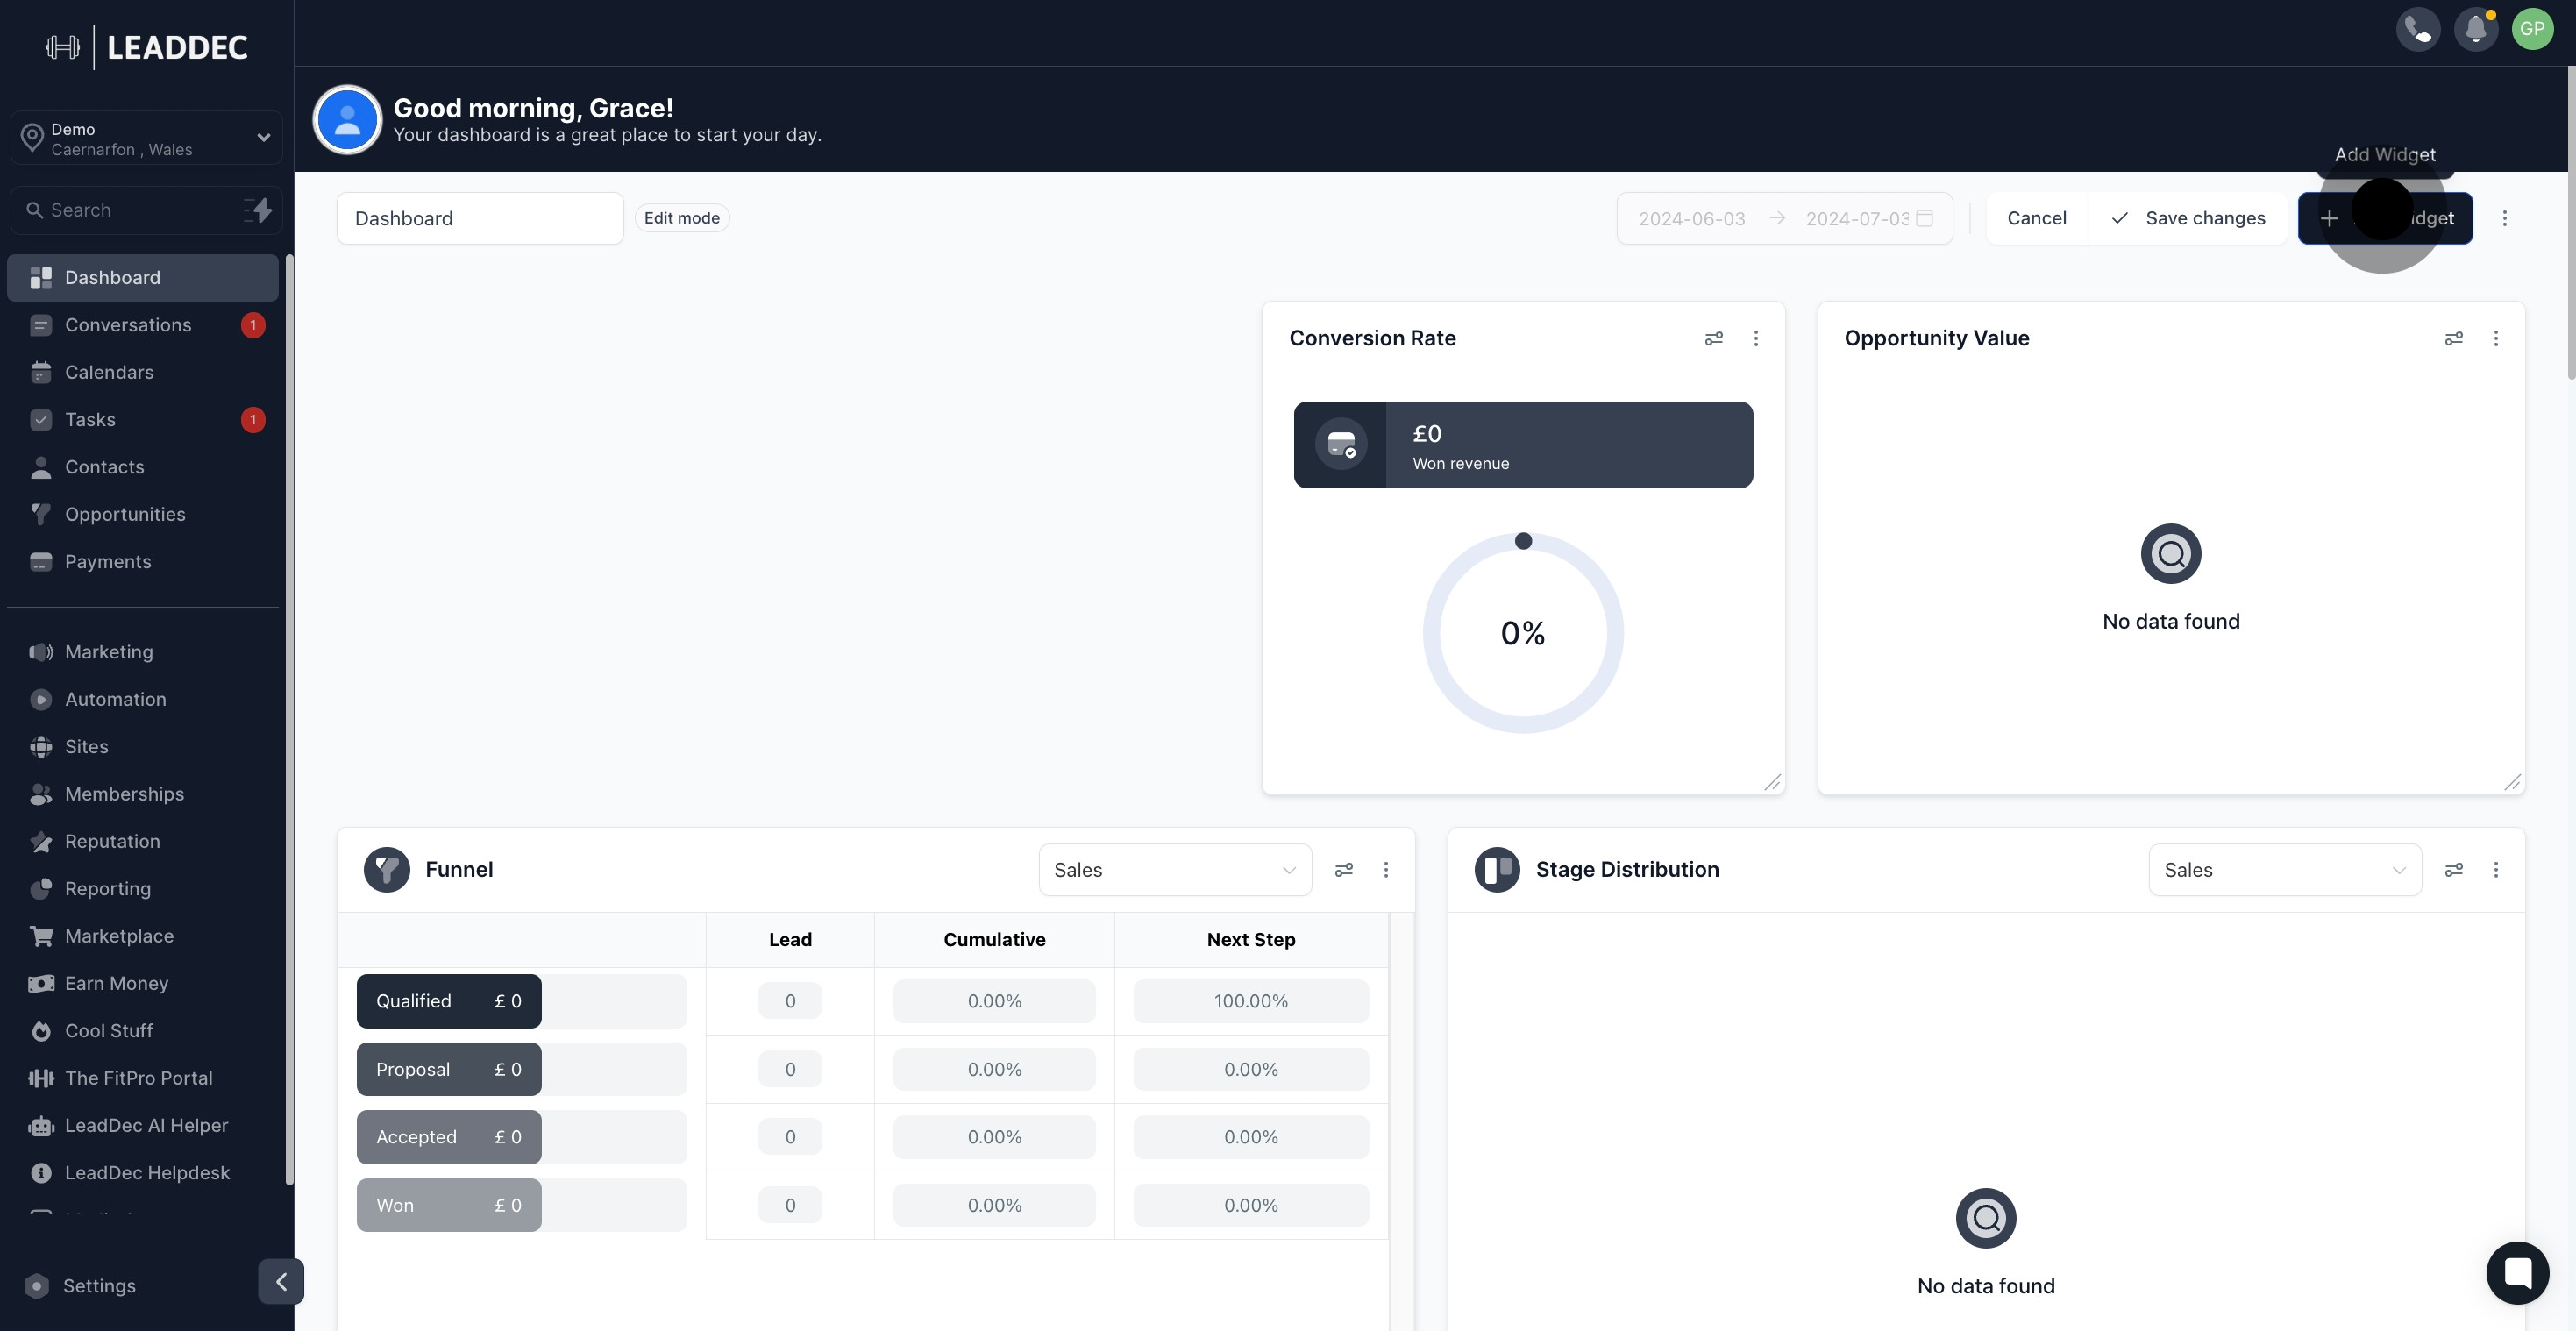
2. Now, go ahead and click 'Edit'.

2 Once that's done, click on the element.

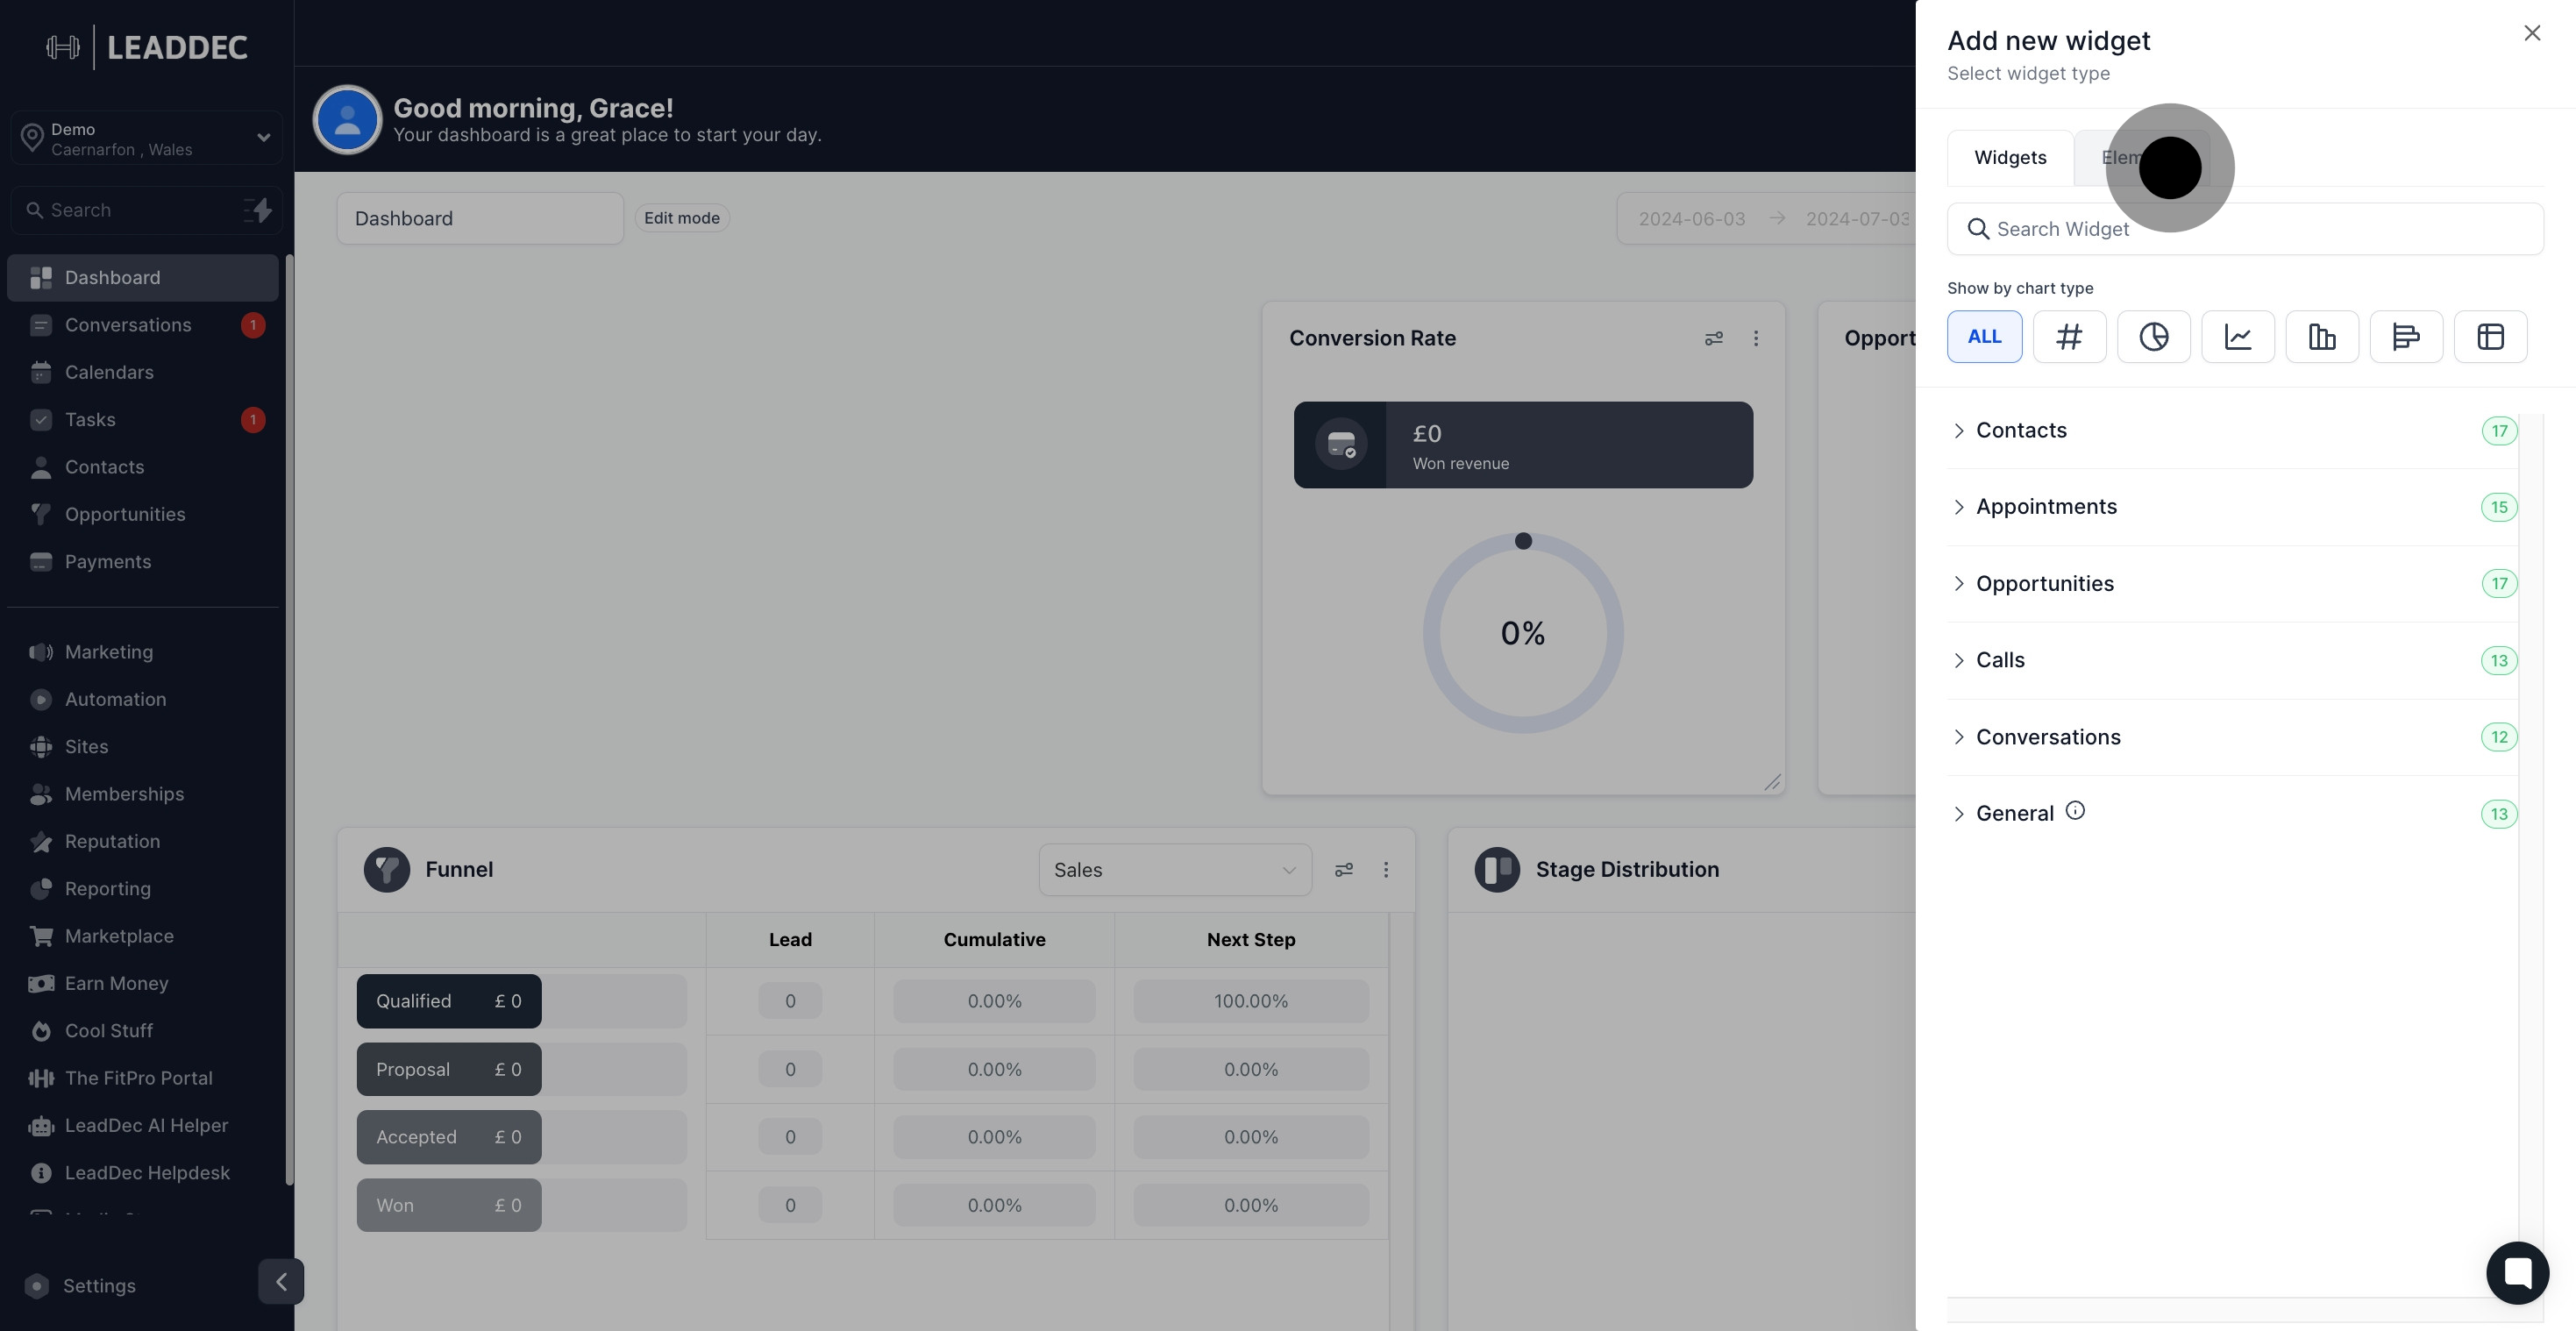
3. Next, choose to 'Add Widget'.

3 Now, click on "Add Widget".

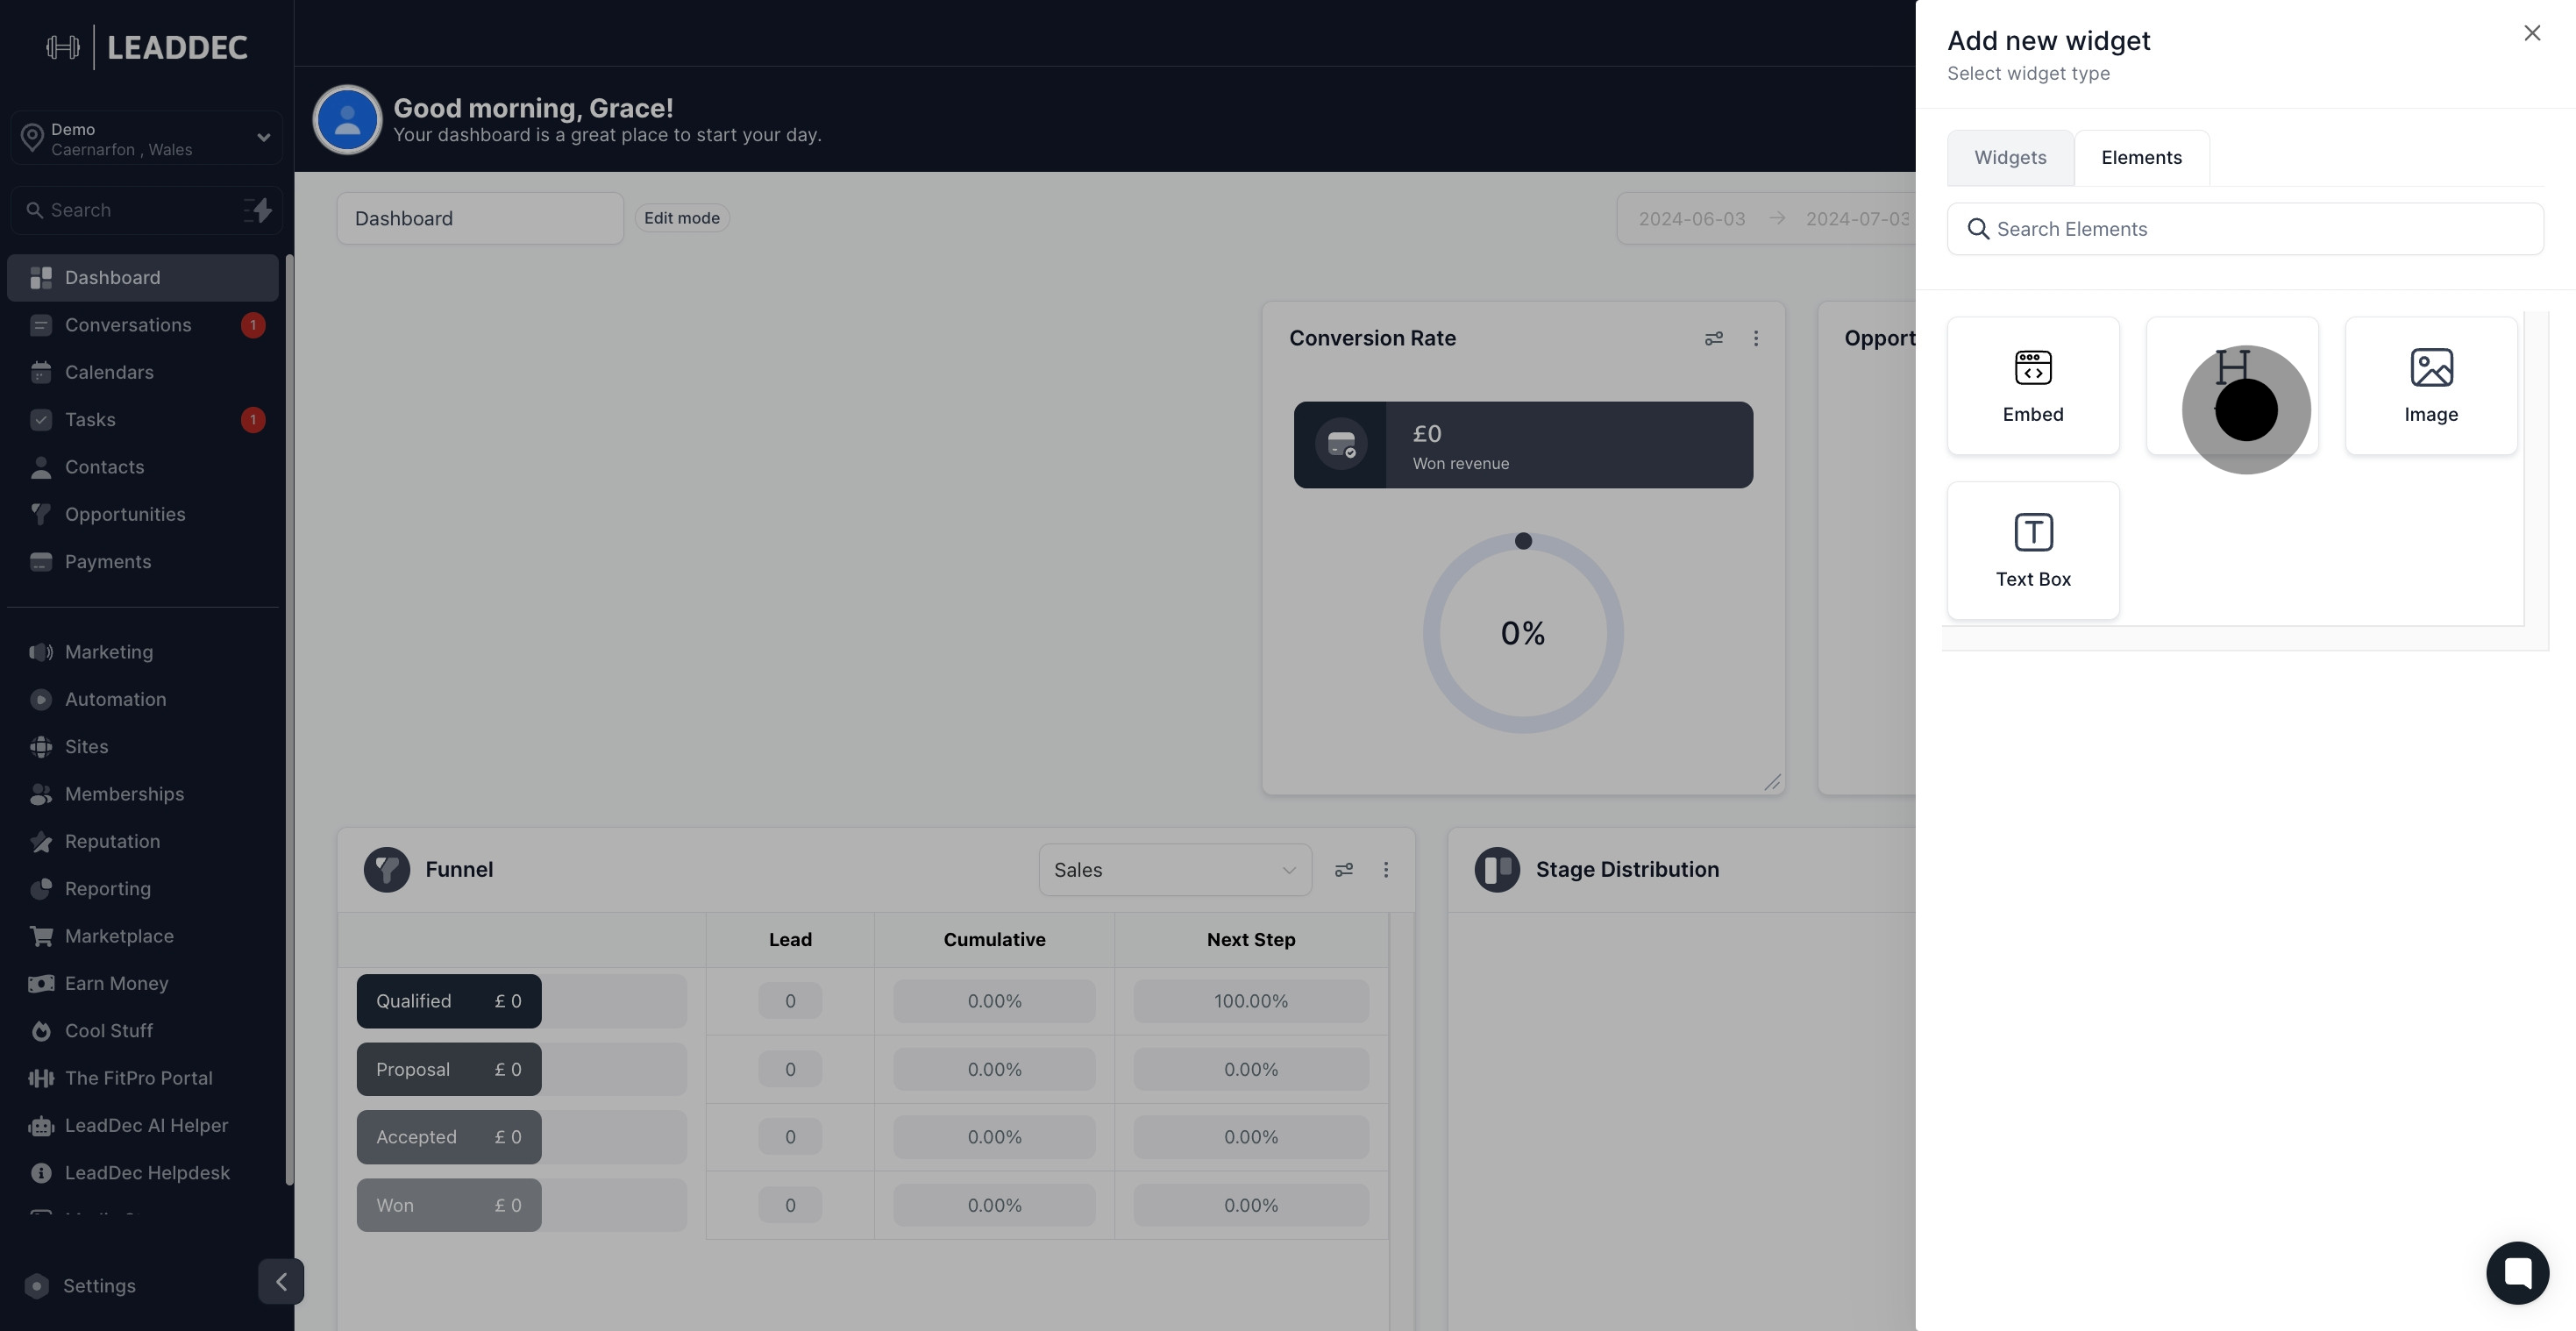
4. Then, select 'Elements' from the options.

4 Following that, click on "Elements".

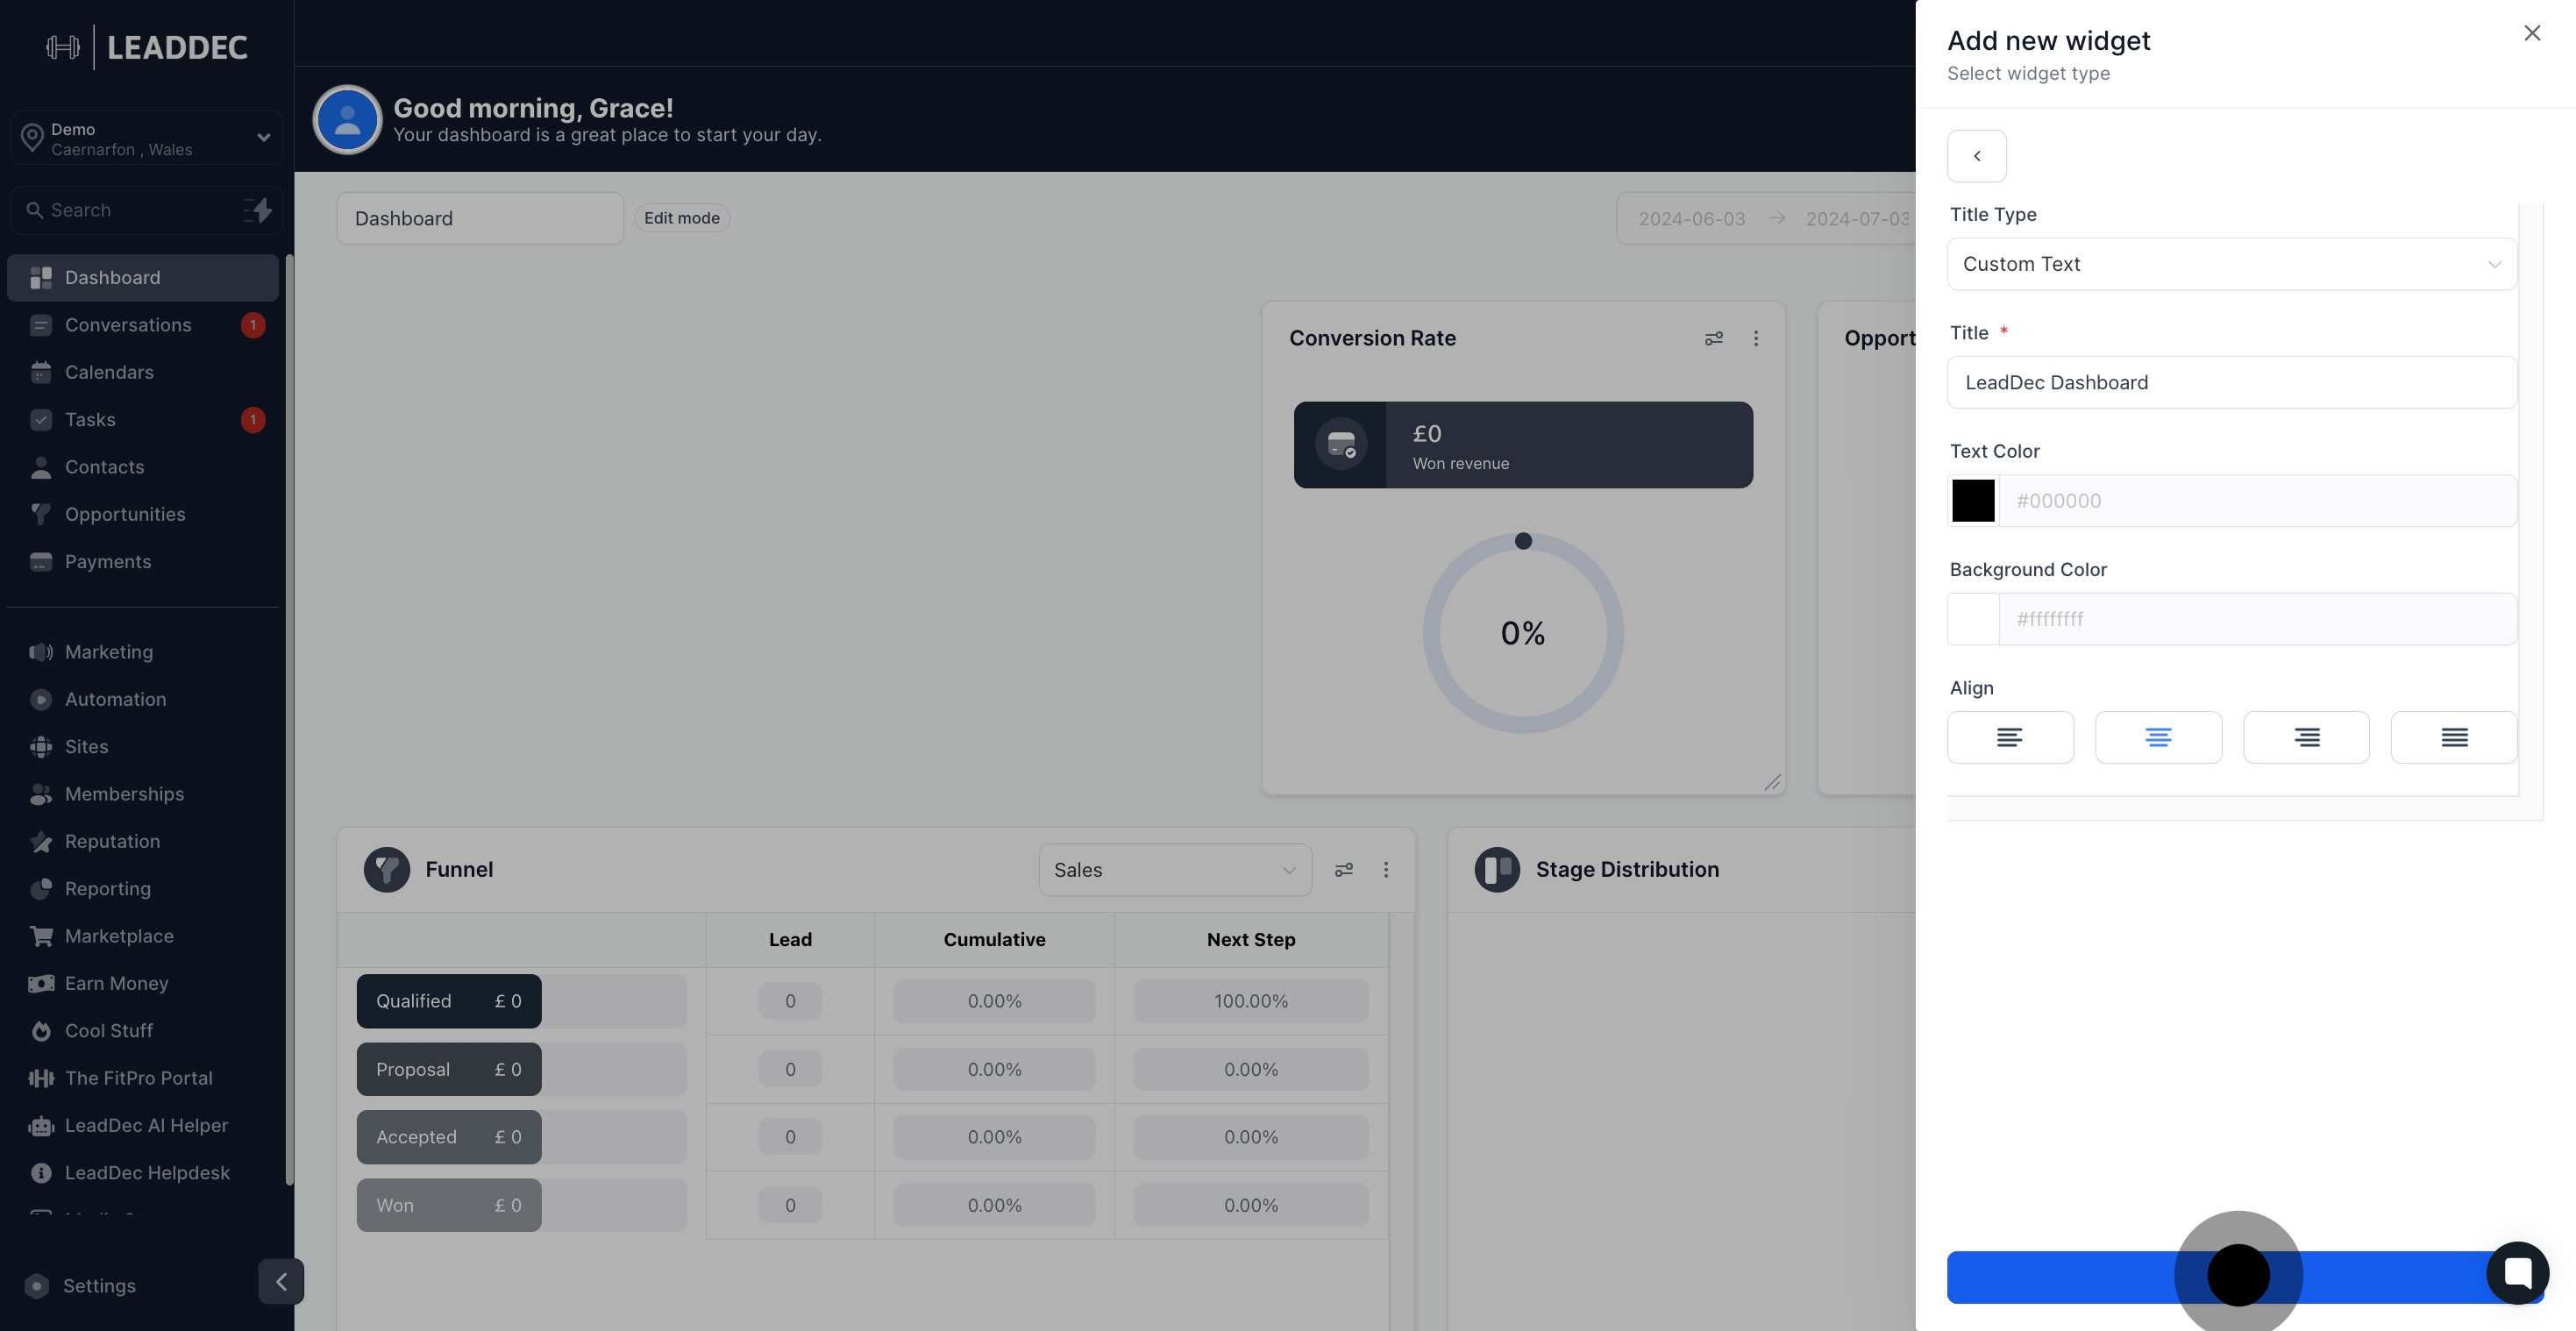
5. Click on 'Title' next.

5 Then, click on "Title".

6. Choose the type of title you'd like to add.

6 Click on "Custom Text".

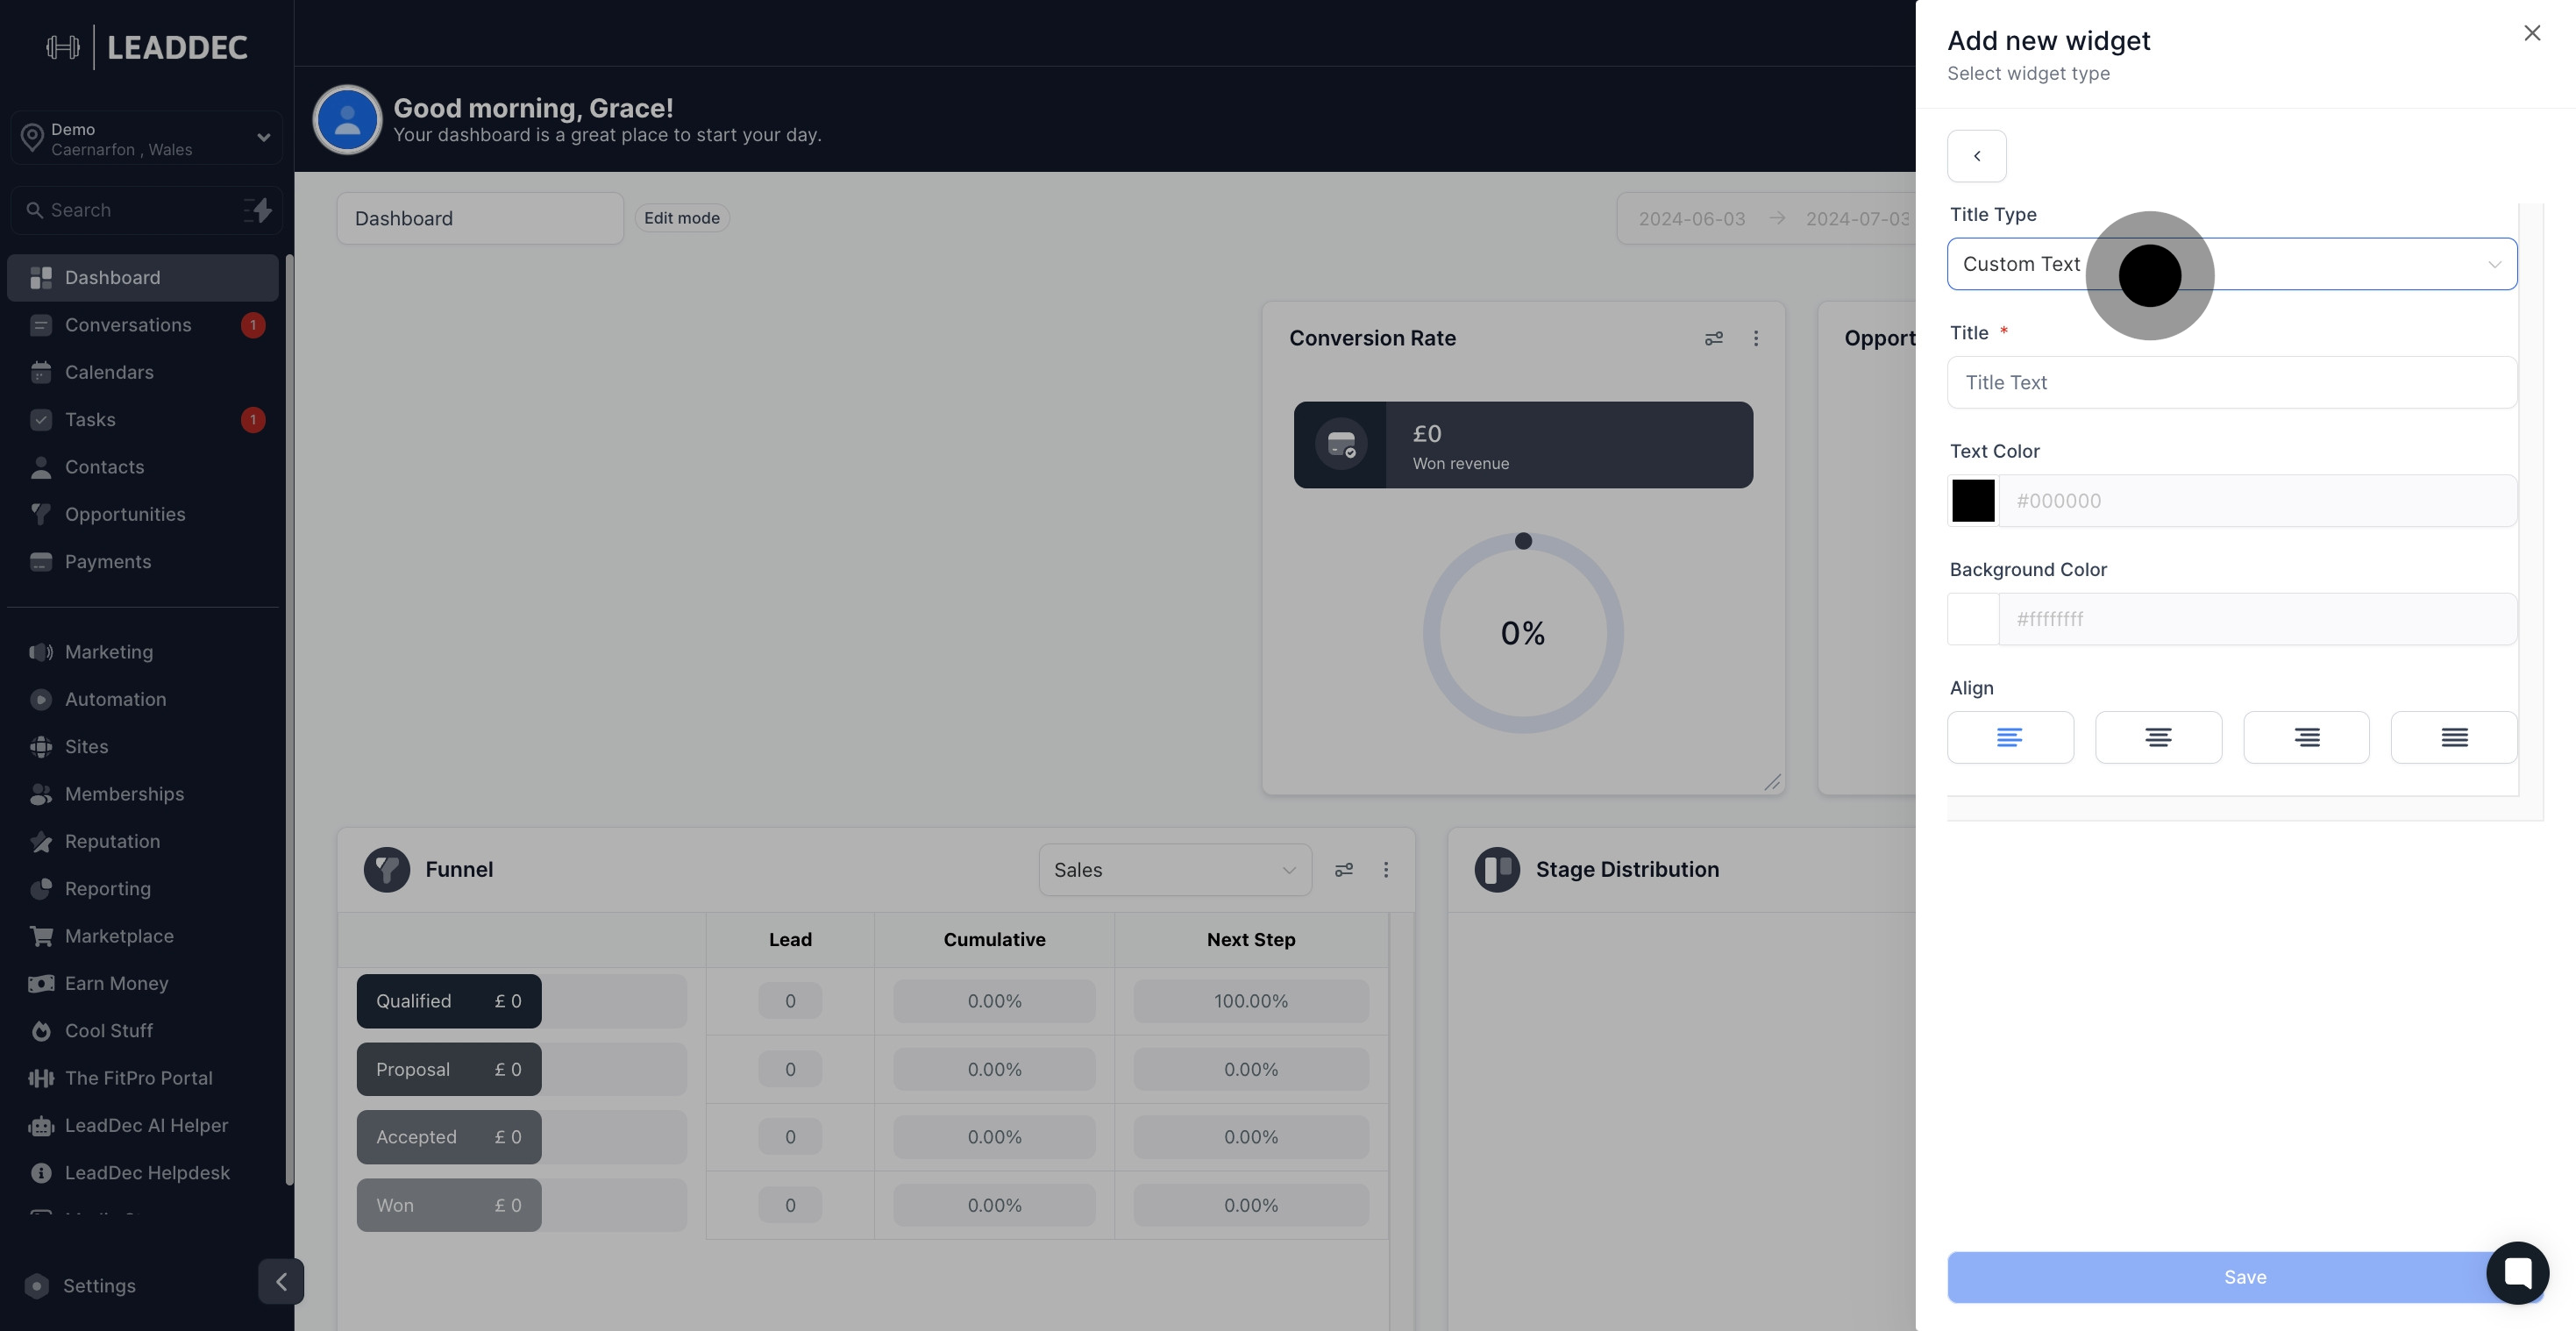
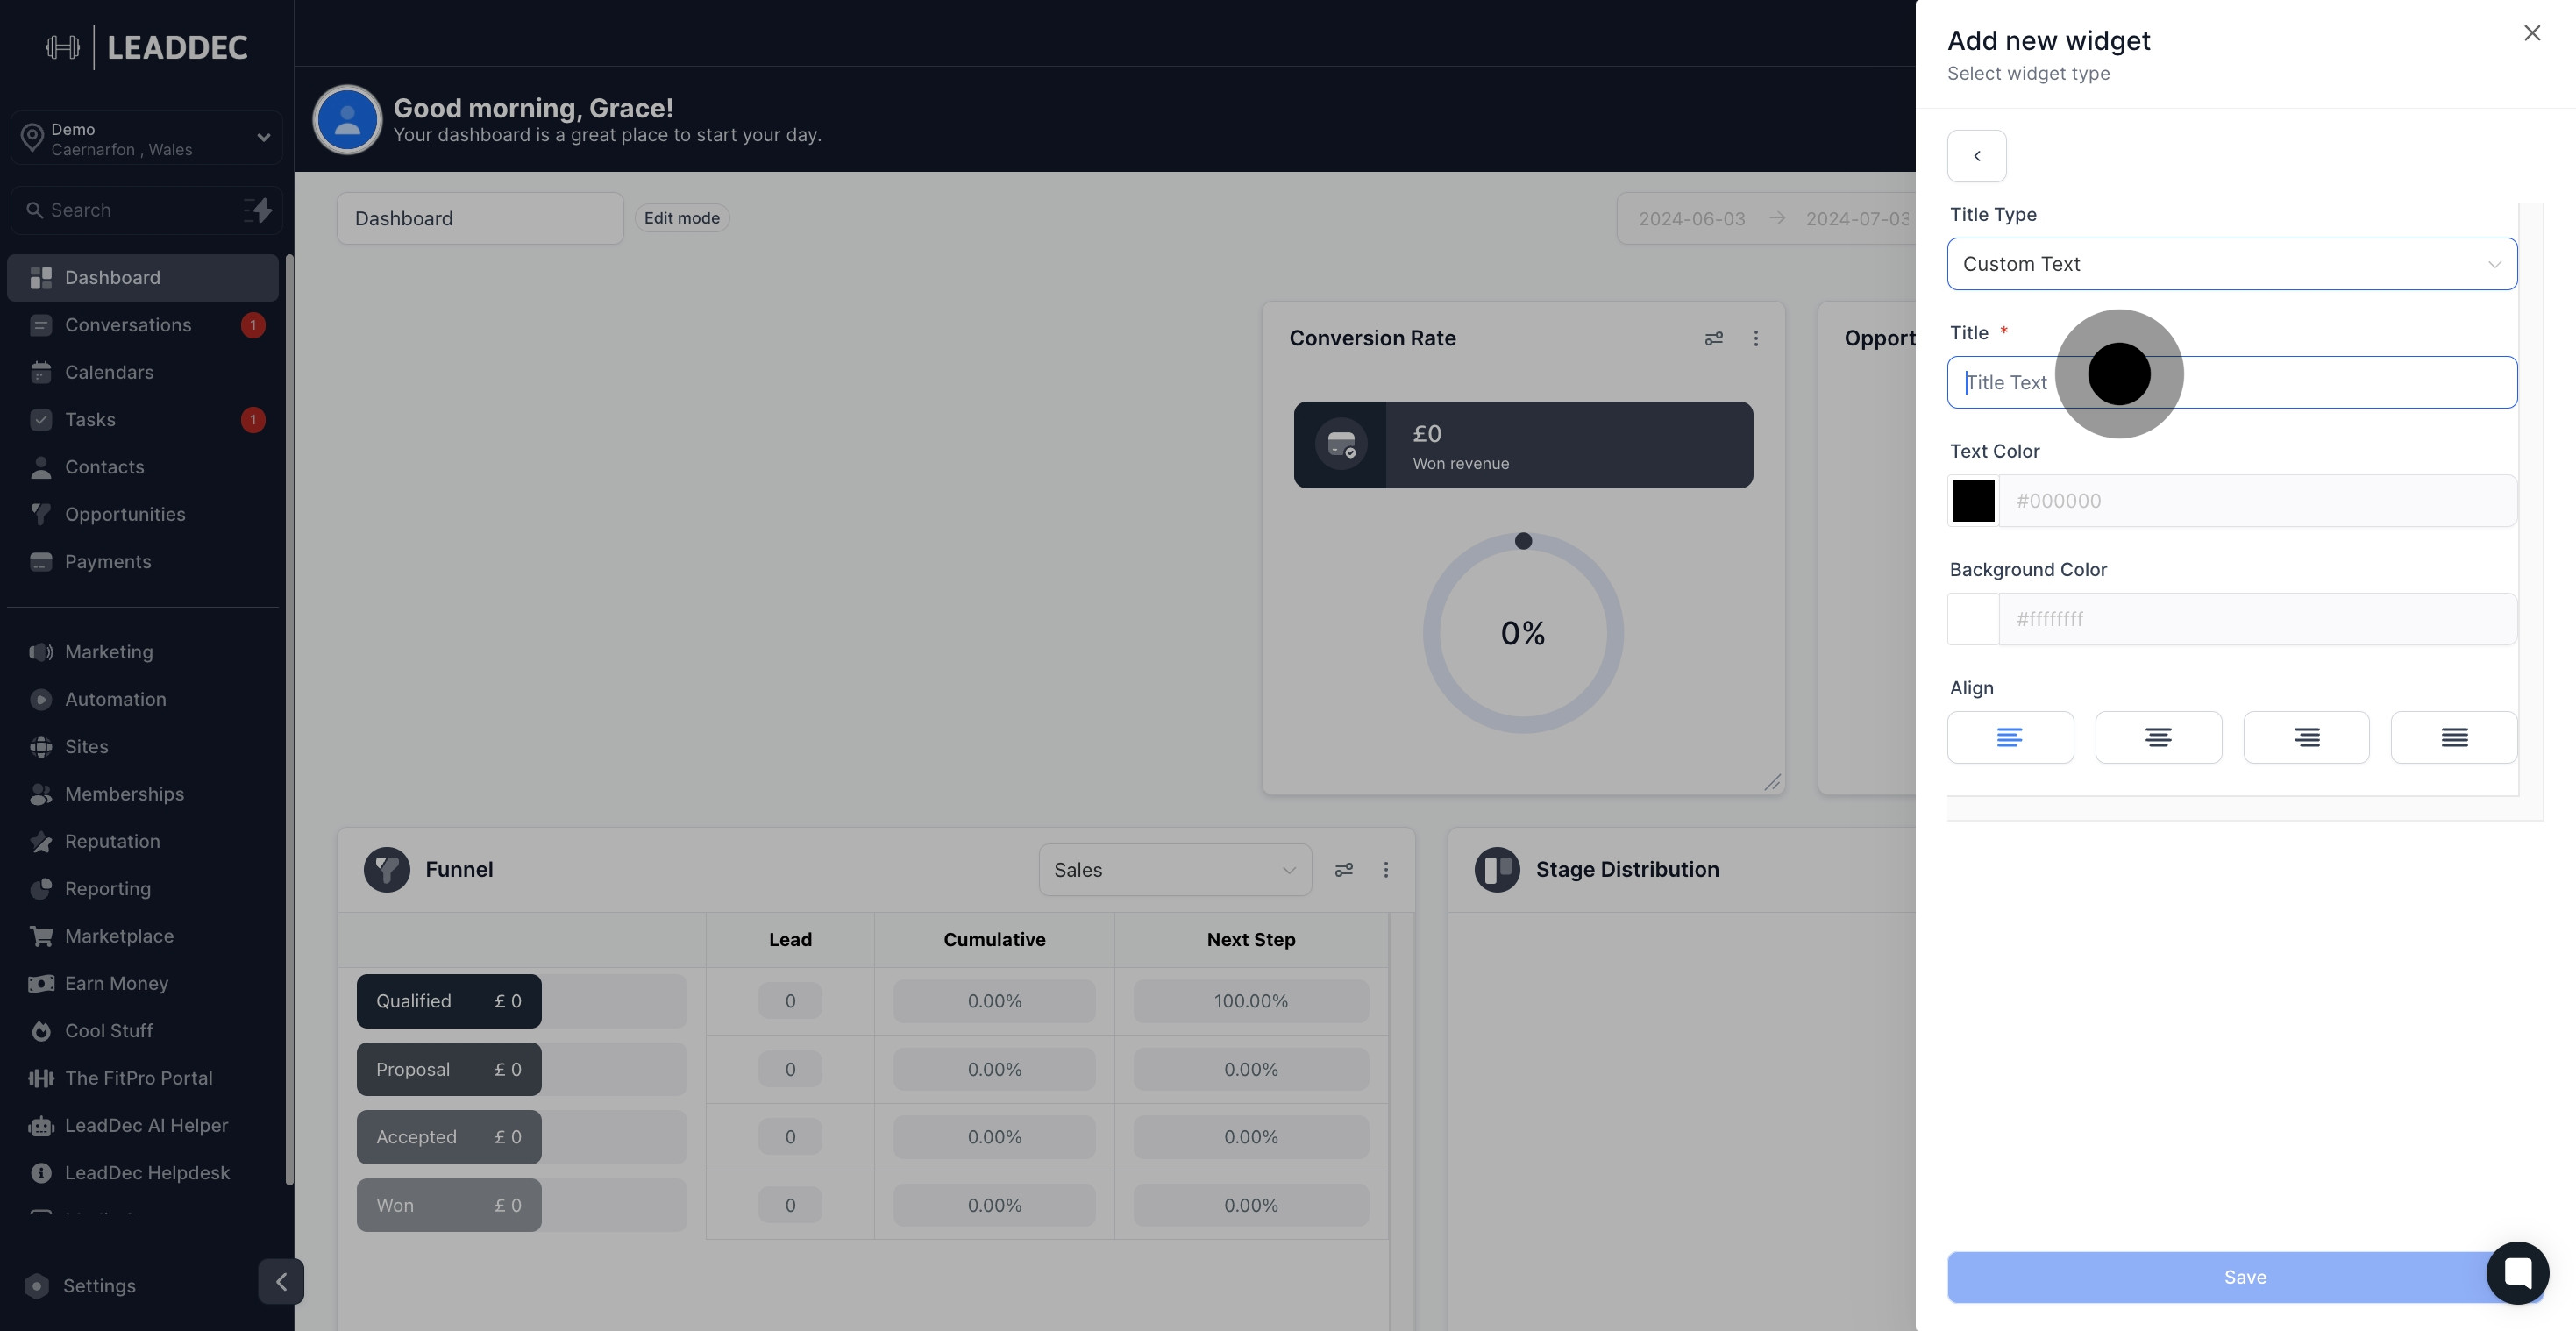
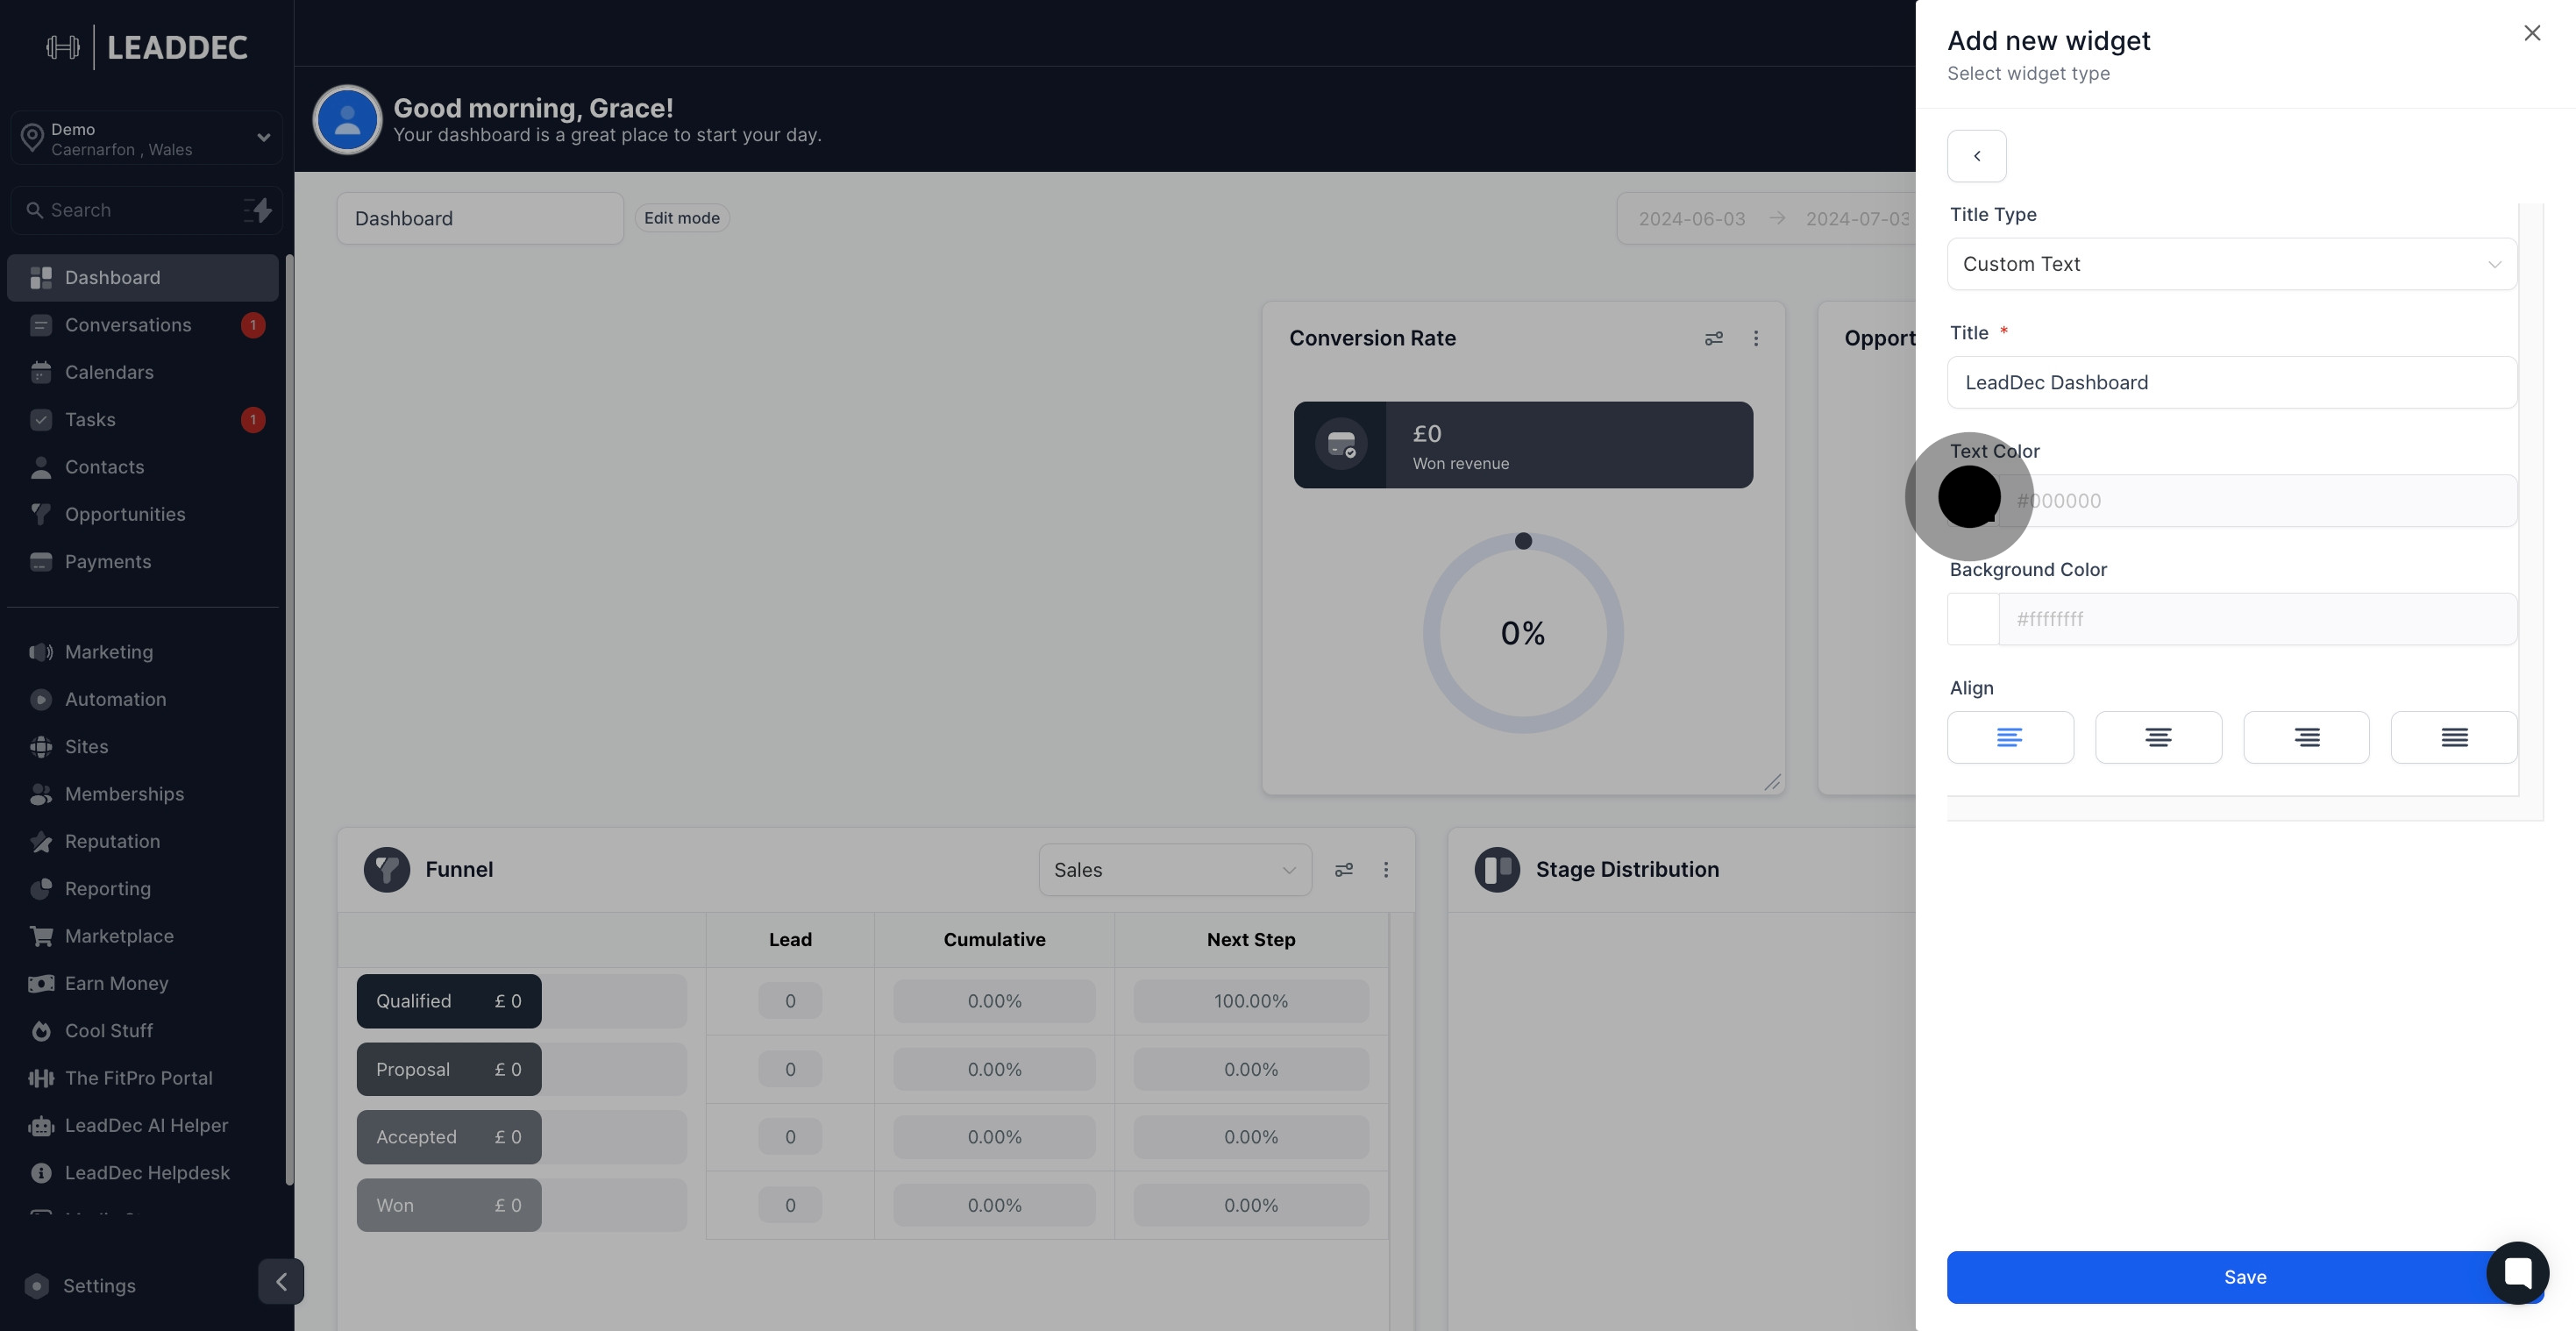
7. Type in your title text now.

7 Next up, click on the element.

8. Select your preferred text color here.

8 Then, click on the element.

9. Next, pick a background color.

9 After that, click here.

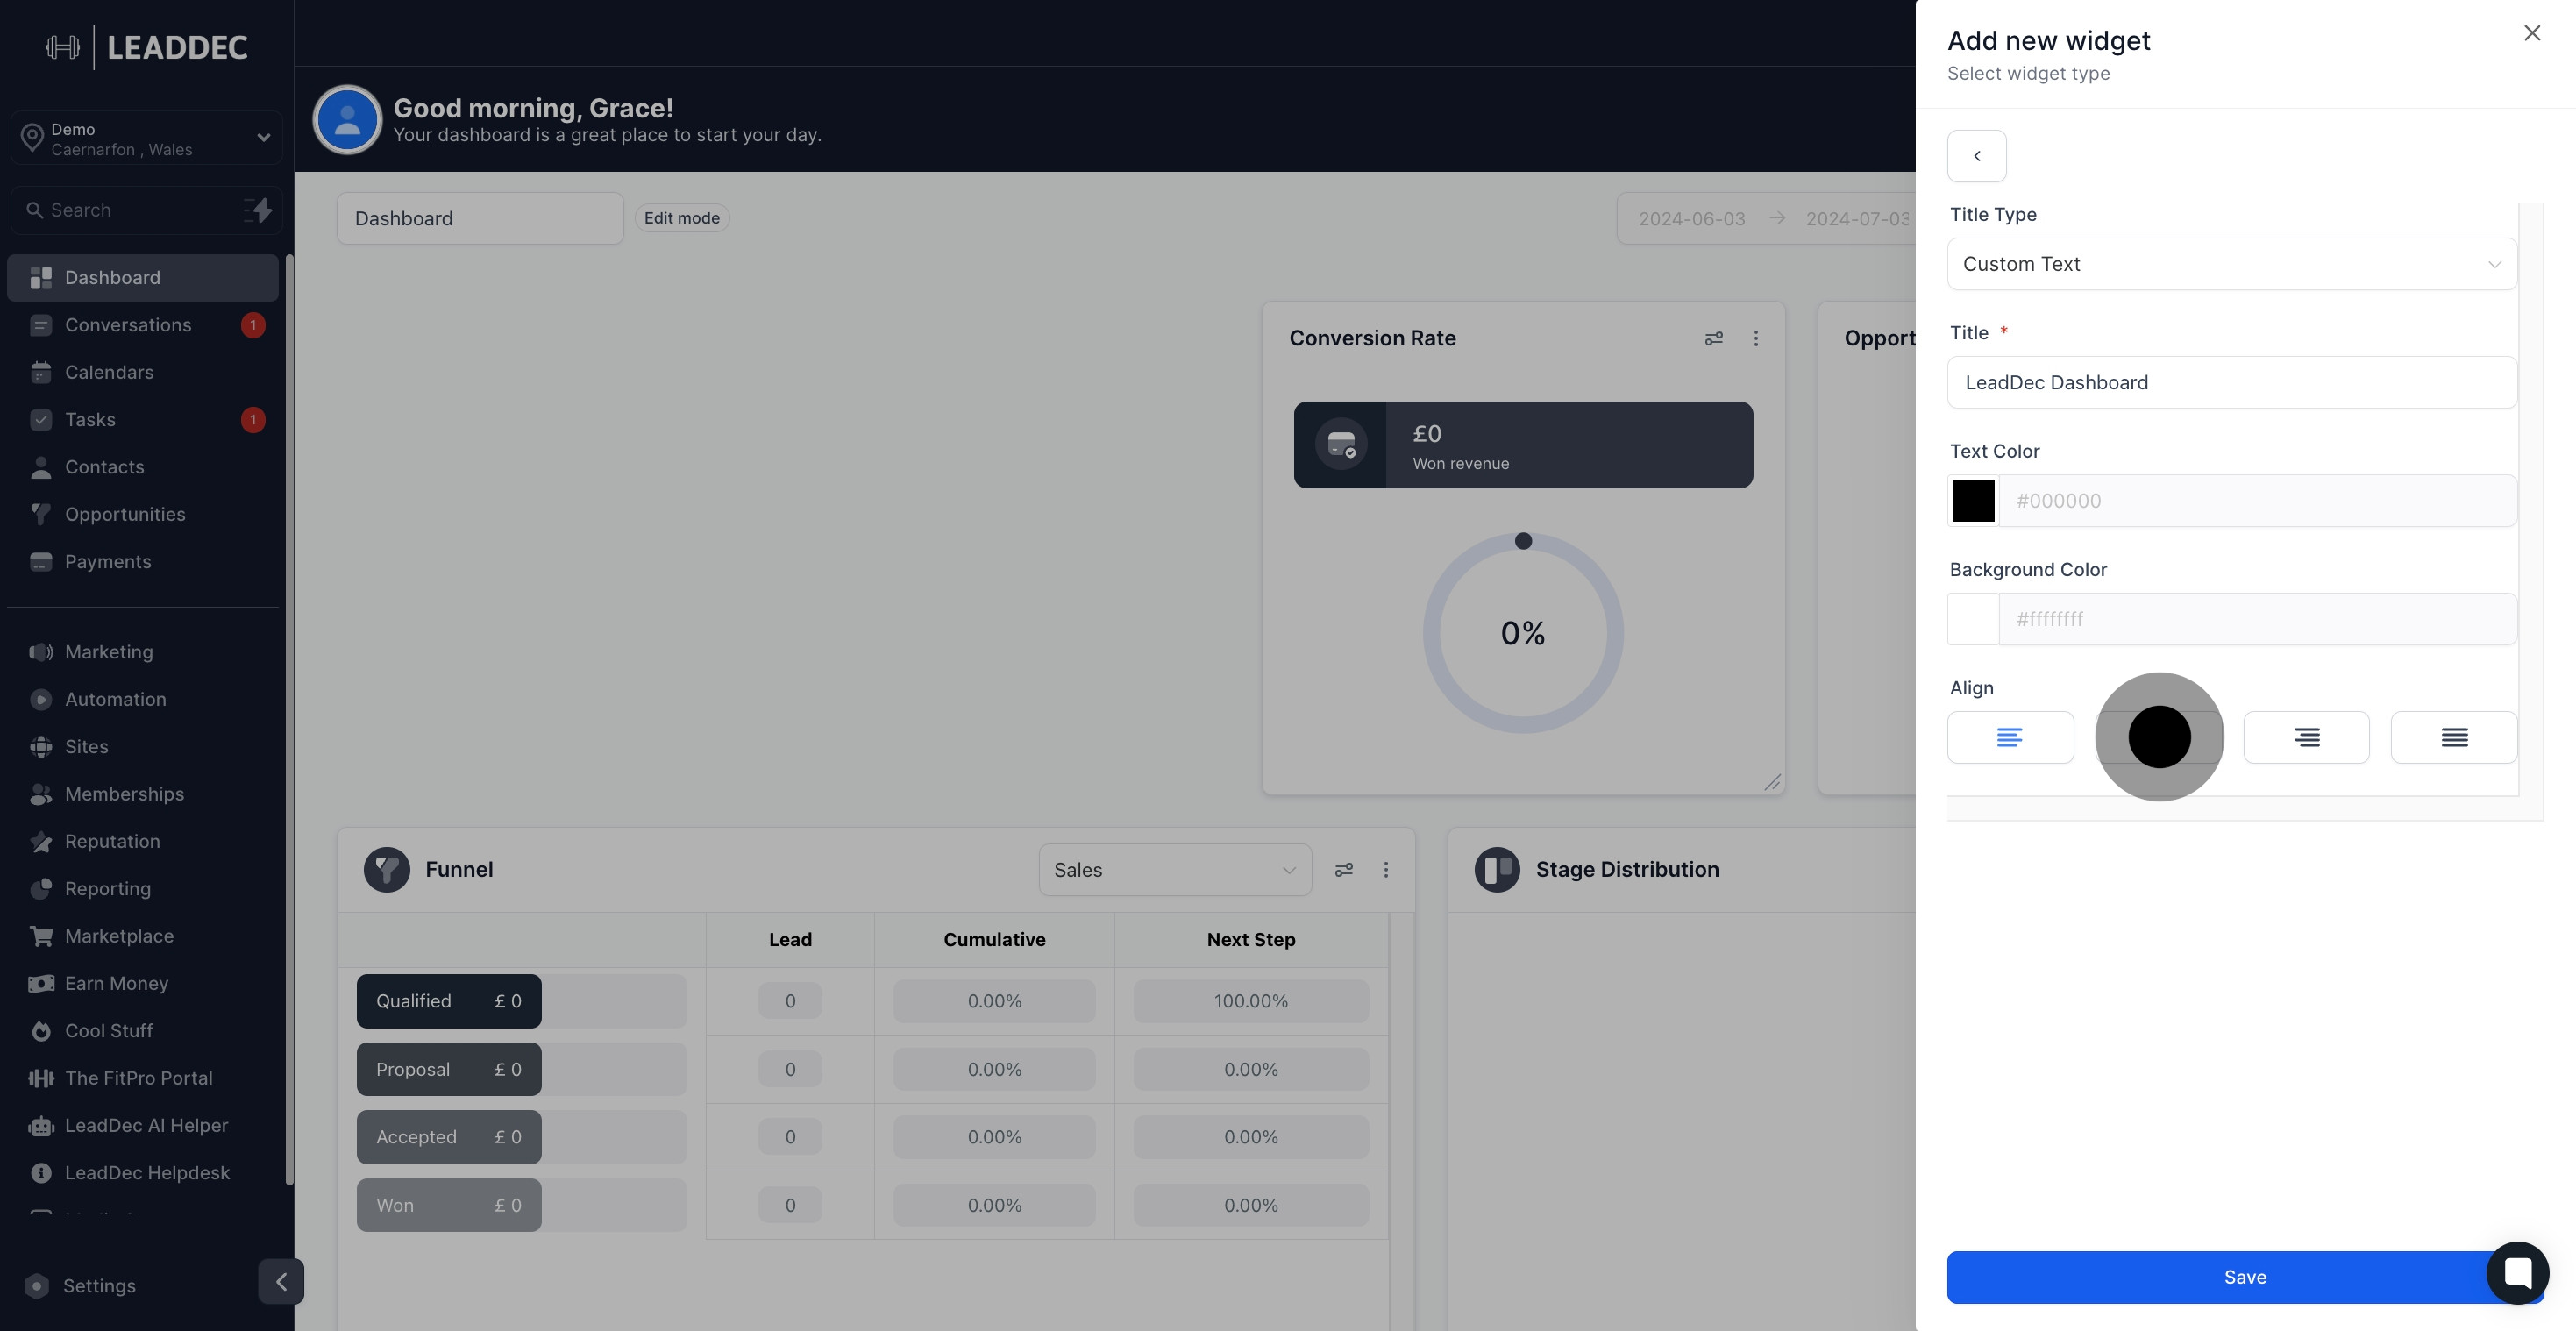
10. Choose your text alignment setting.

10 Click on the element.

11. Finally, save your configurations by clicking 'Save'.

11 Once that's done, click on "Save".

12. Give your dashboard a new name.

12 Next up, click here.

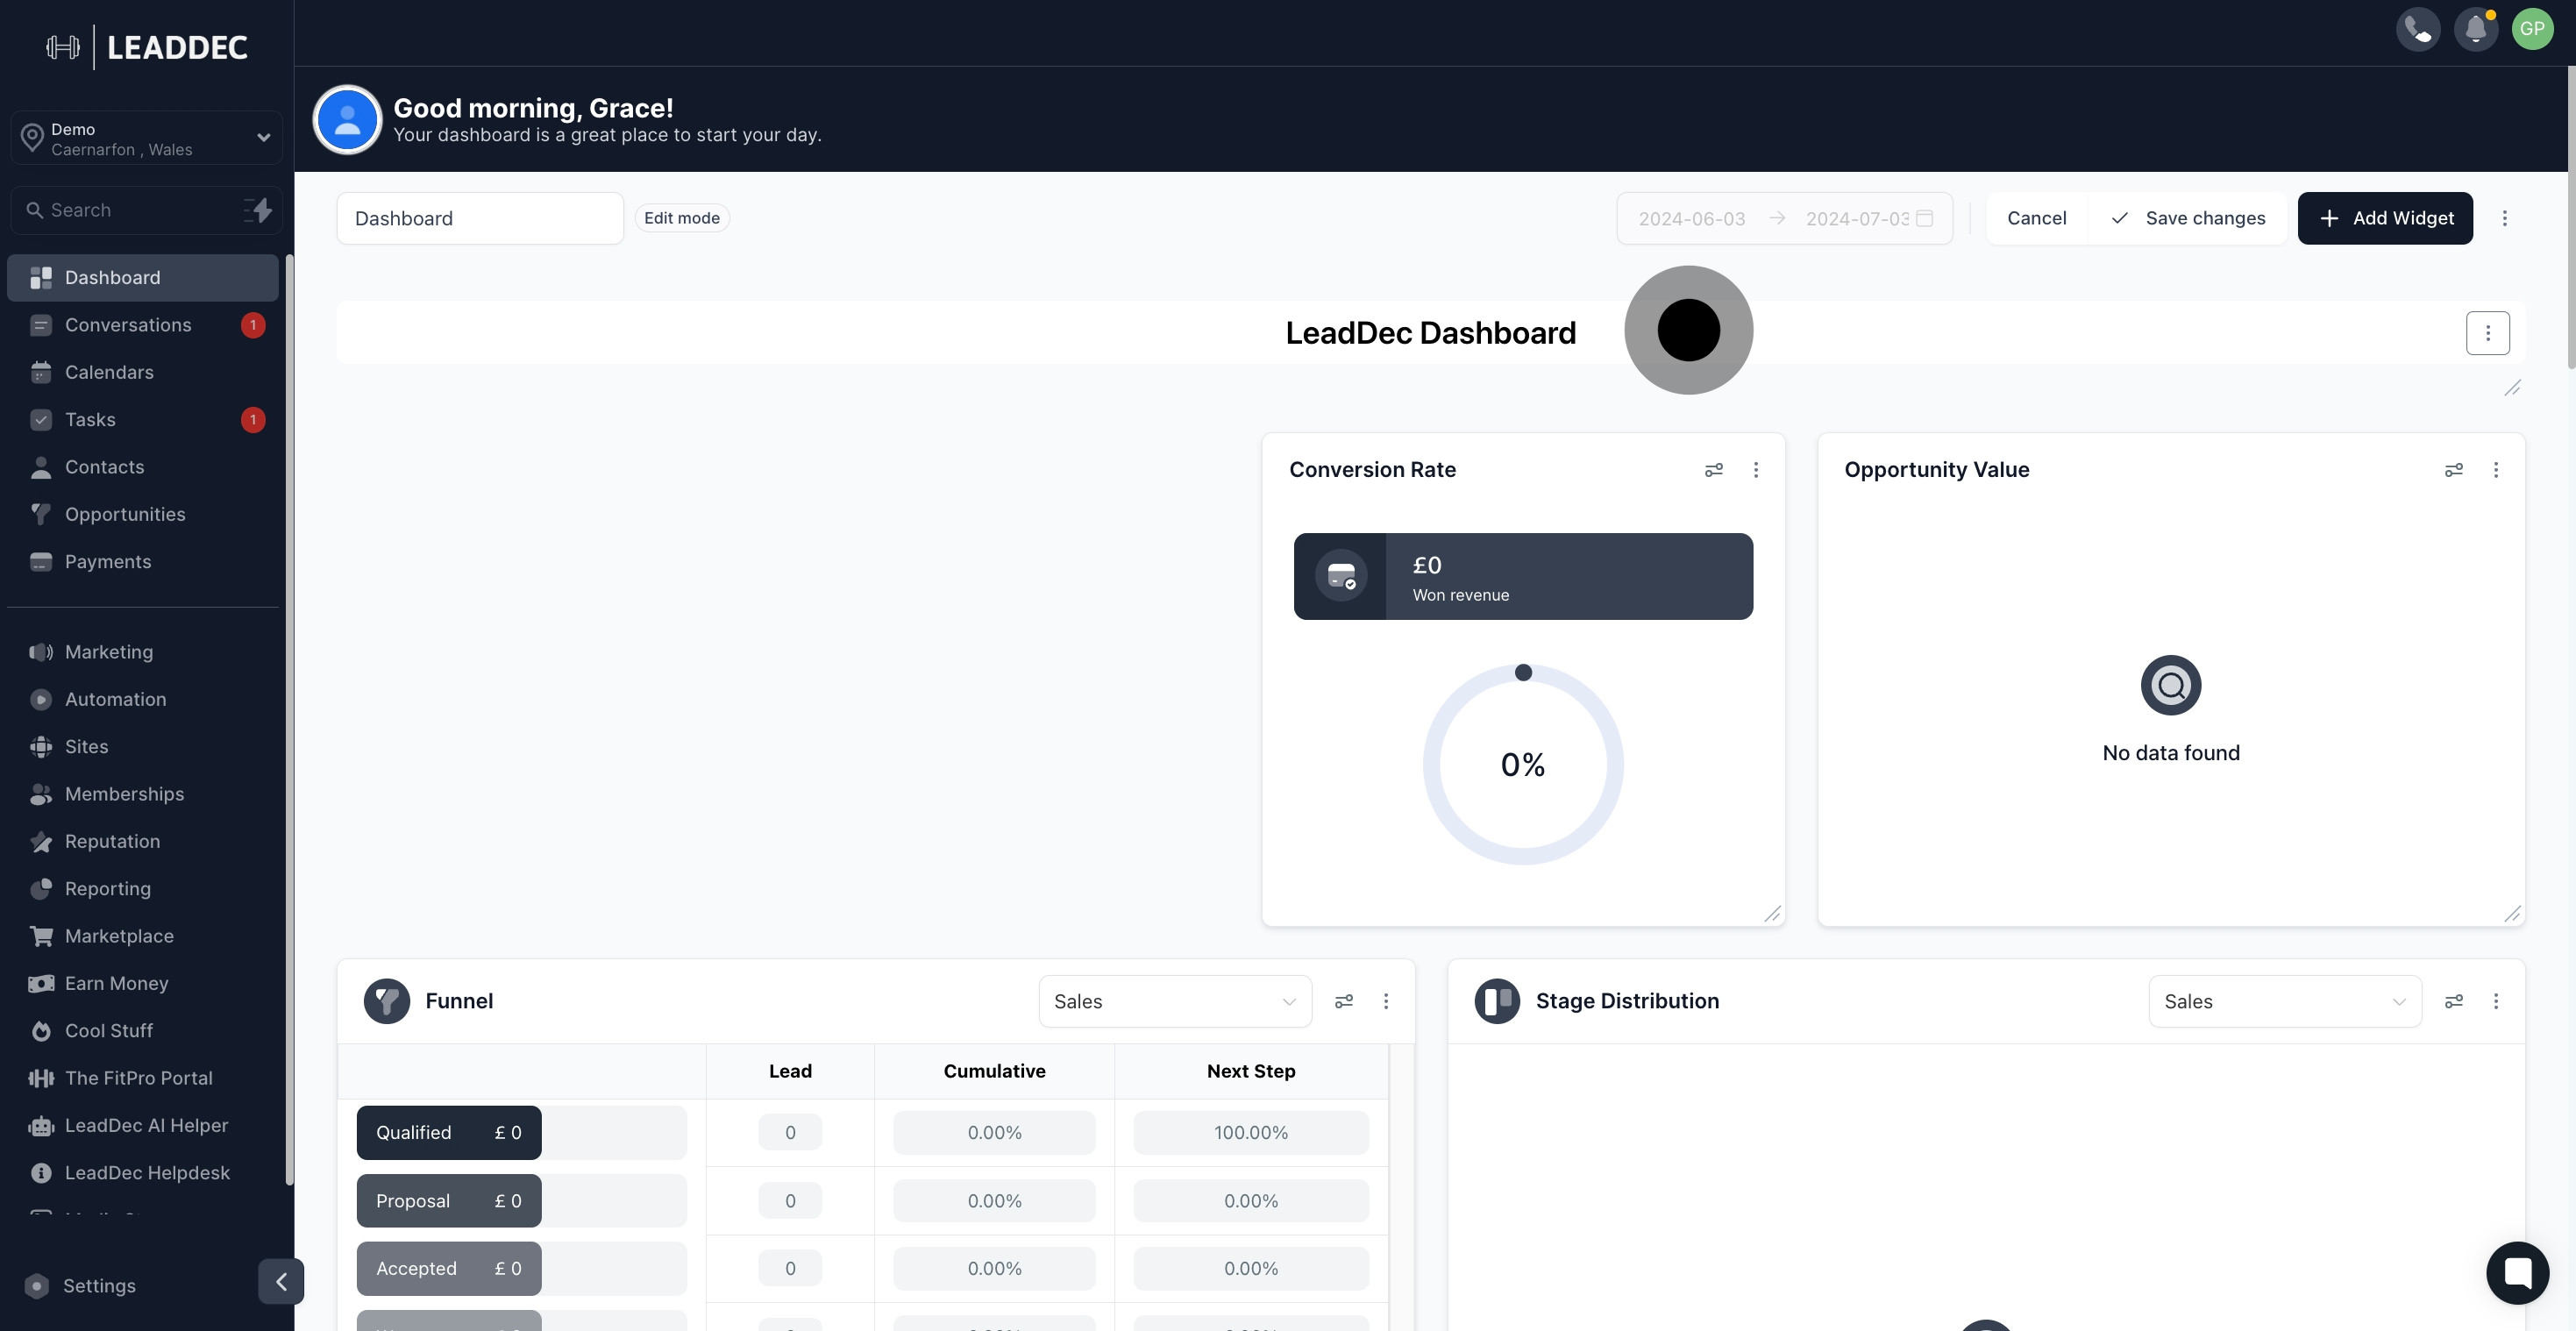
13. Save the changes to update your dashboard.

13 Click on "Save changes".

Did this answer your question?
😞
😐
😁