Creating Multi-Select Dropdown Custom Fields in LeadDec

Learn how to enhance your forms by creating multi-select dropdown custom fields in LeadDec. This guide provides step-by-step instructions on adding dropdown menus that allow users to select multiple options, ideal for capturing diverse preferences or attributes. Discover the benefits of using multi-select fields to gather comprehensive data, streamline user interactions, and provide a more dynamic form experience.


1. First, locate and select 'Settings' from the navigation panel.
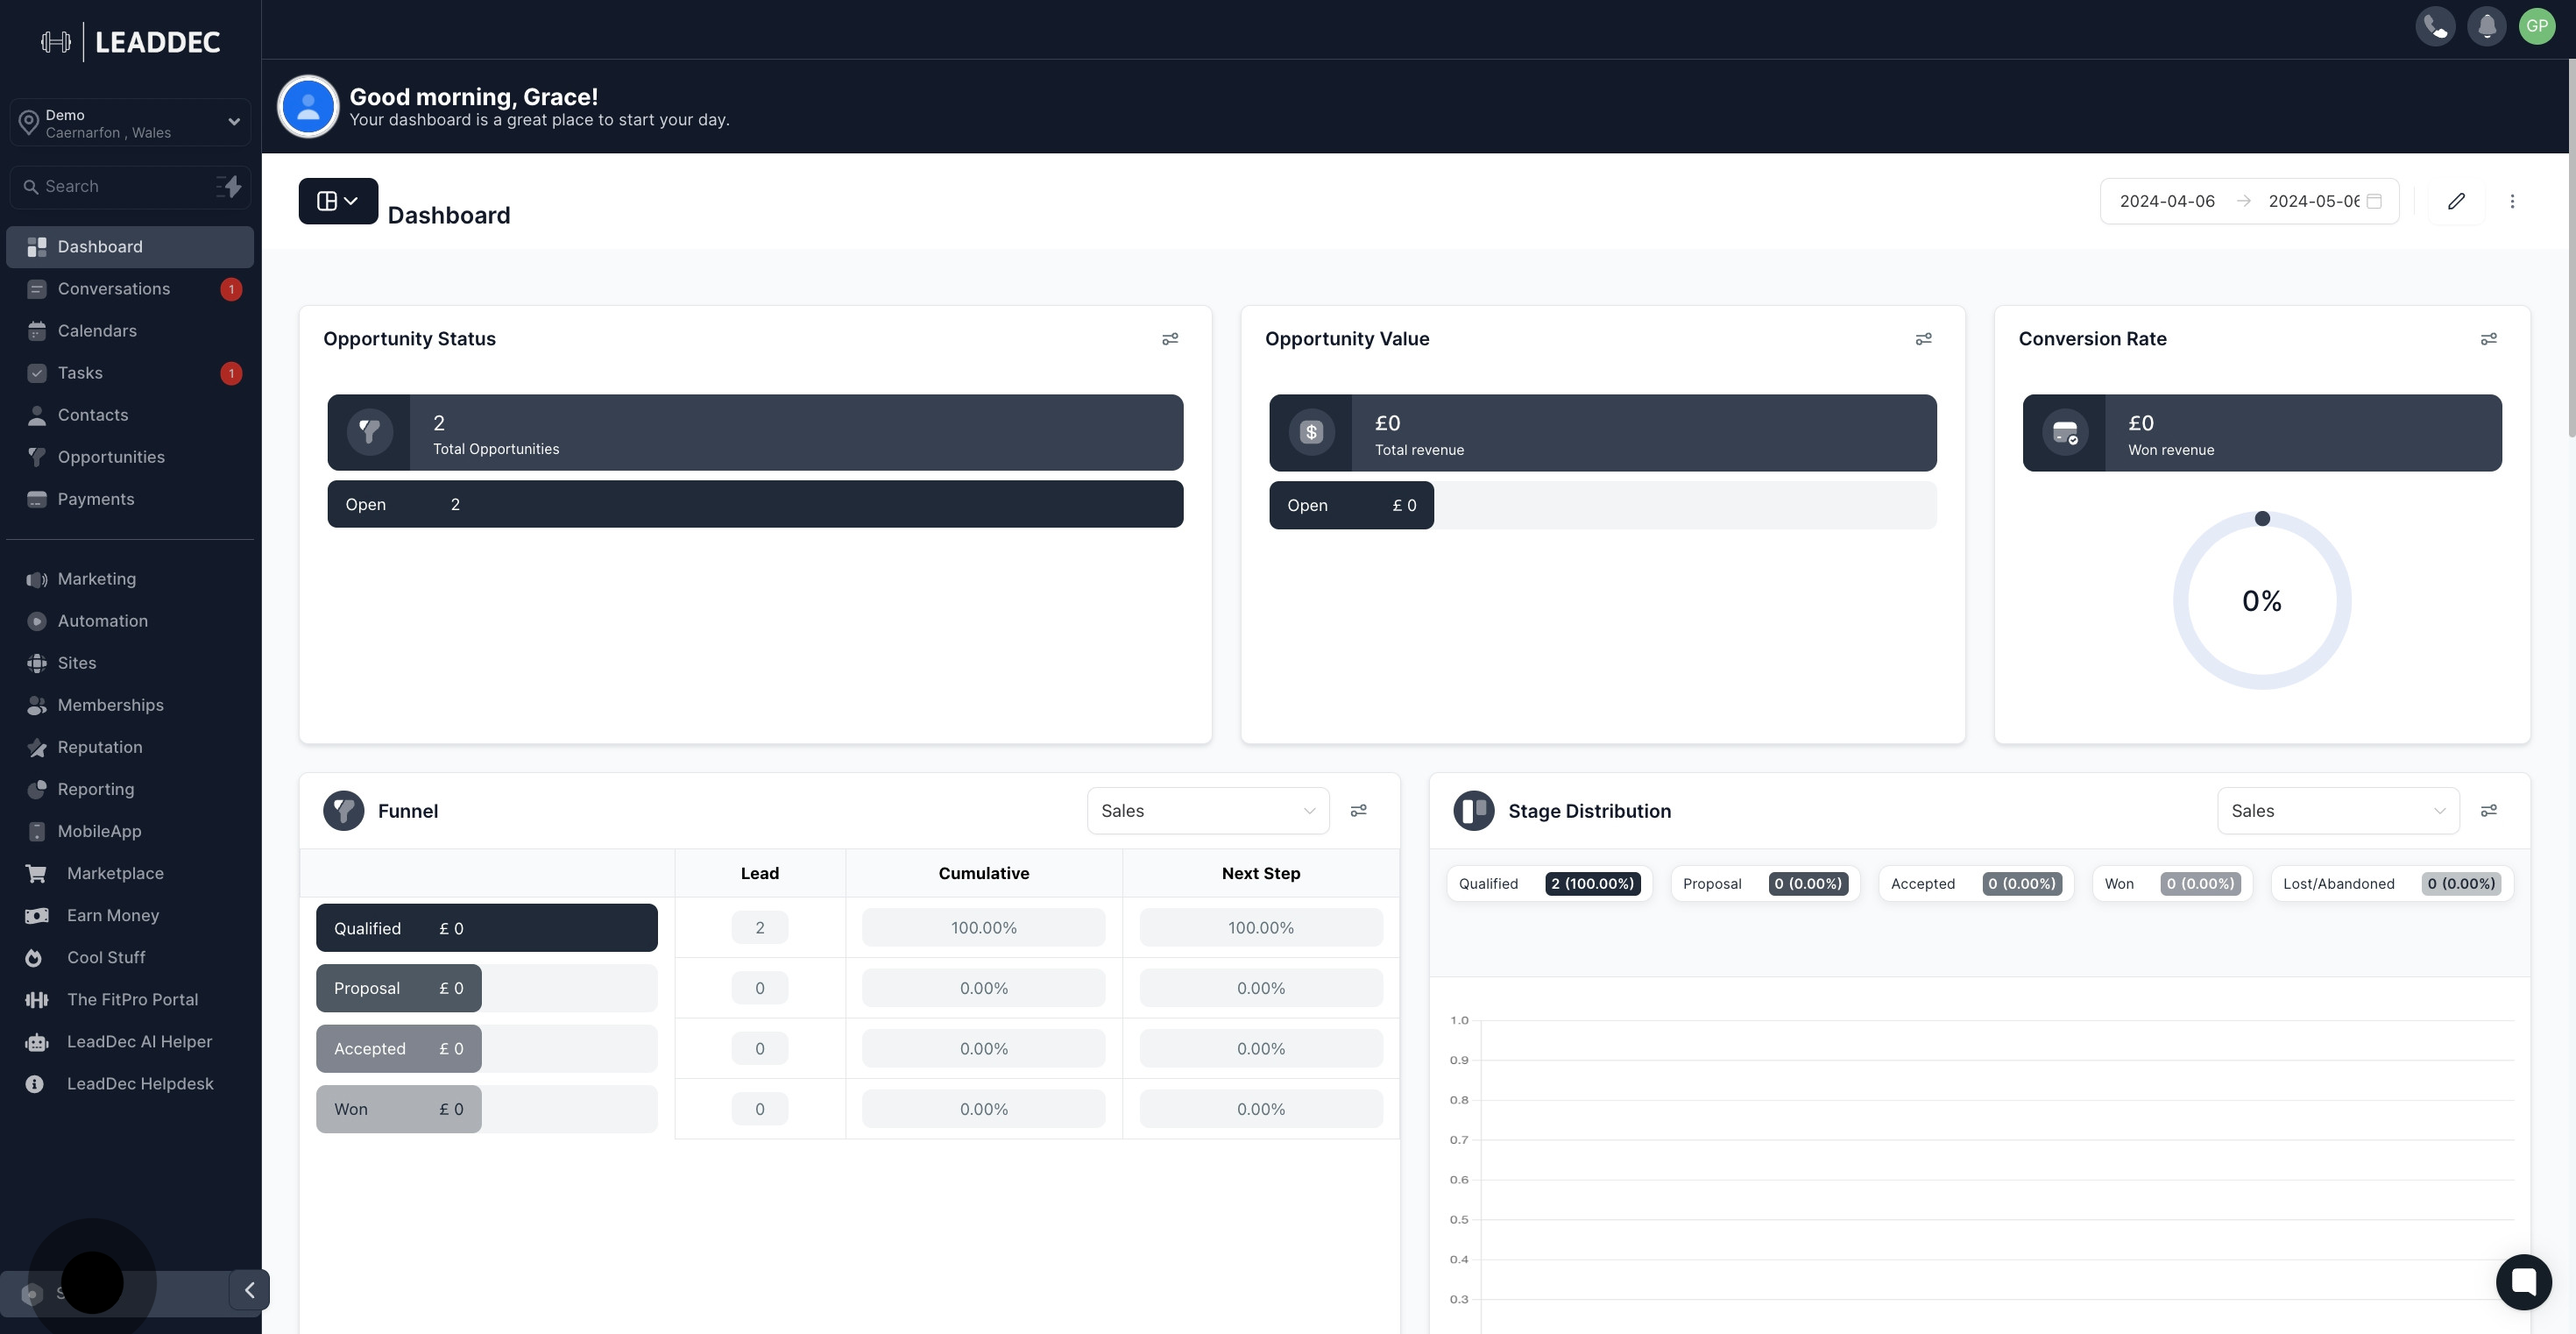
1 First, click on "Settings".

2. Then, choose 'Custom Fields' from the displayed options.
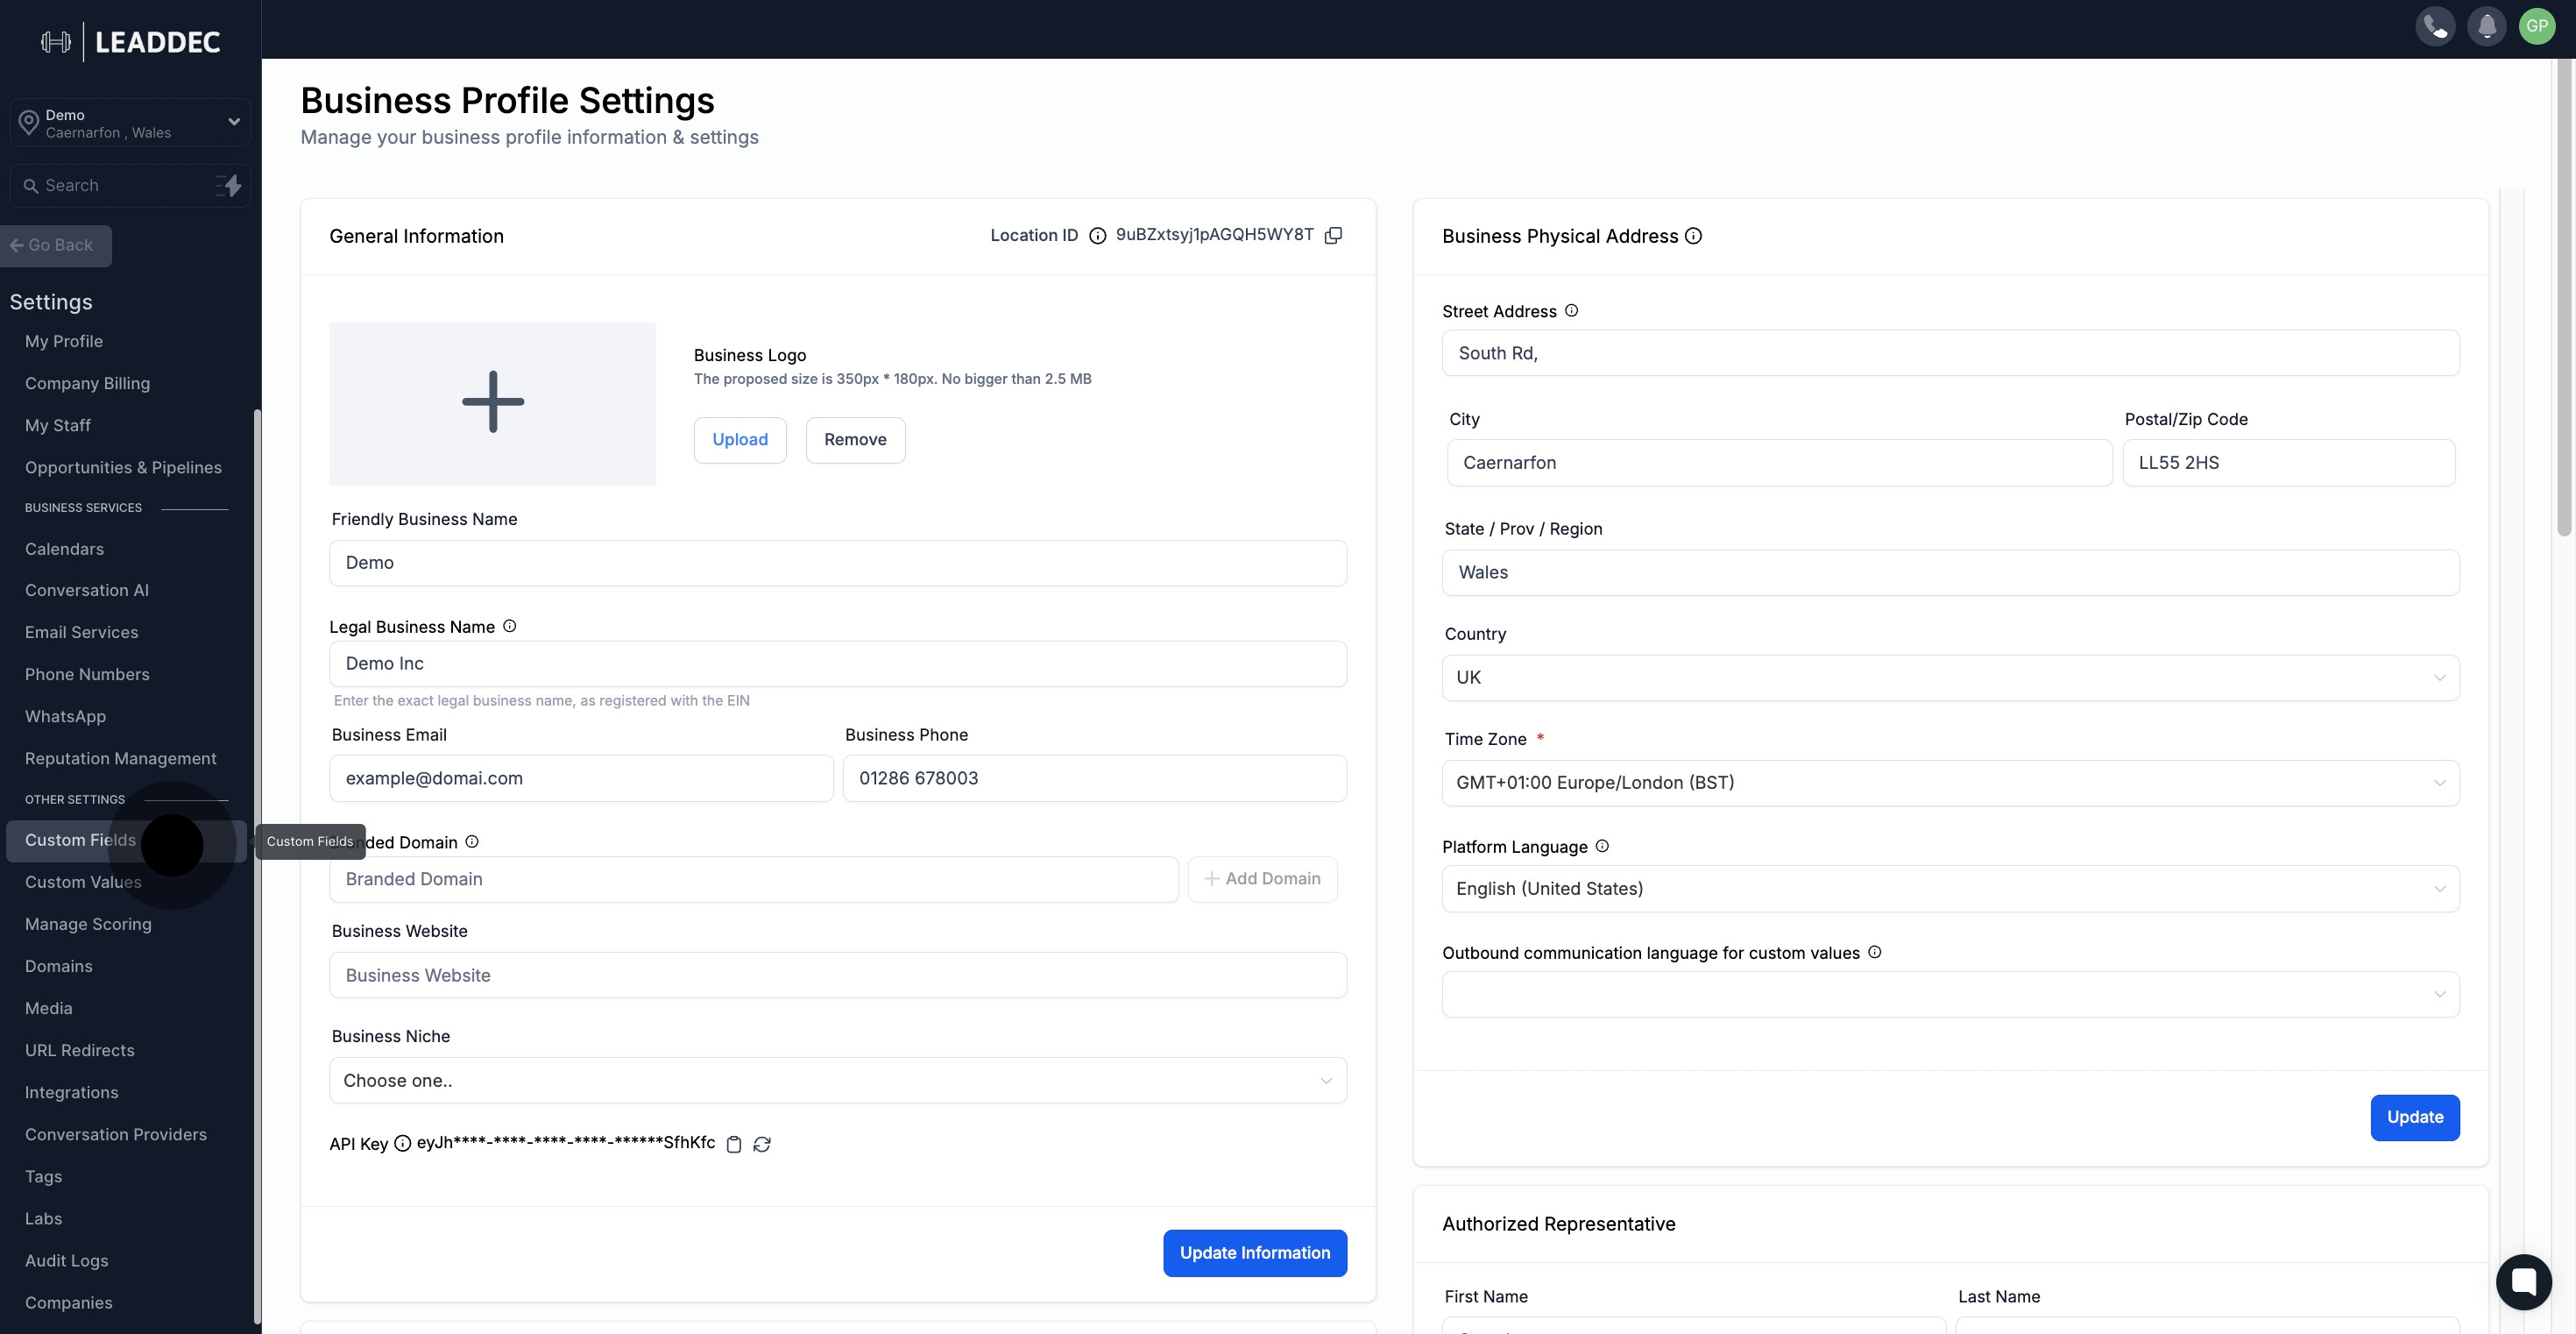
2 Click on "Custom Fields".

3. Next, click the button labeled 'Add Field'.
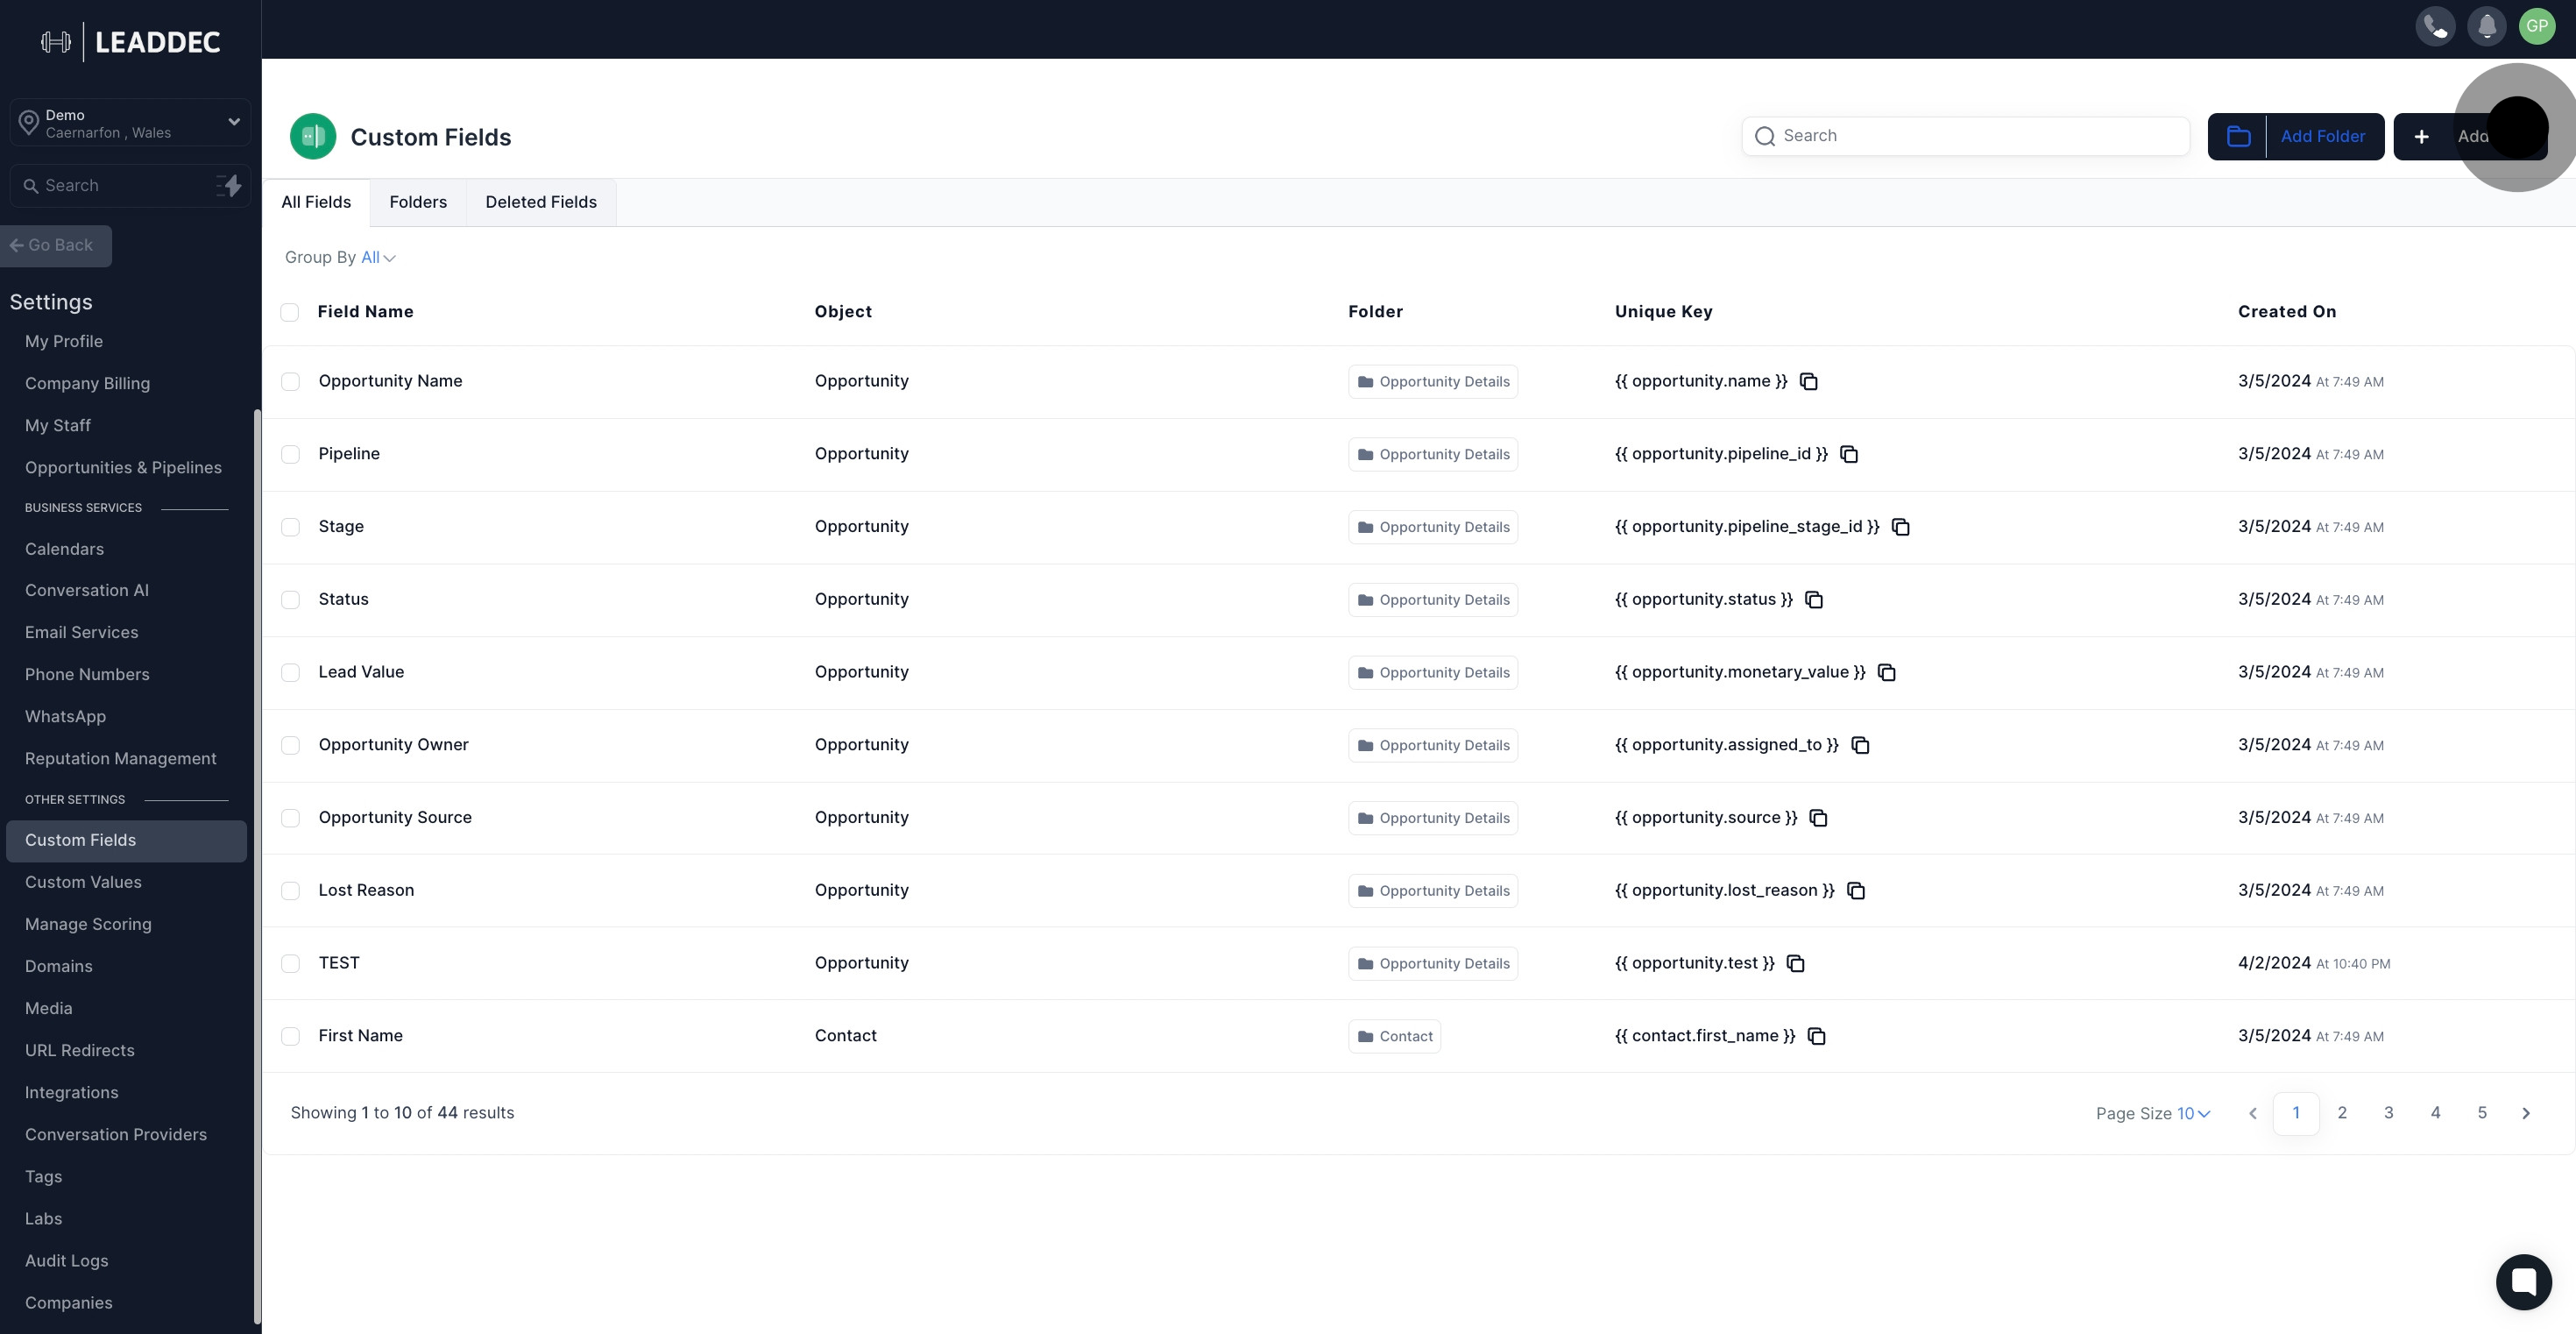
3 After, click on "Add Field".

4. Select 'Dropdown (Multiple)' from the pop-up menu.
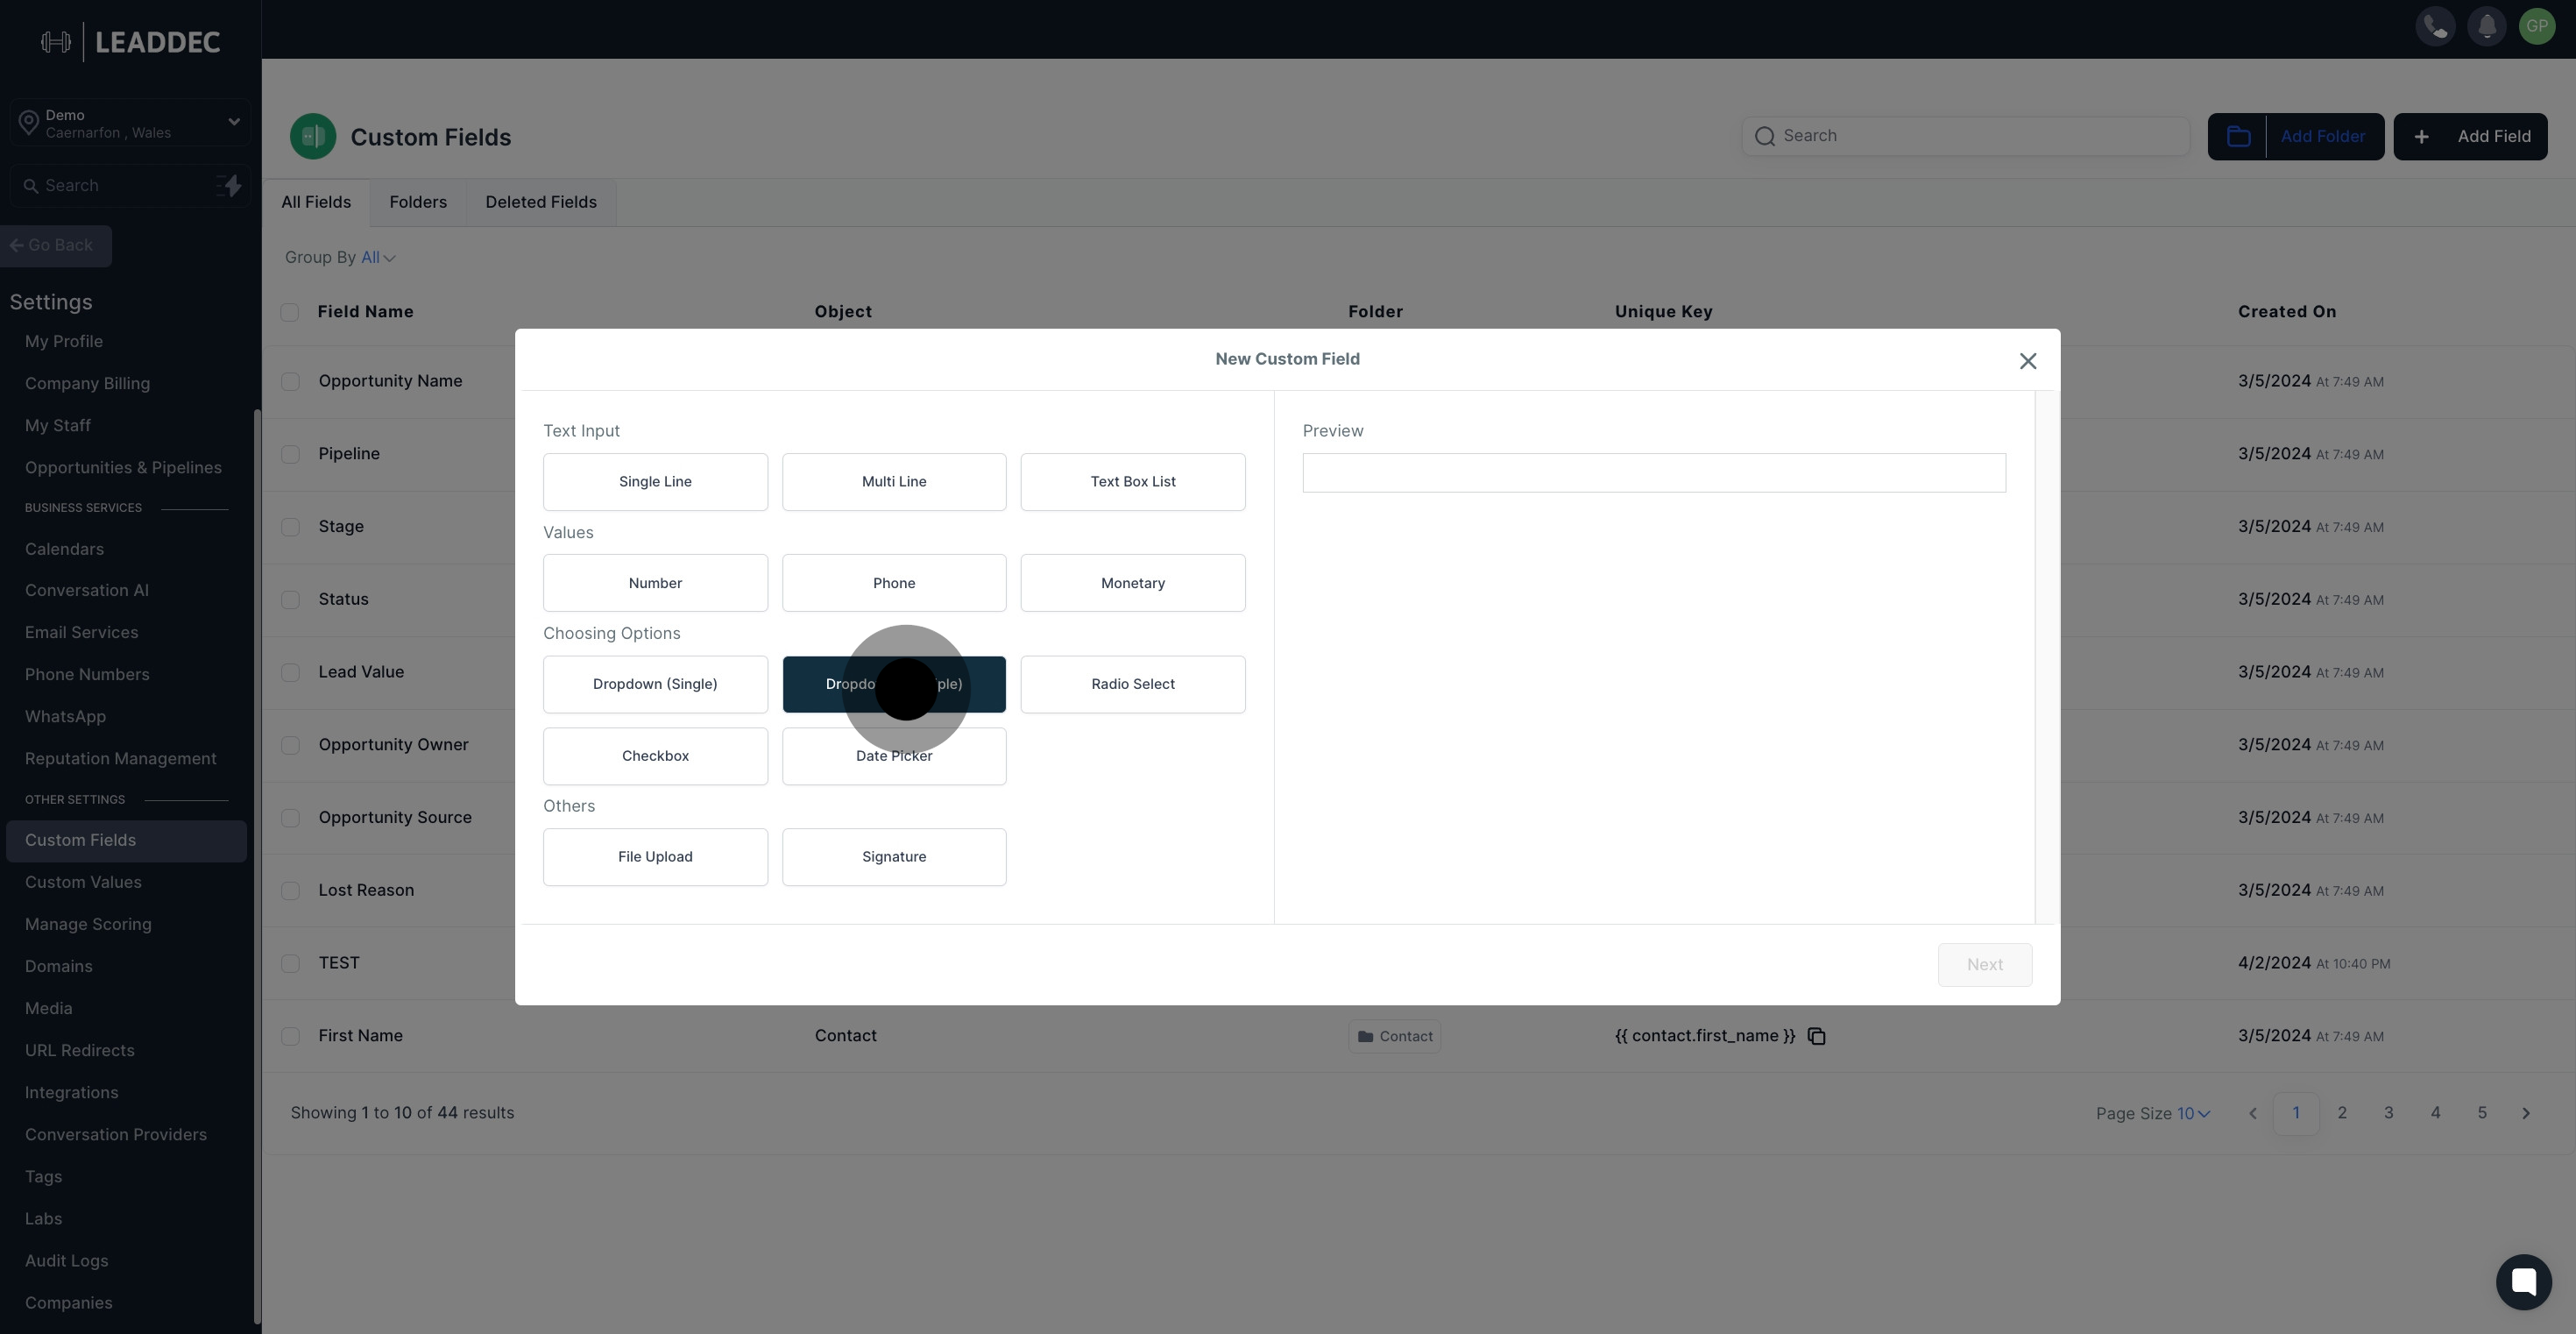
4 Once that's done, click on "Dropdown (Multiple)".

5. Review your selection in the preview window.
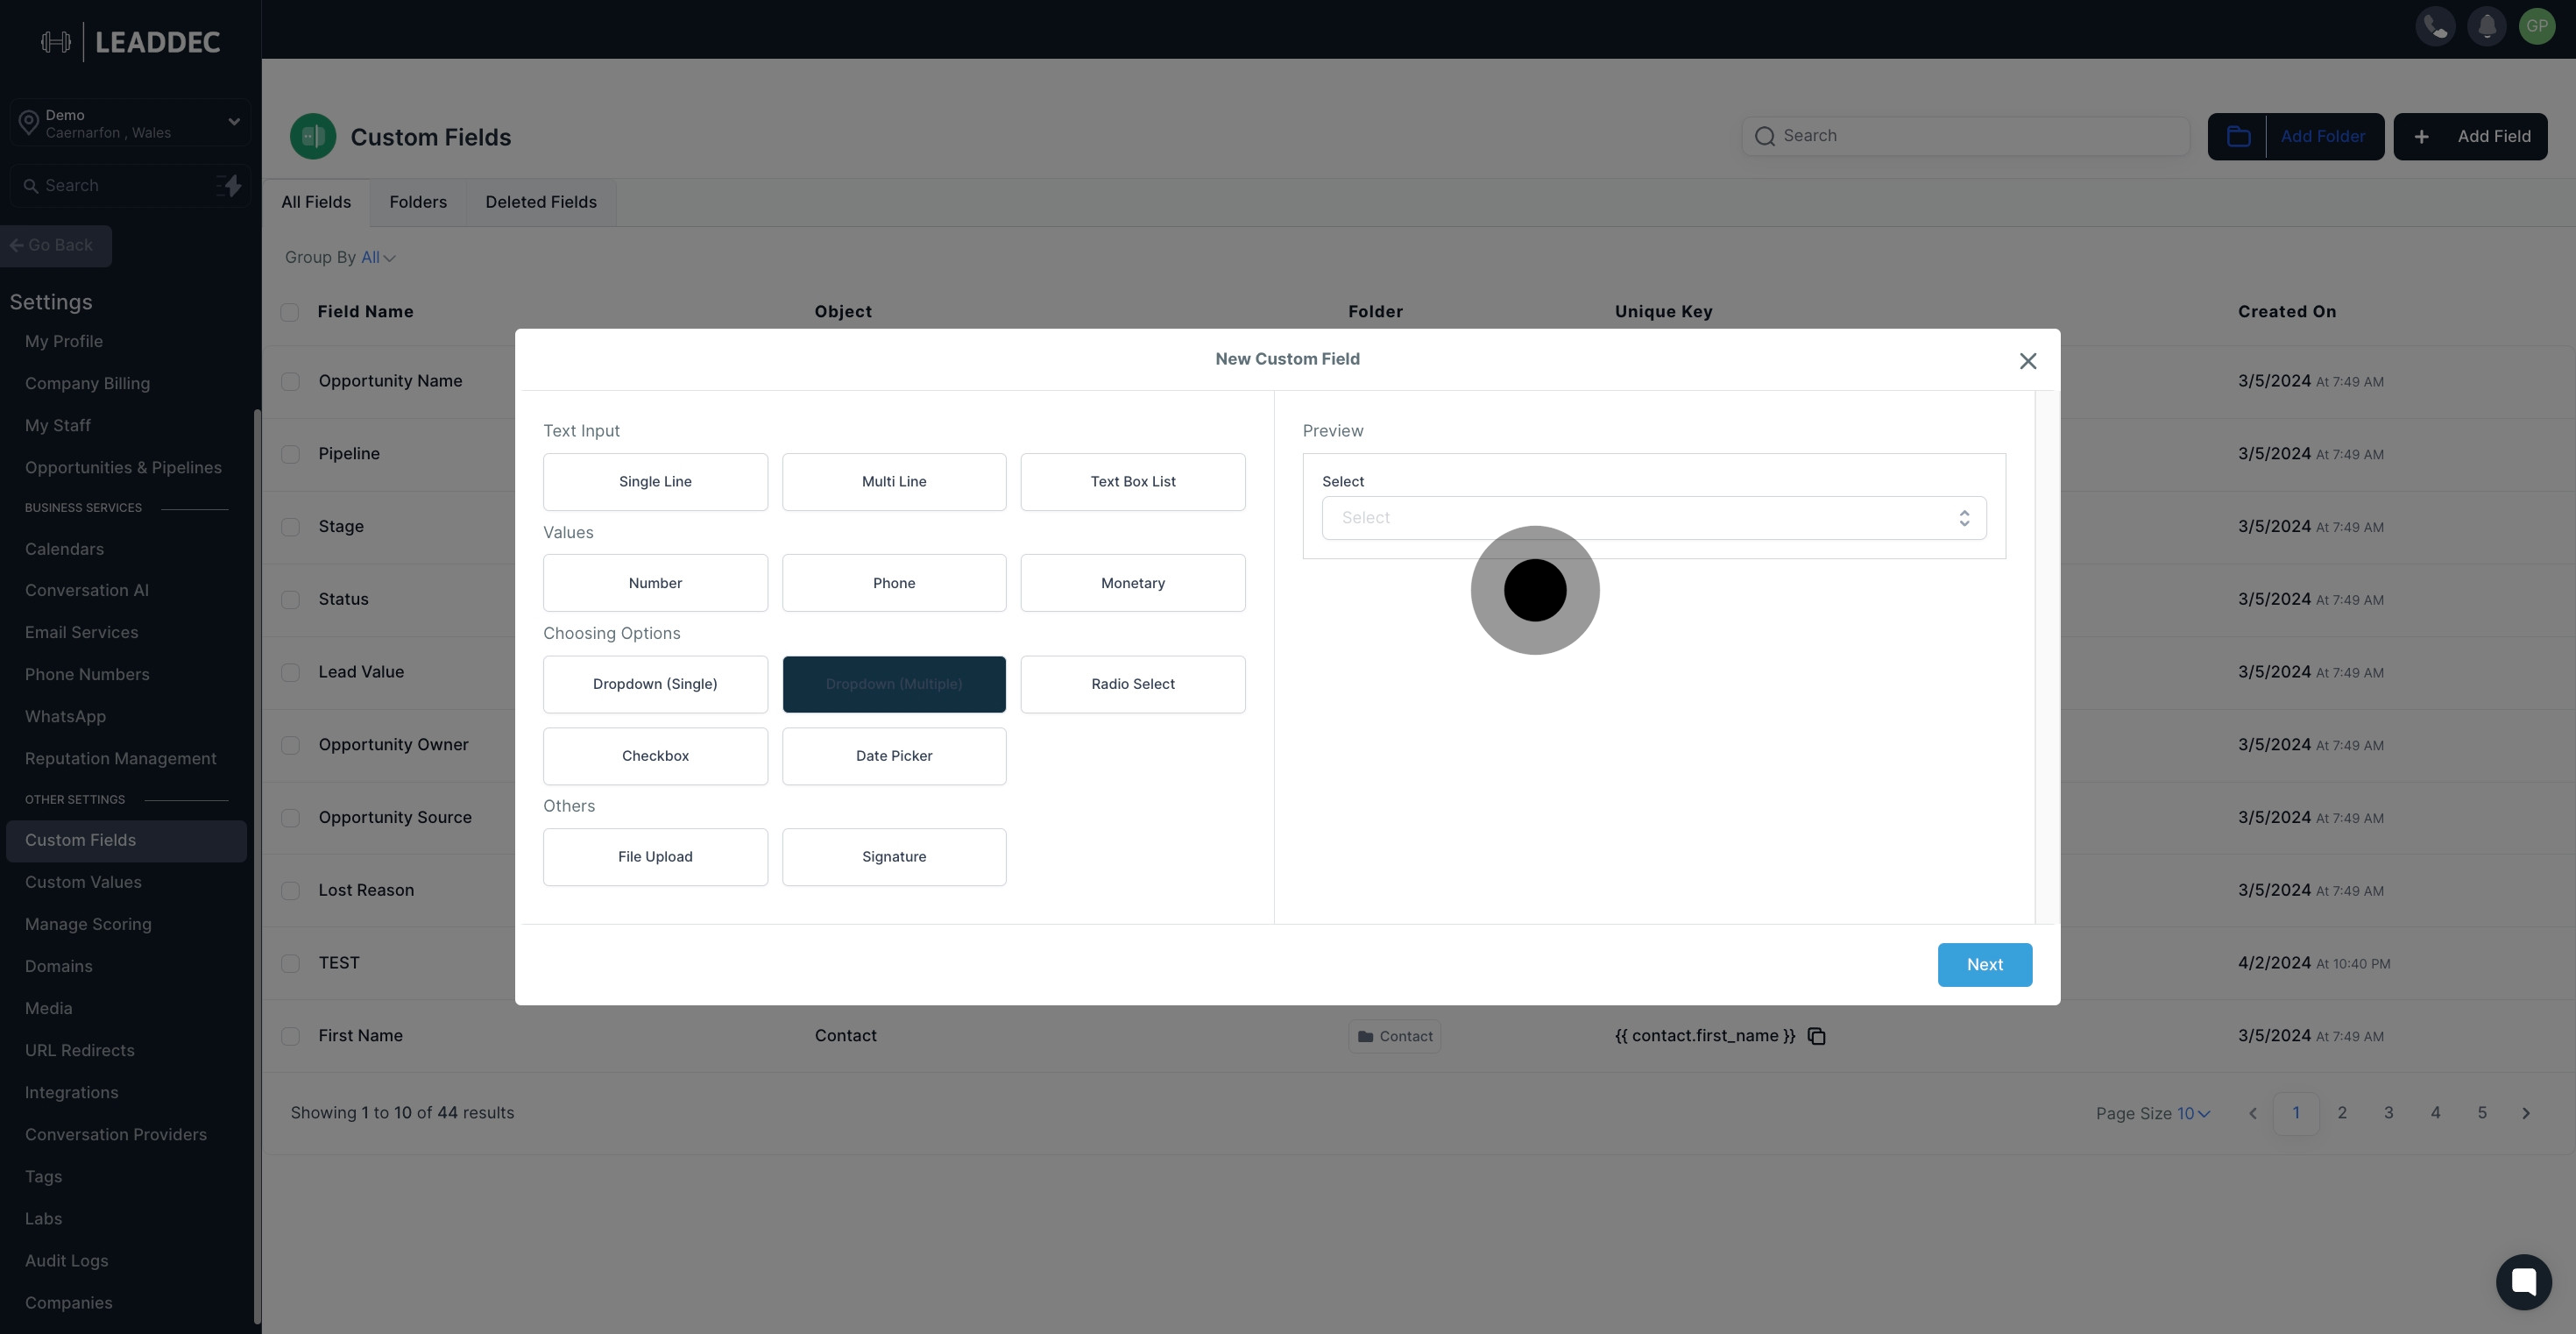
5 Next up, click on "Preview".

6. Continue by pressing the 'Next' button.
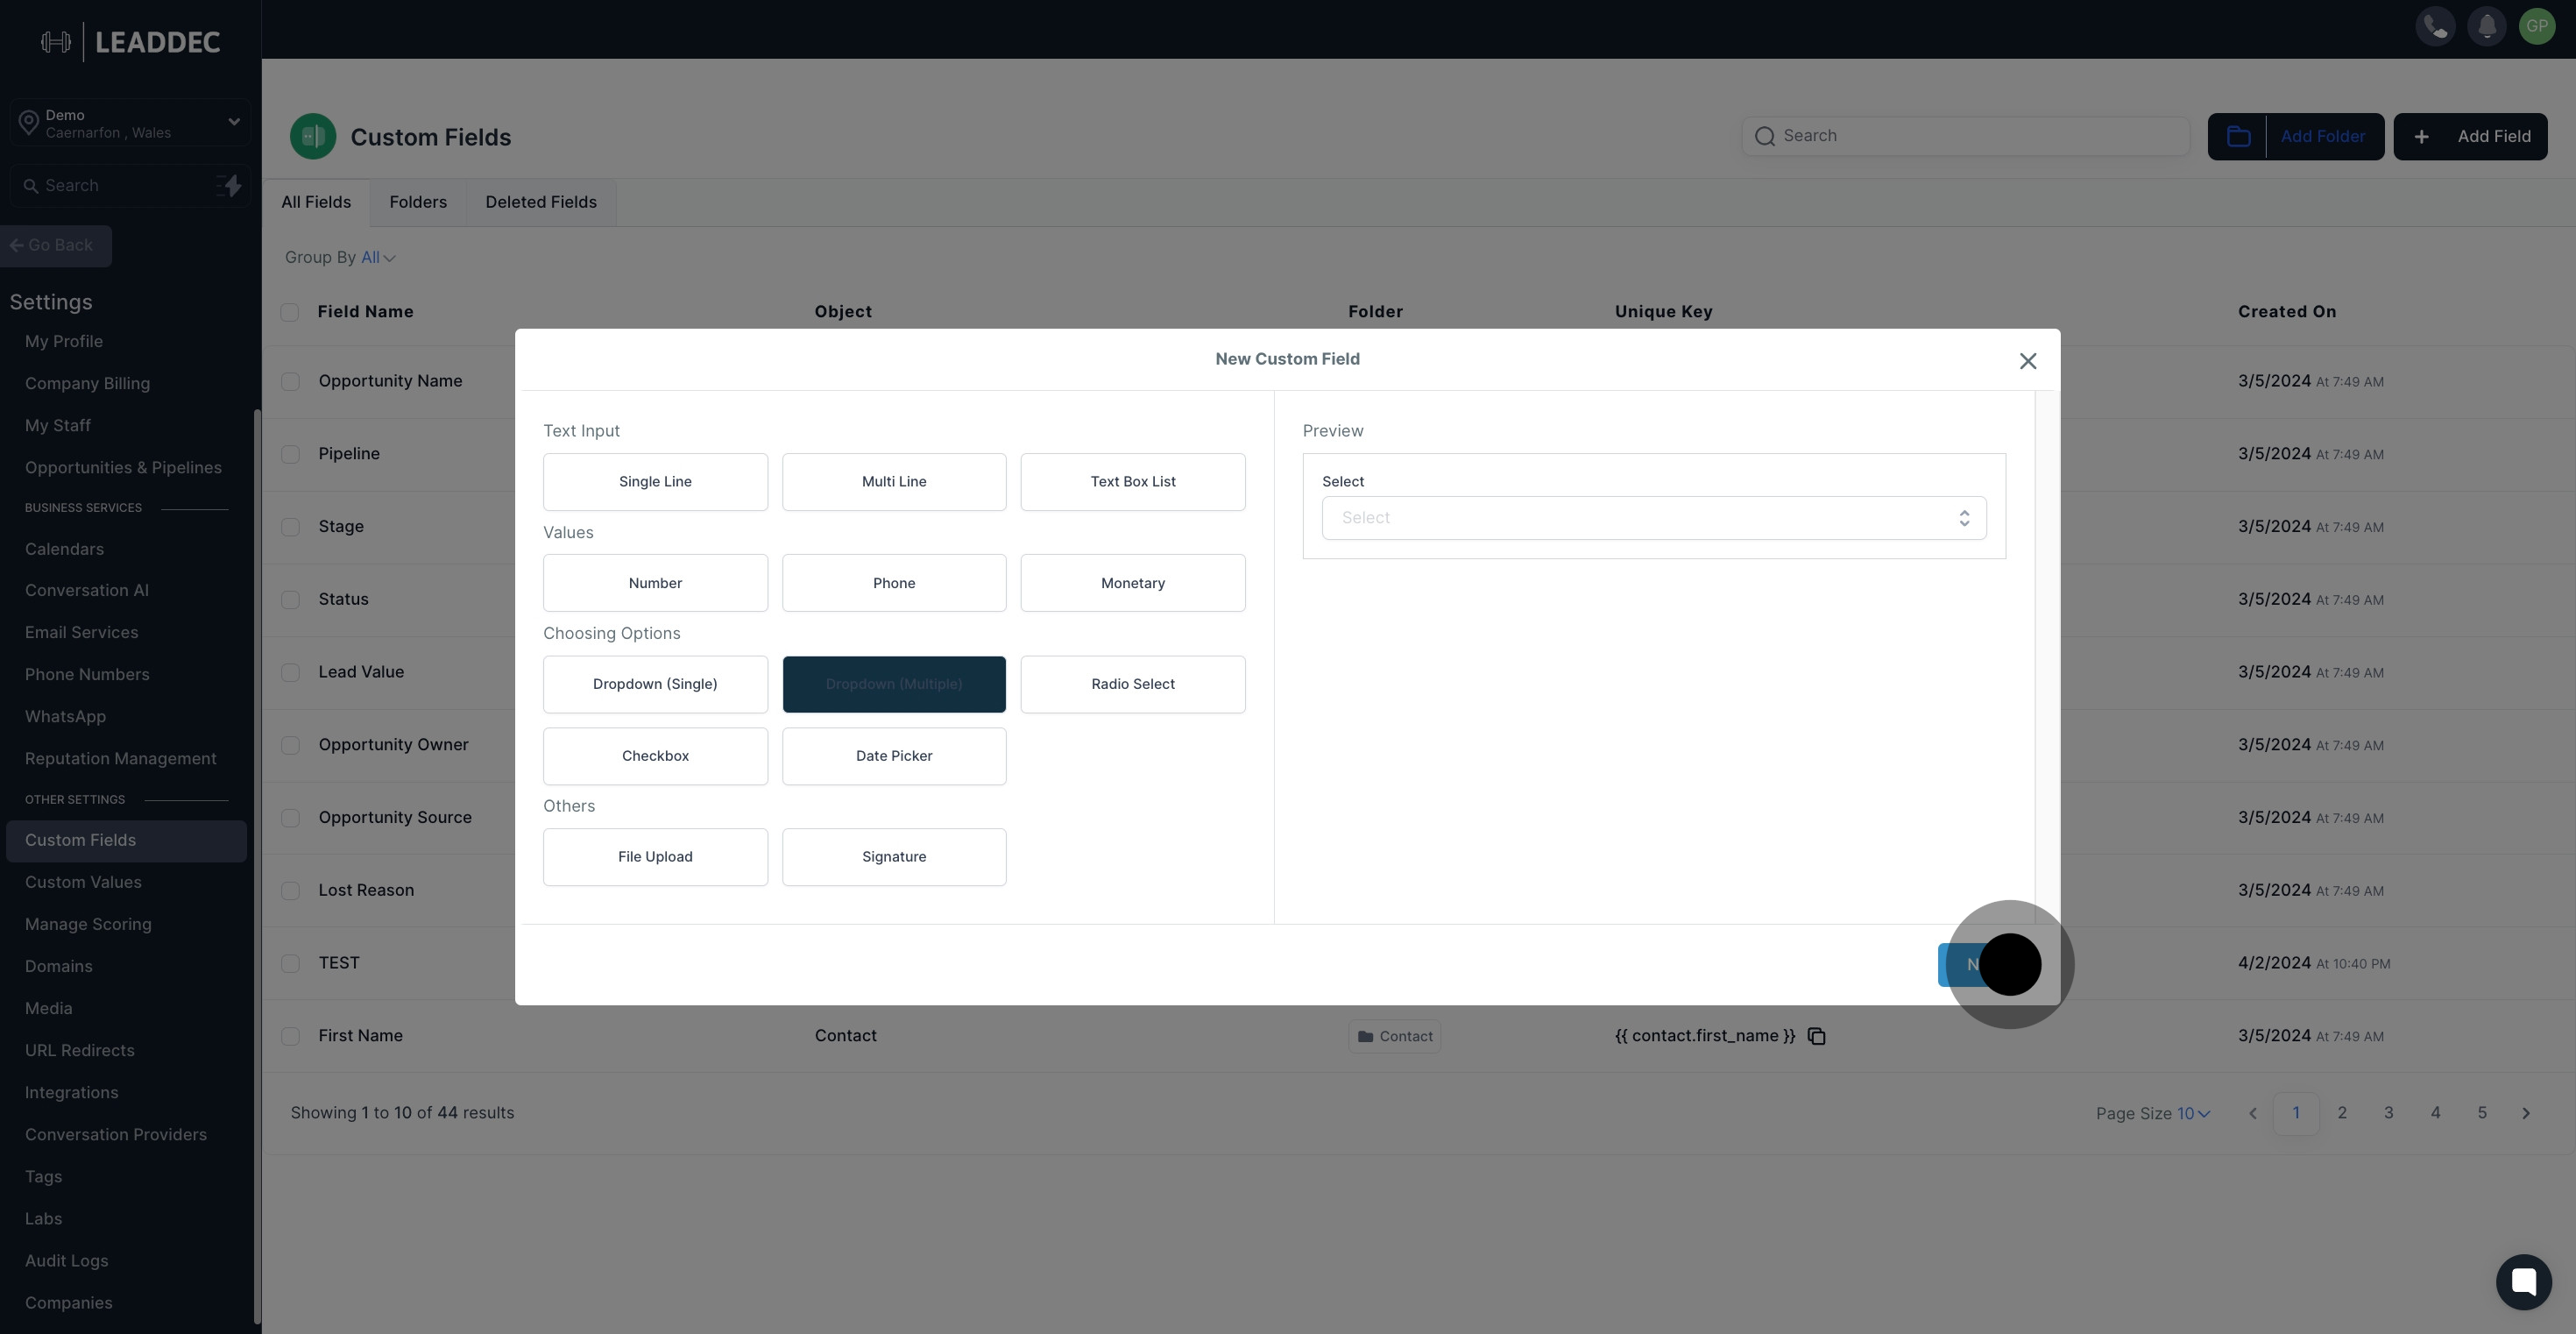
6 Next, click on "Next".

7. Enter your desired field name in the provided text box.
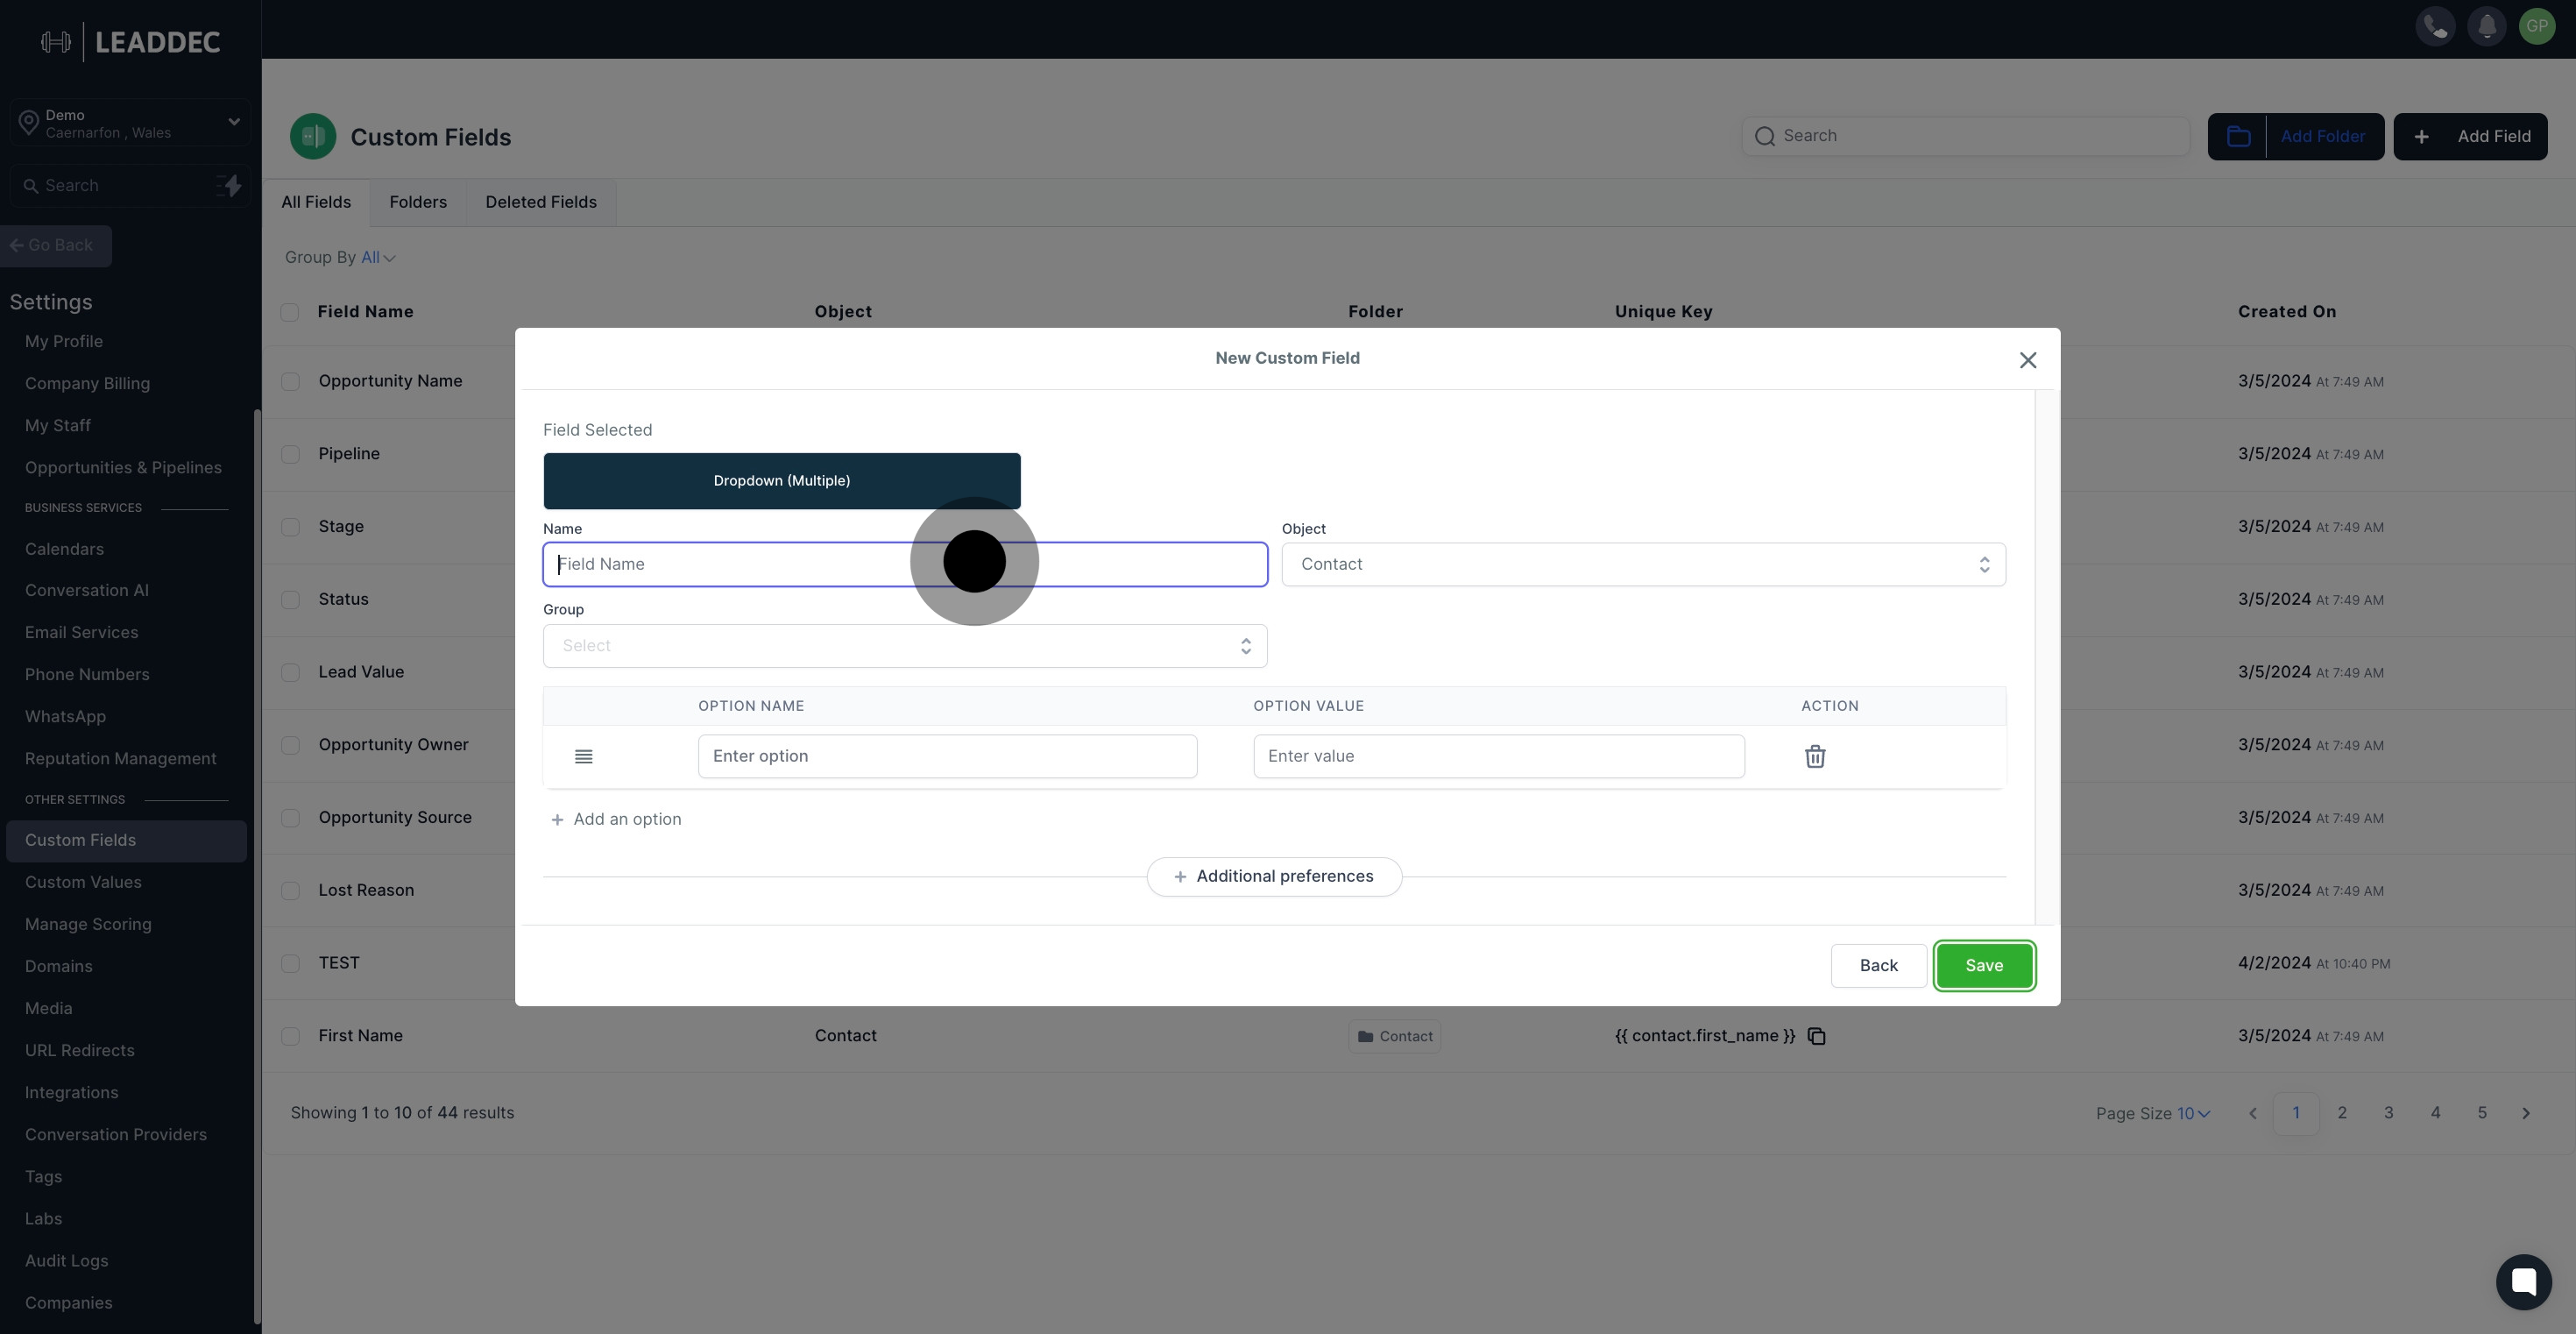
7 After that, click on the element.

8. Choose your preferred group from the dropdown list.
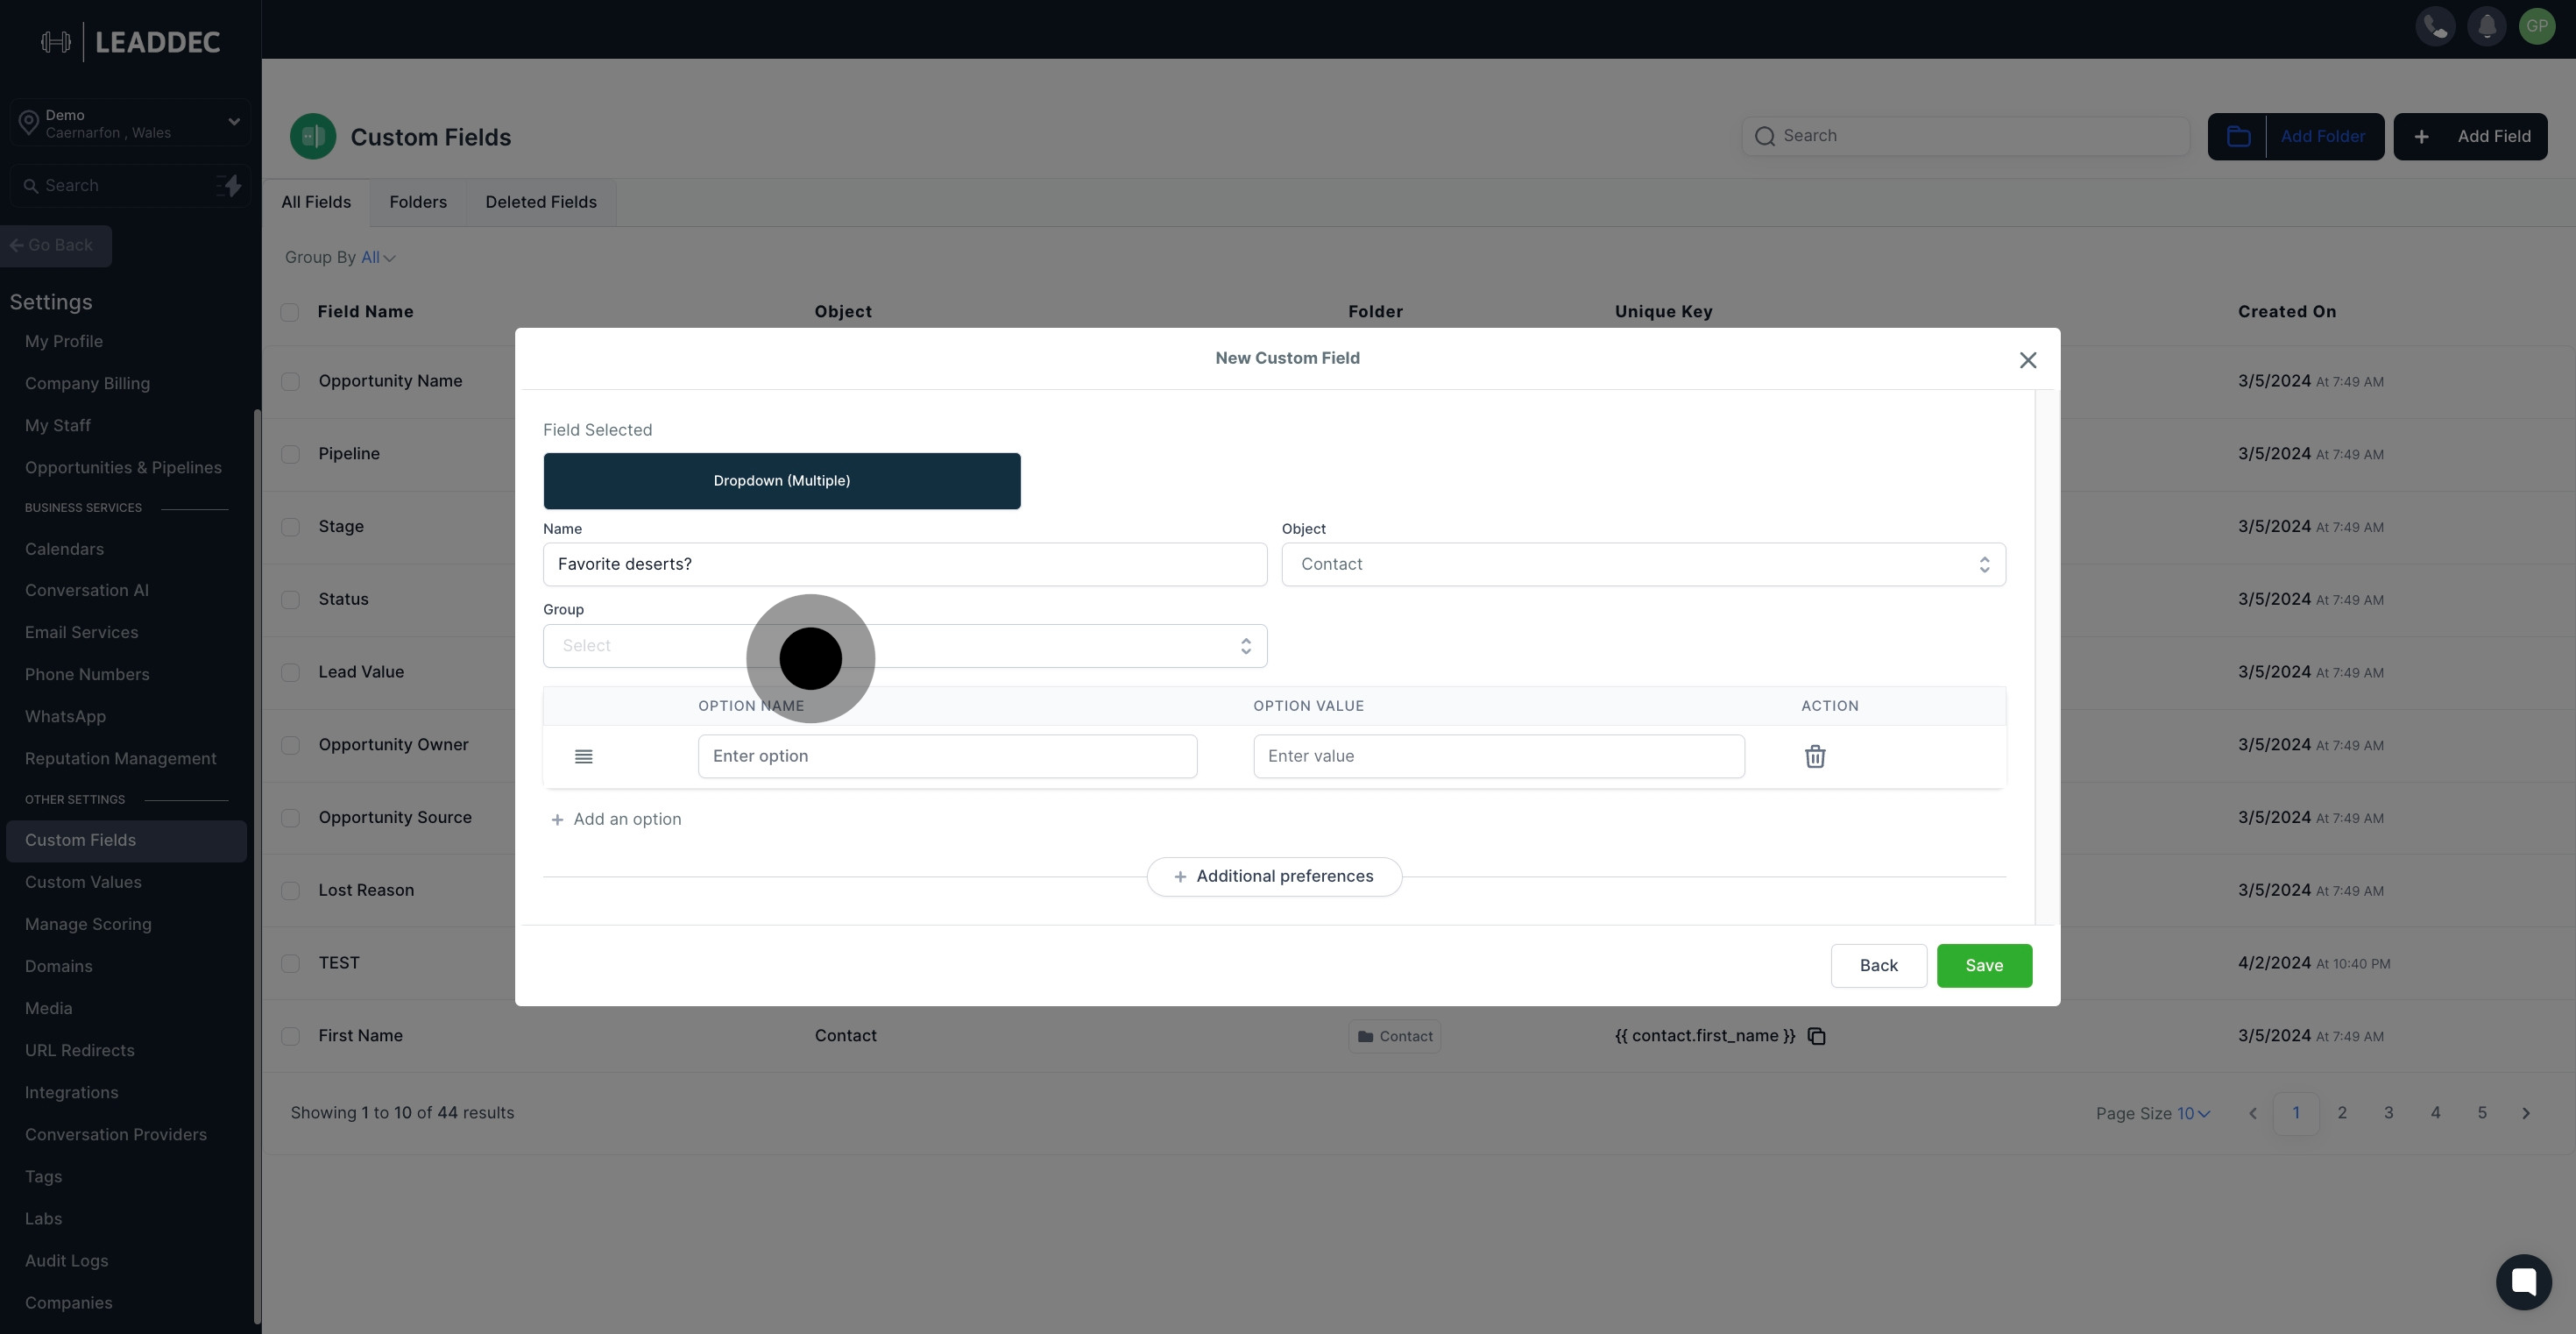
8 Now, click on "Select".

9. Enter the option name in the corresponding field.
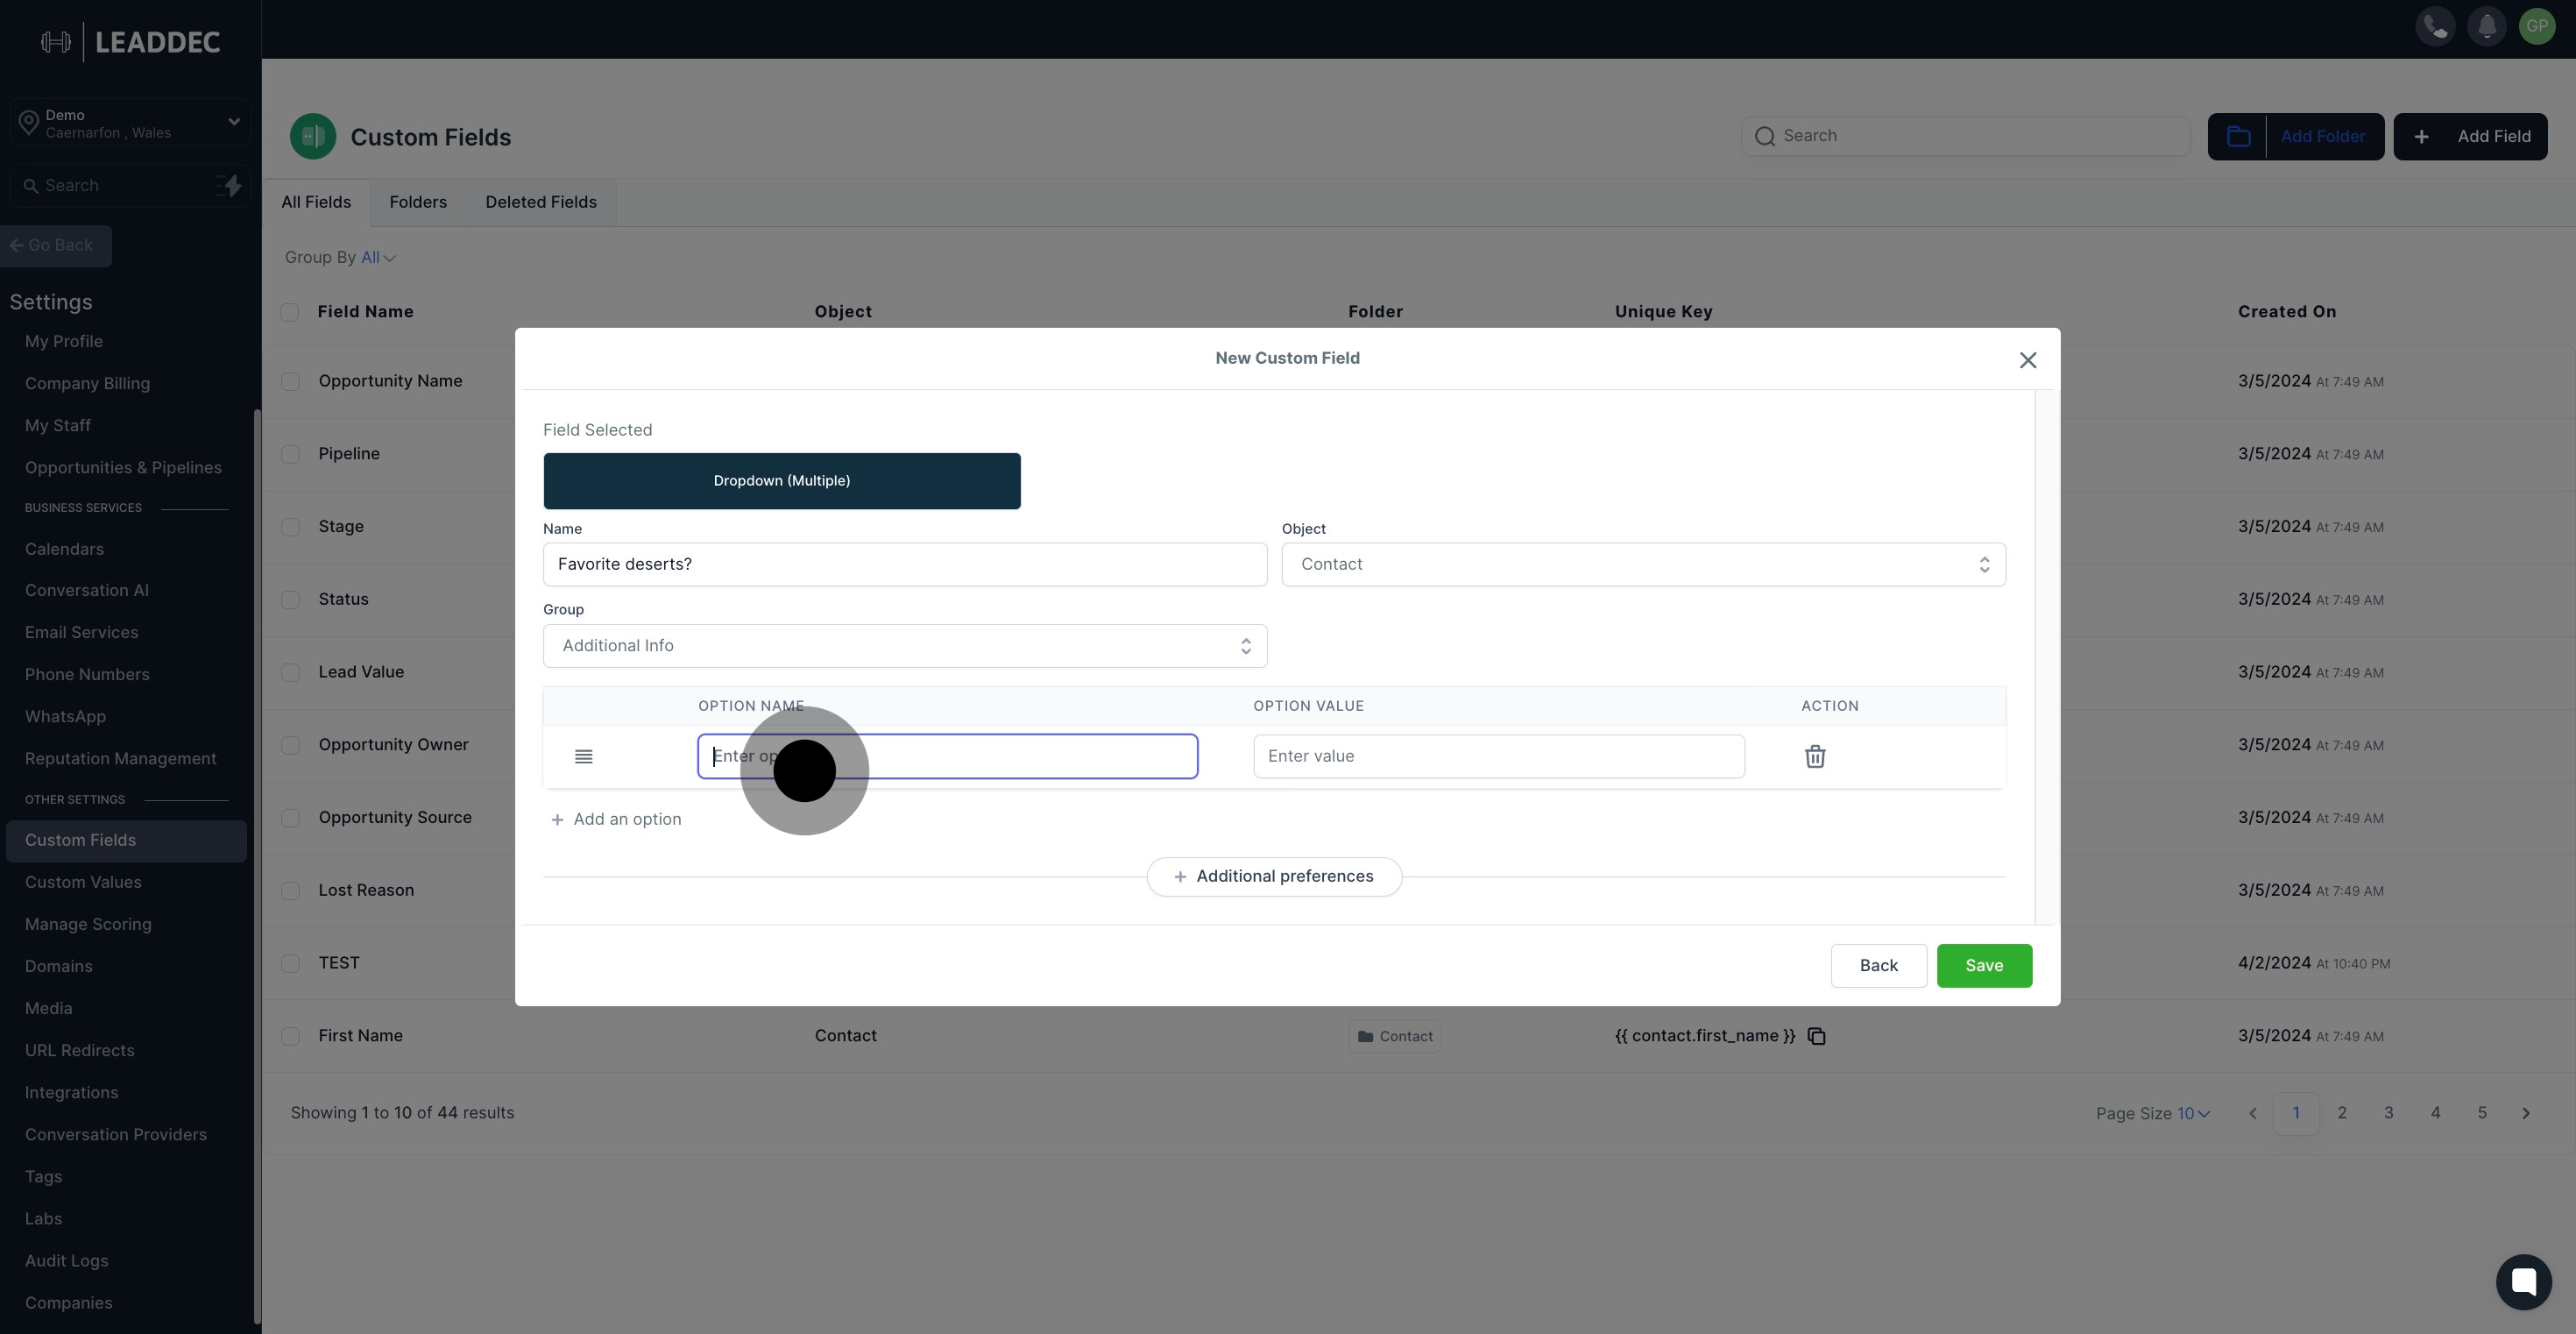
9 Afterwards, click on the element.

10. Add the option's value in the 'Enter value' field.
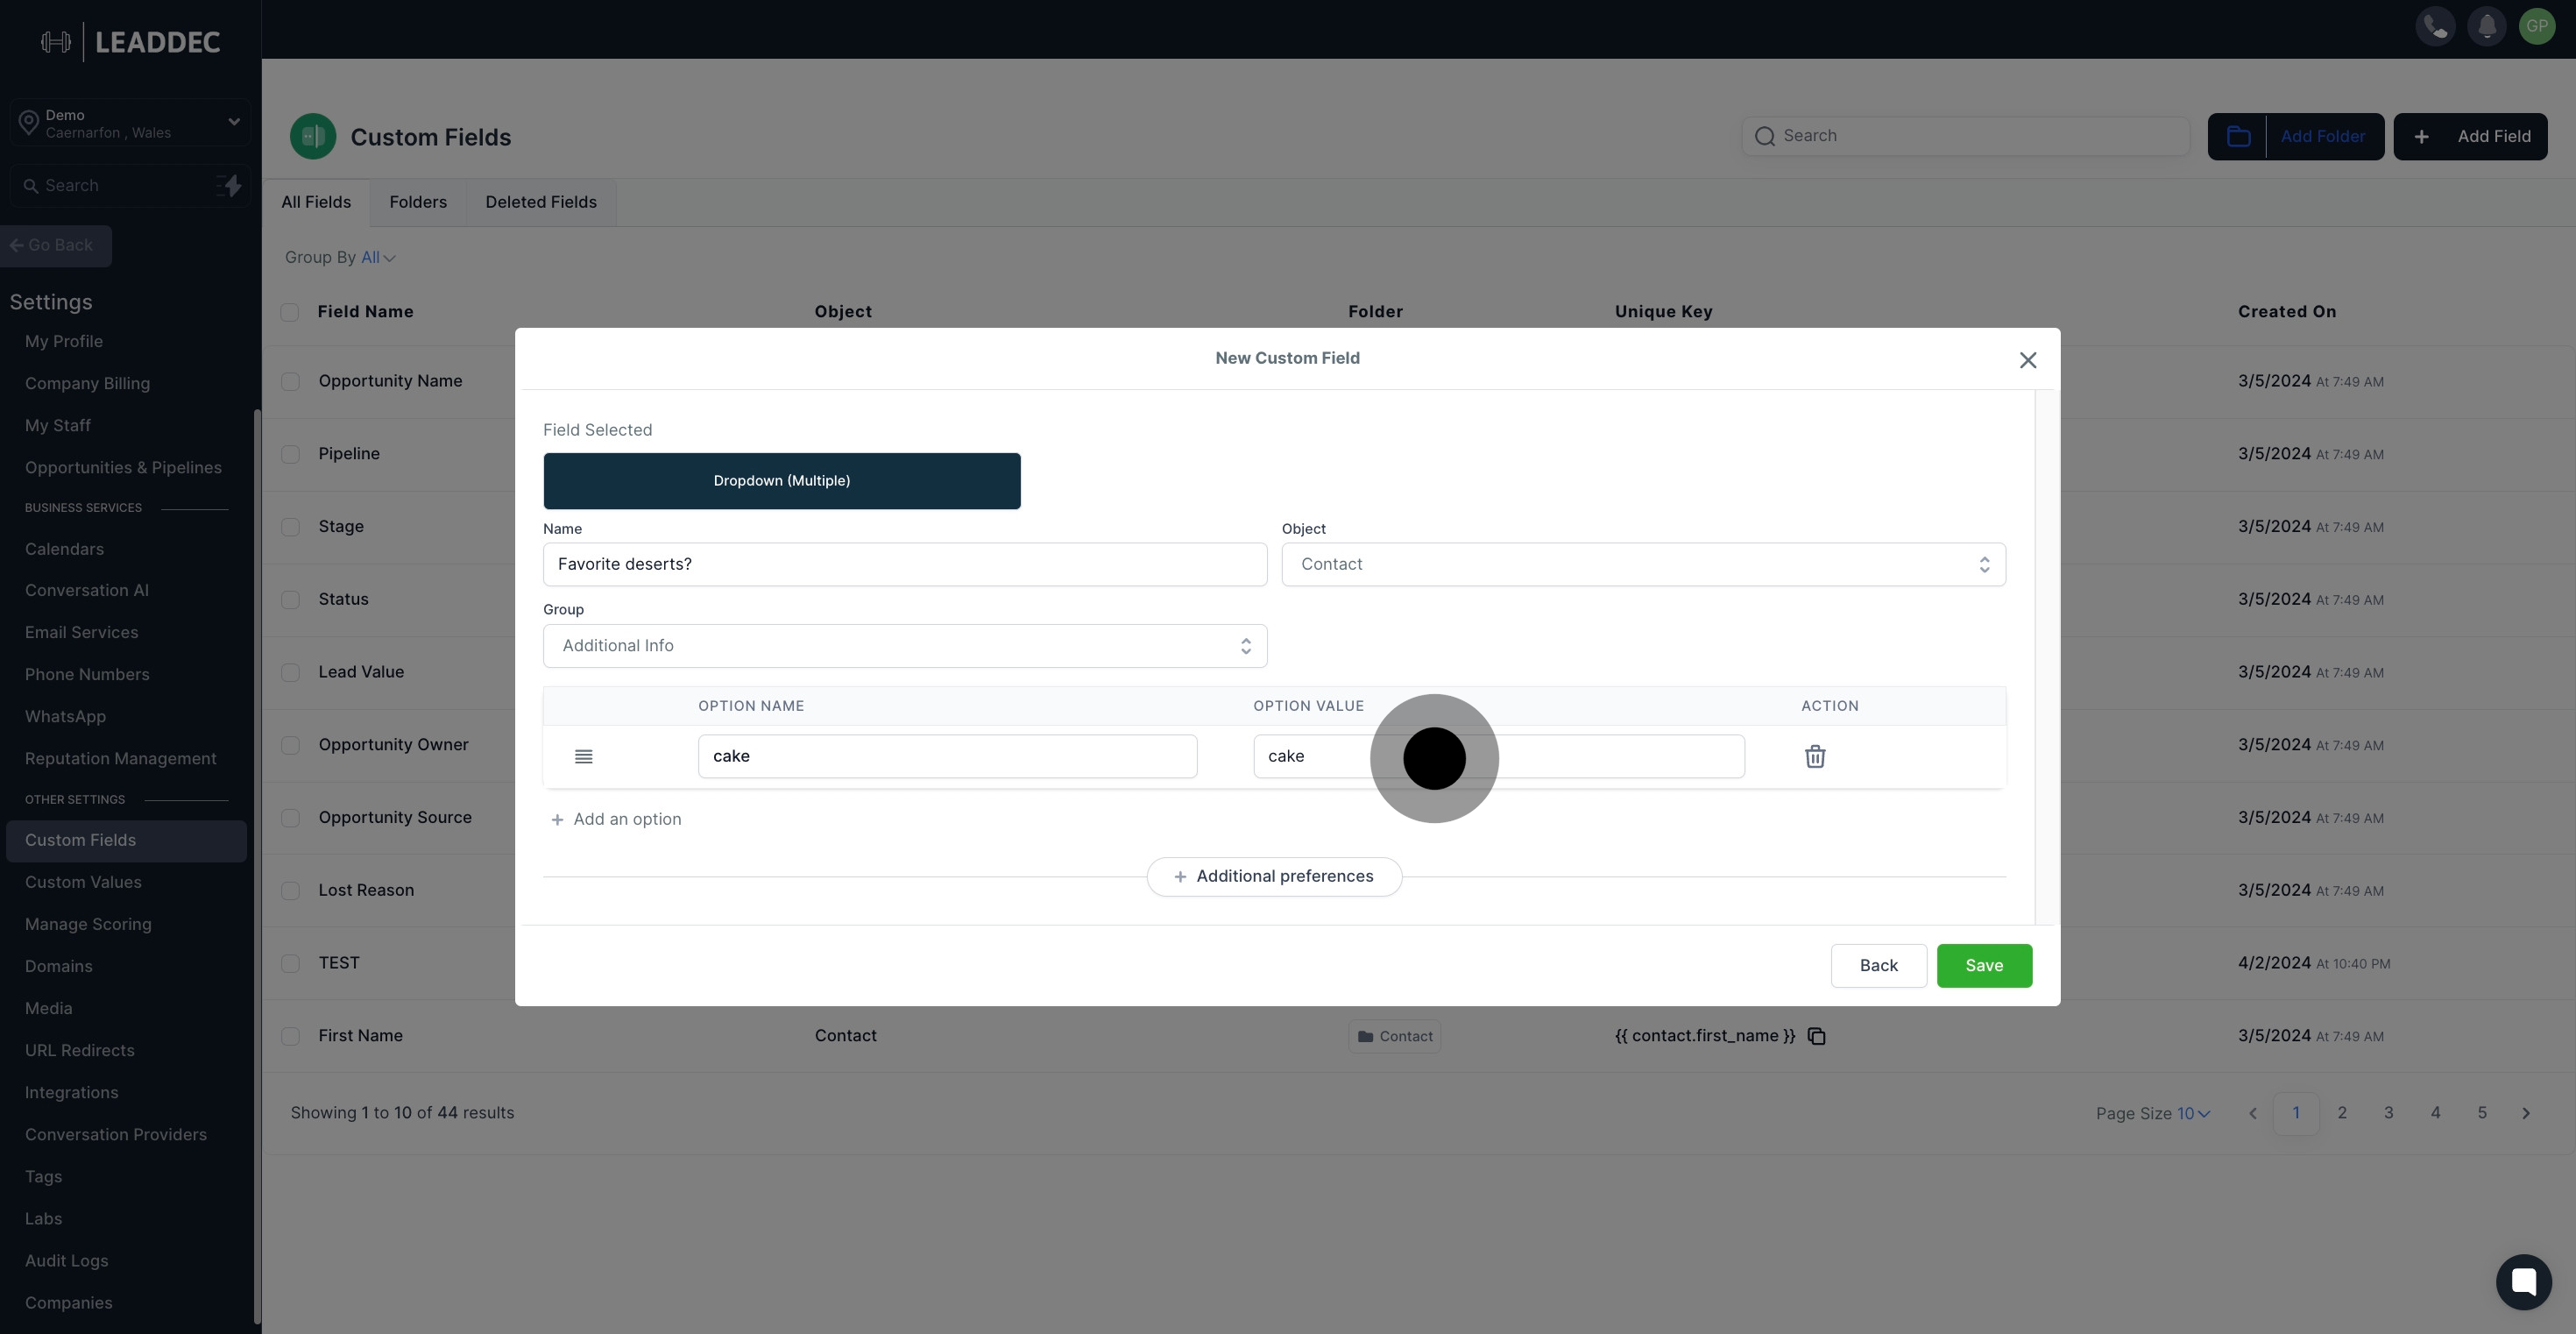
10 Following that, click on the element.

11. Delete any unwanted options using the delete option button.
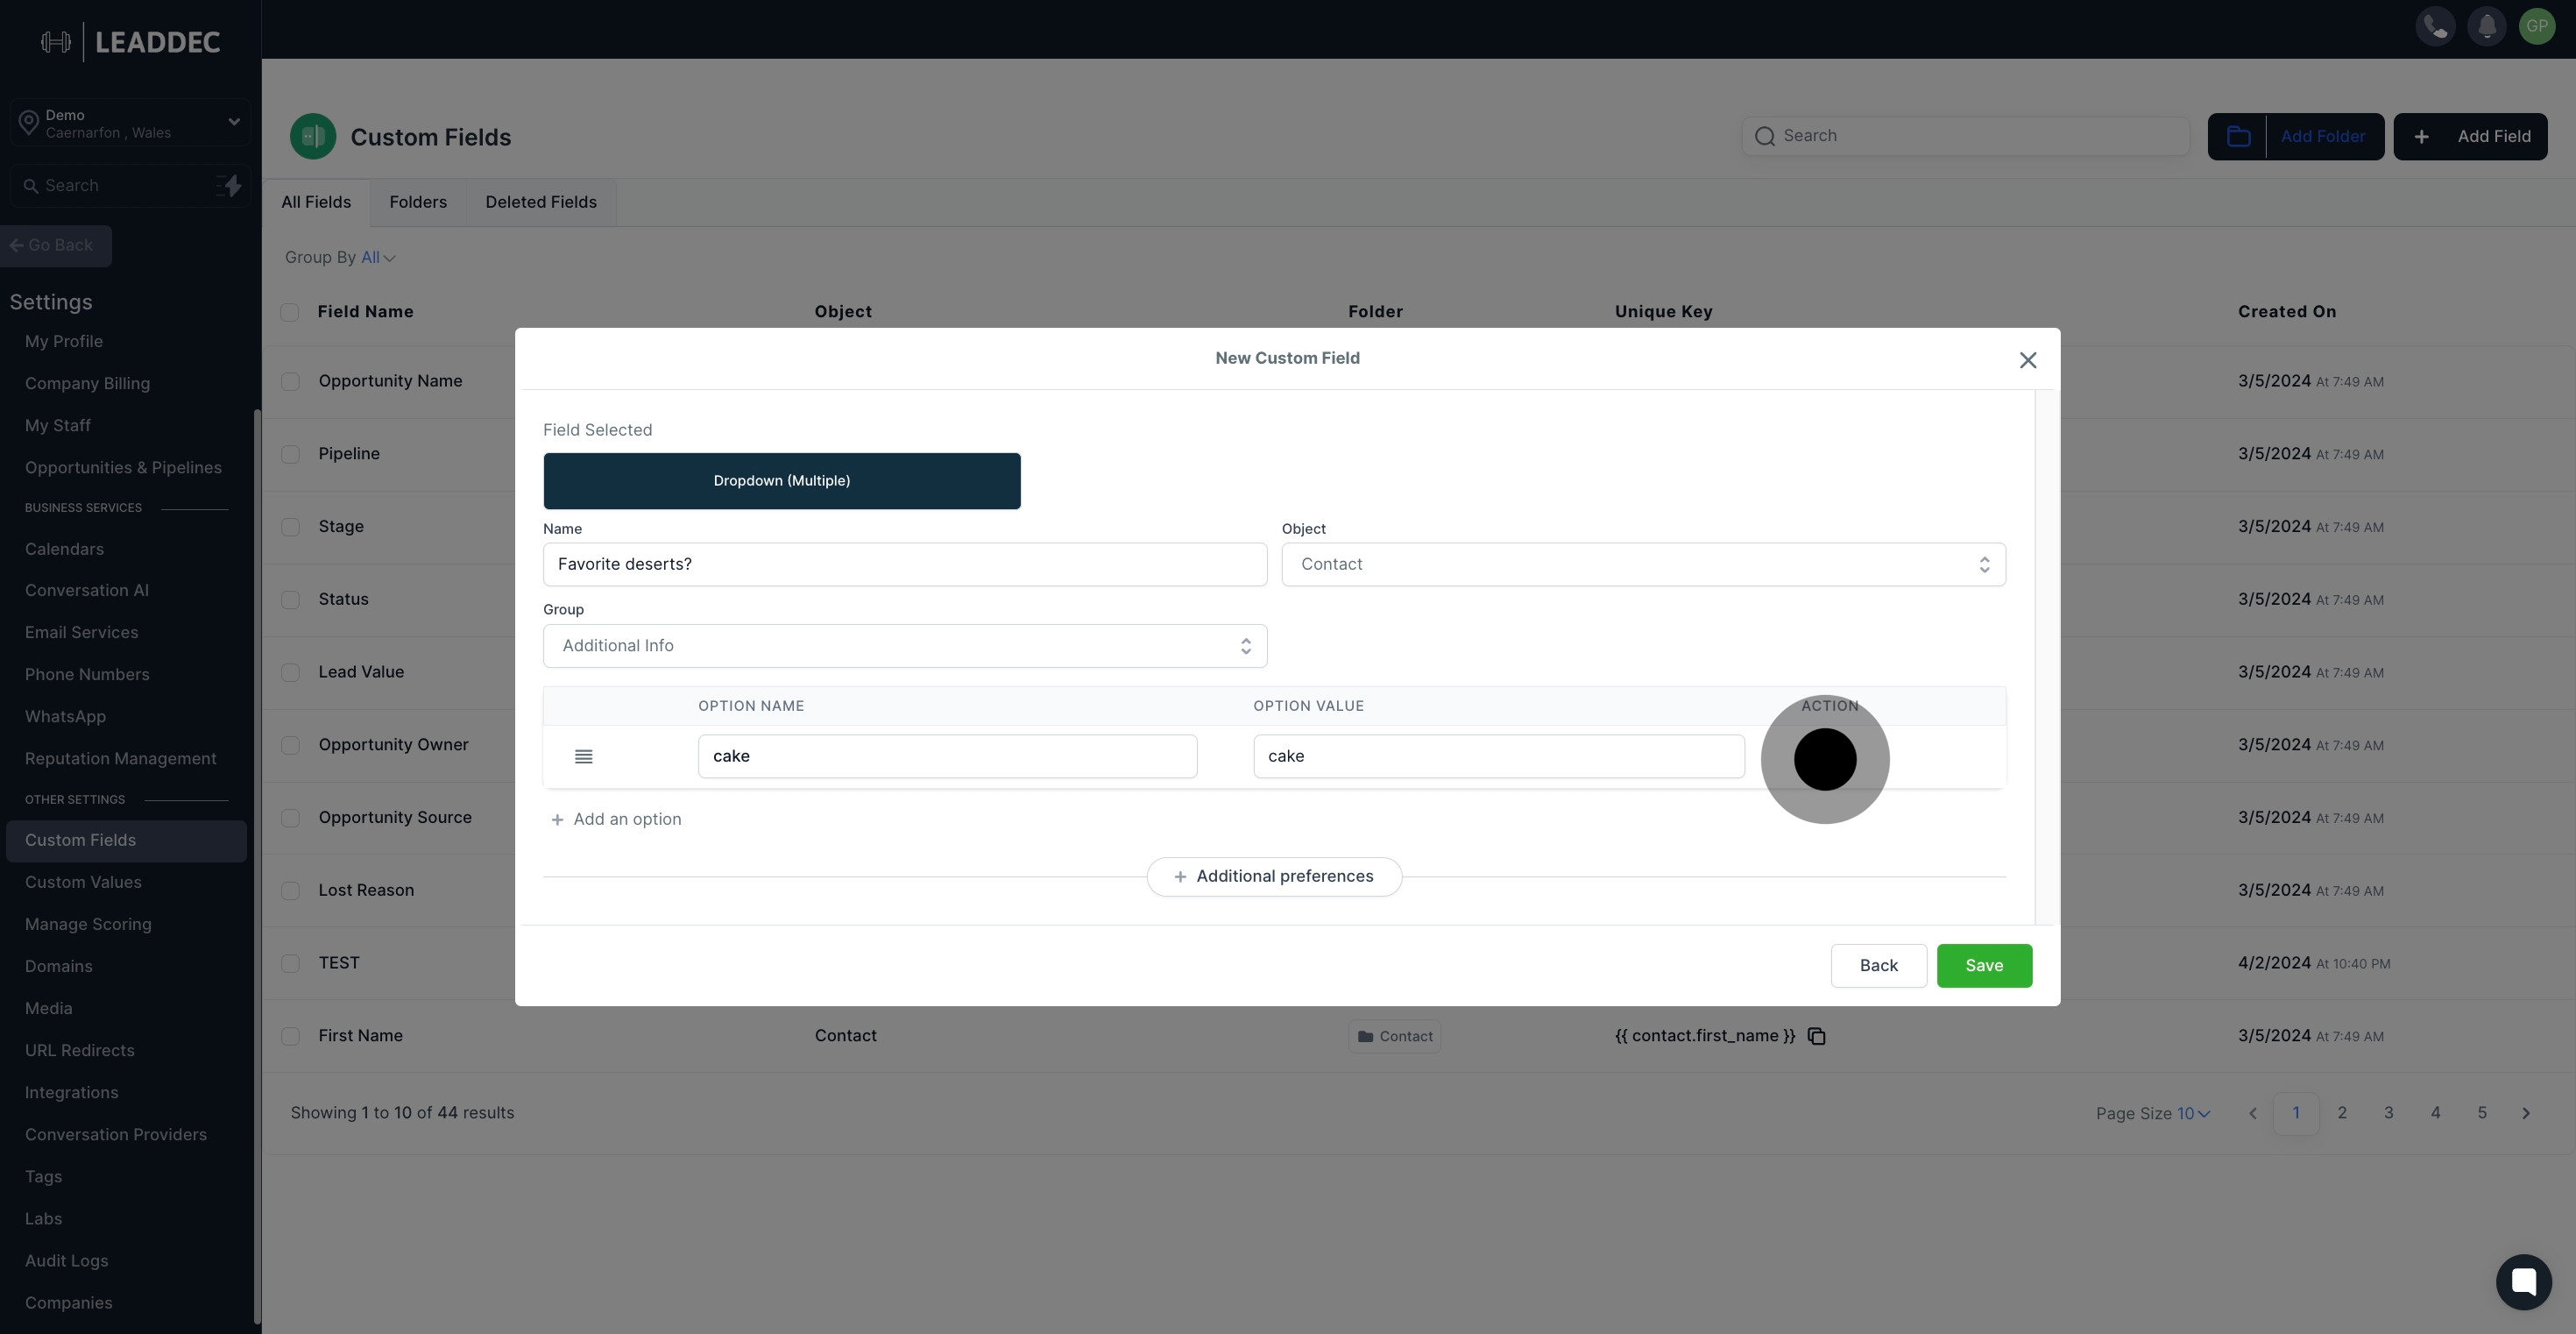
11 Following that, click here.

12. Select the object associated with this field from the dropdown list.
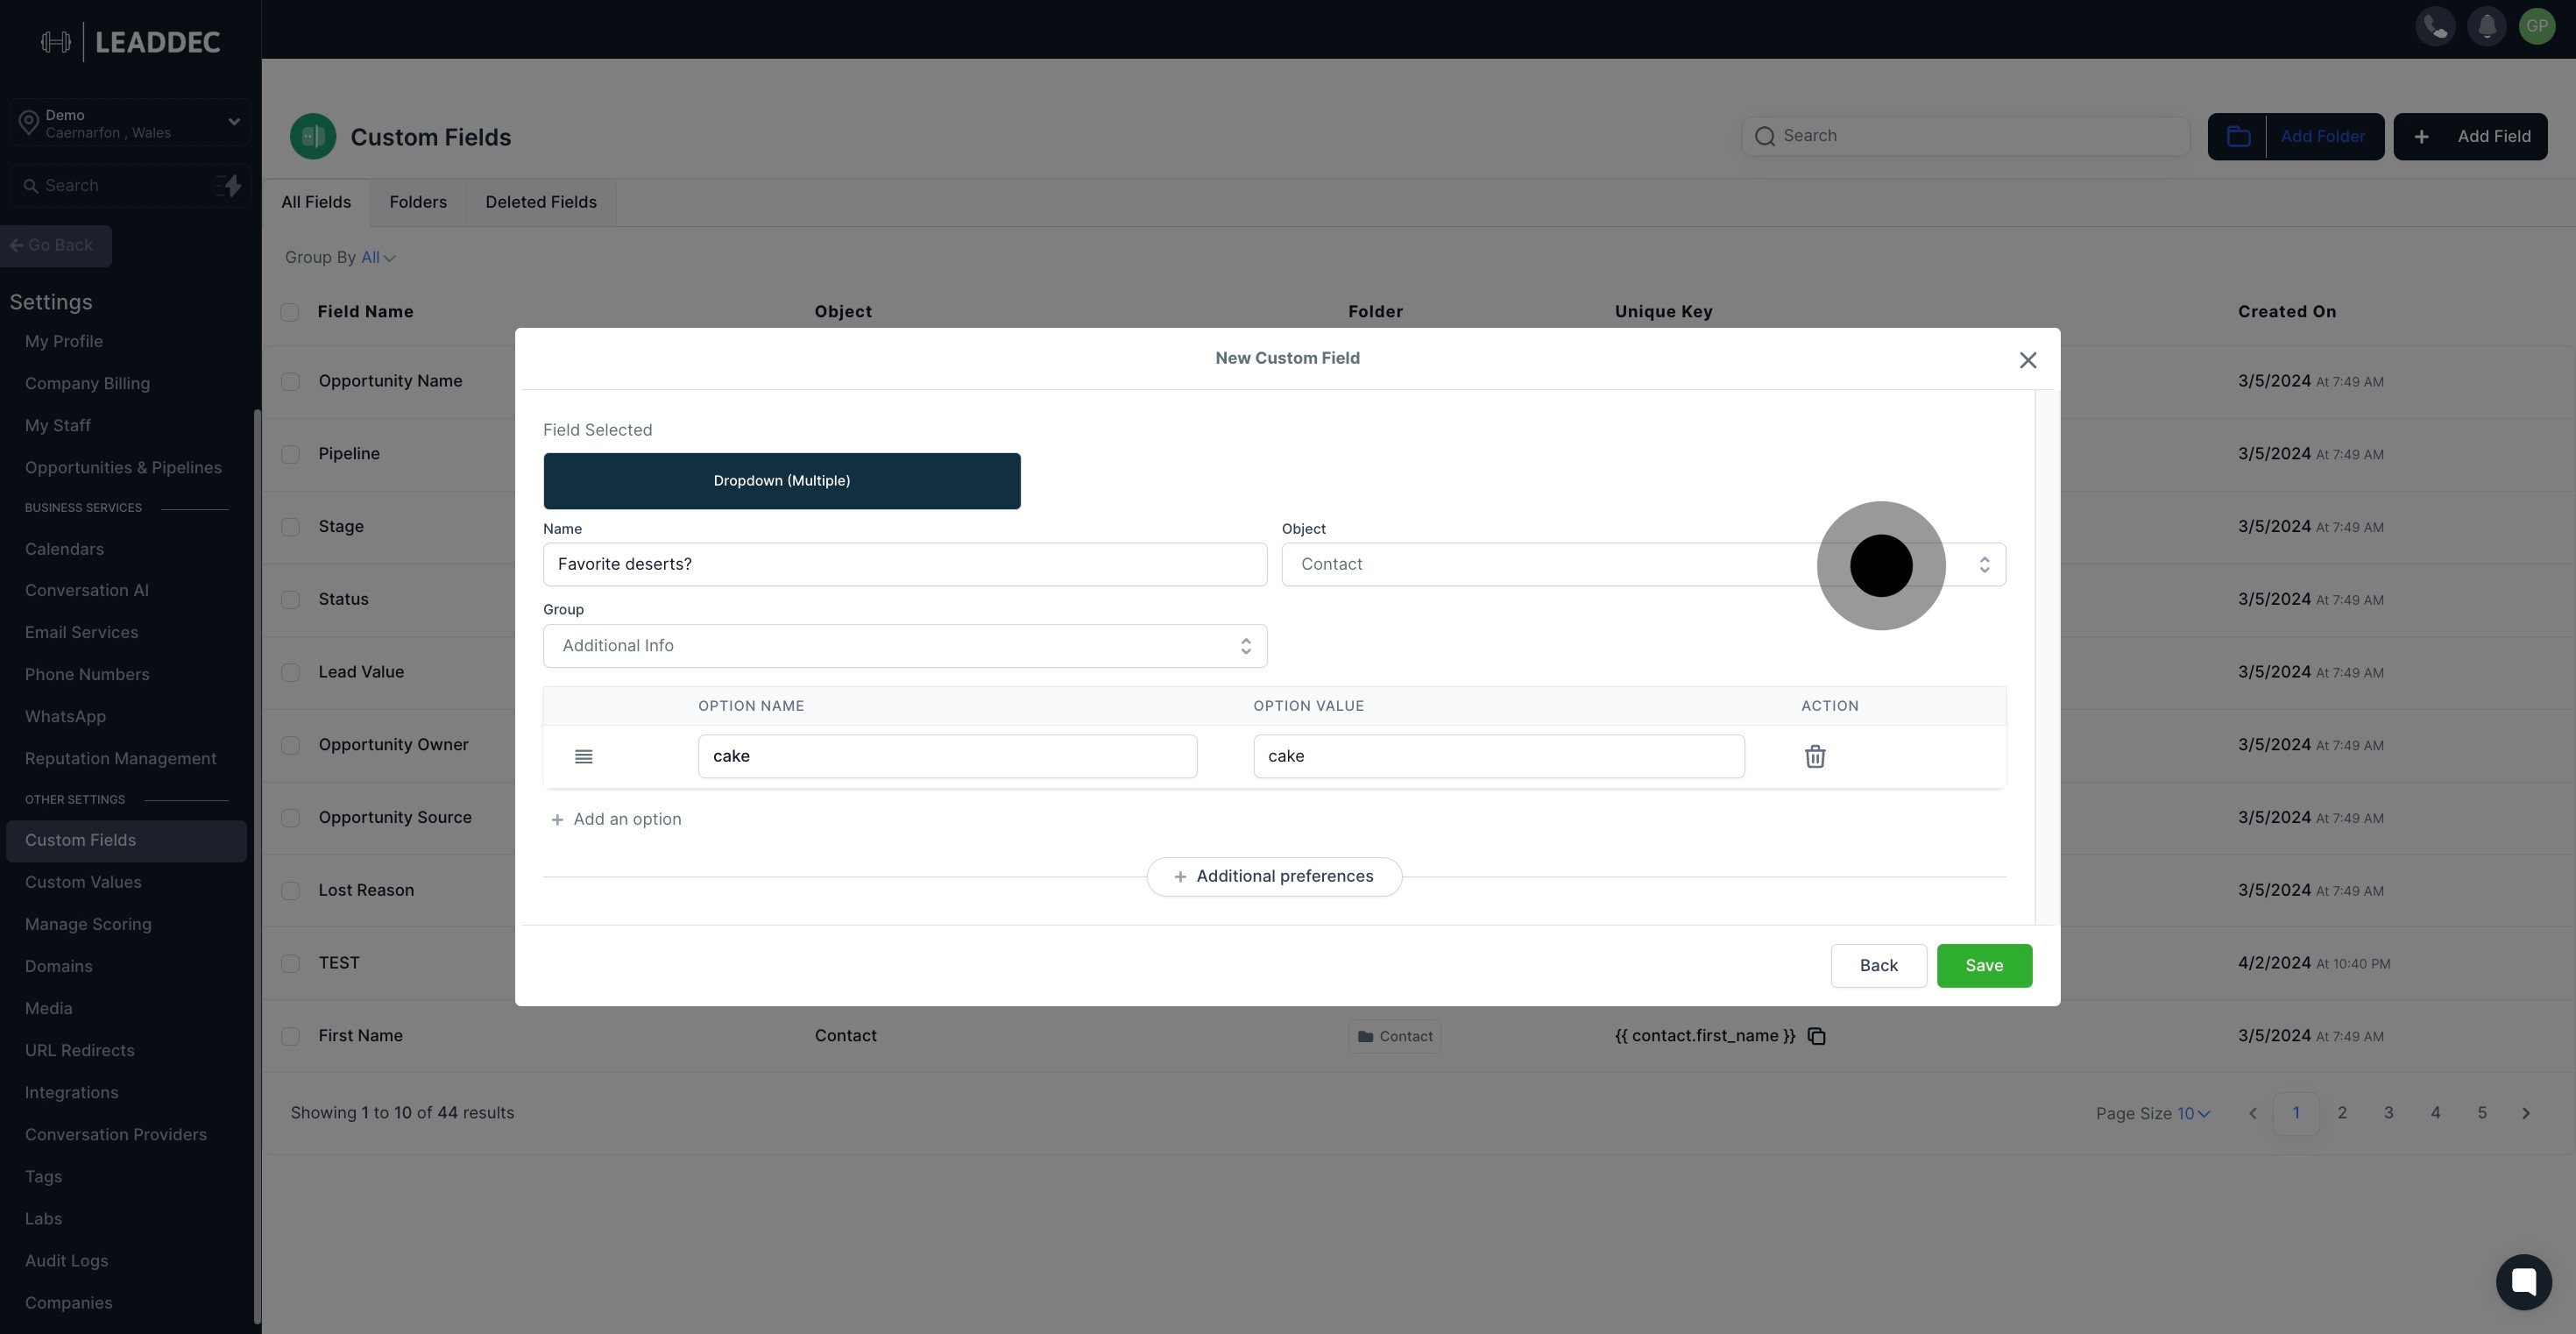
12 Click on "Contact".

13. Want to add more options? Click on 'Add an Option'.
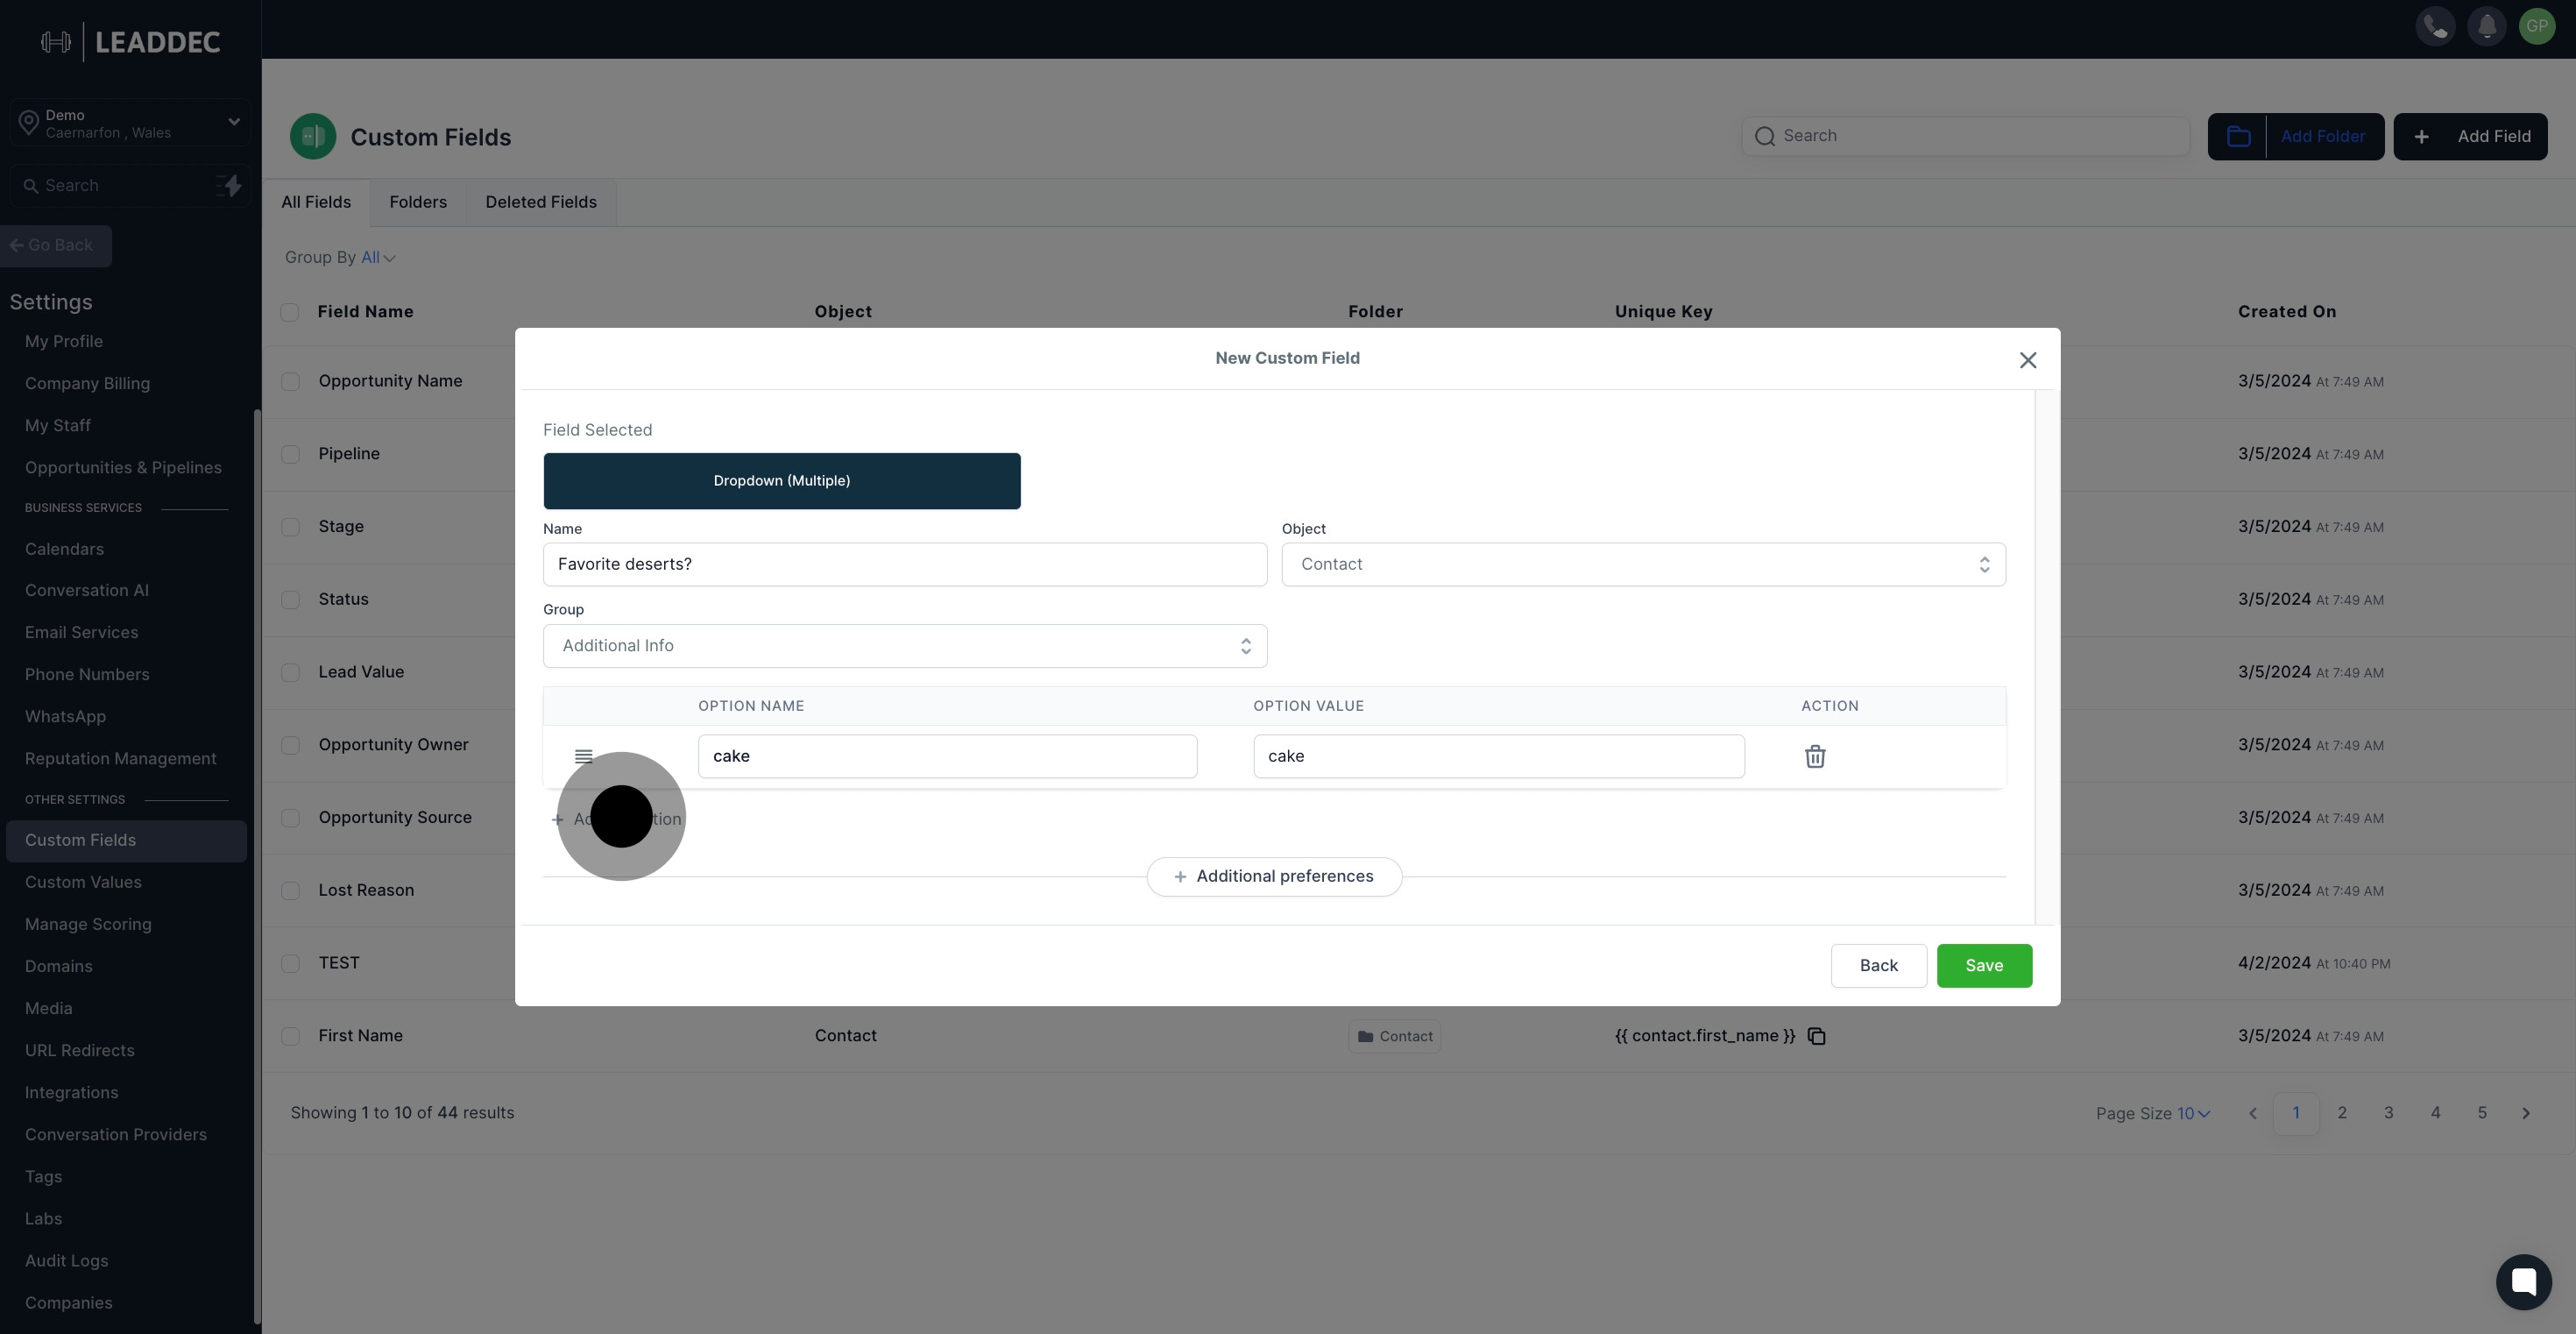
13 Click on "Add an option".

14. Add any additional preferences using the corresponding button.
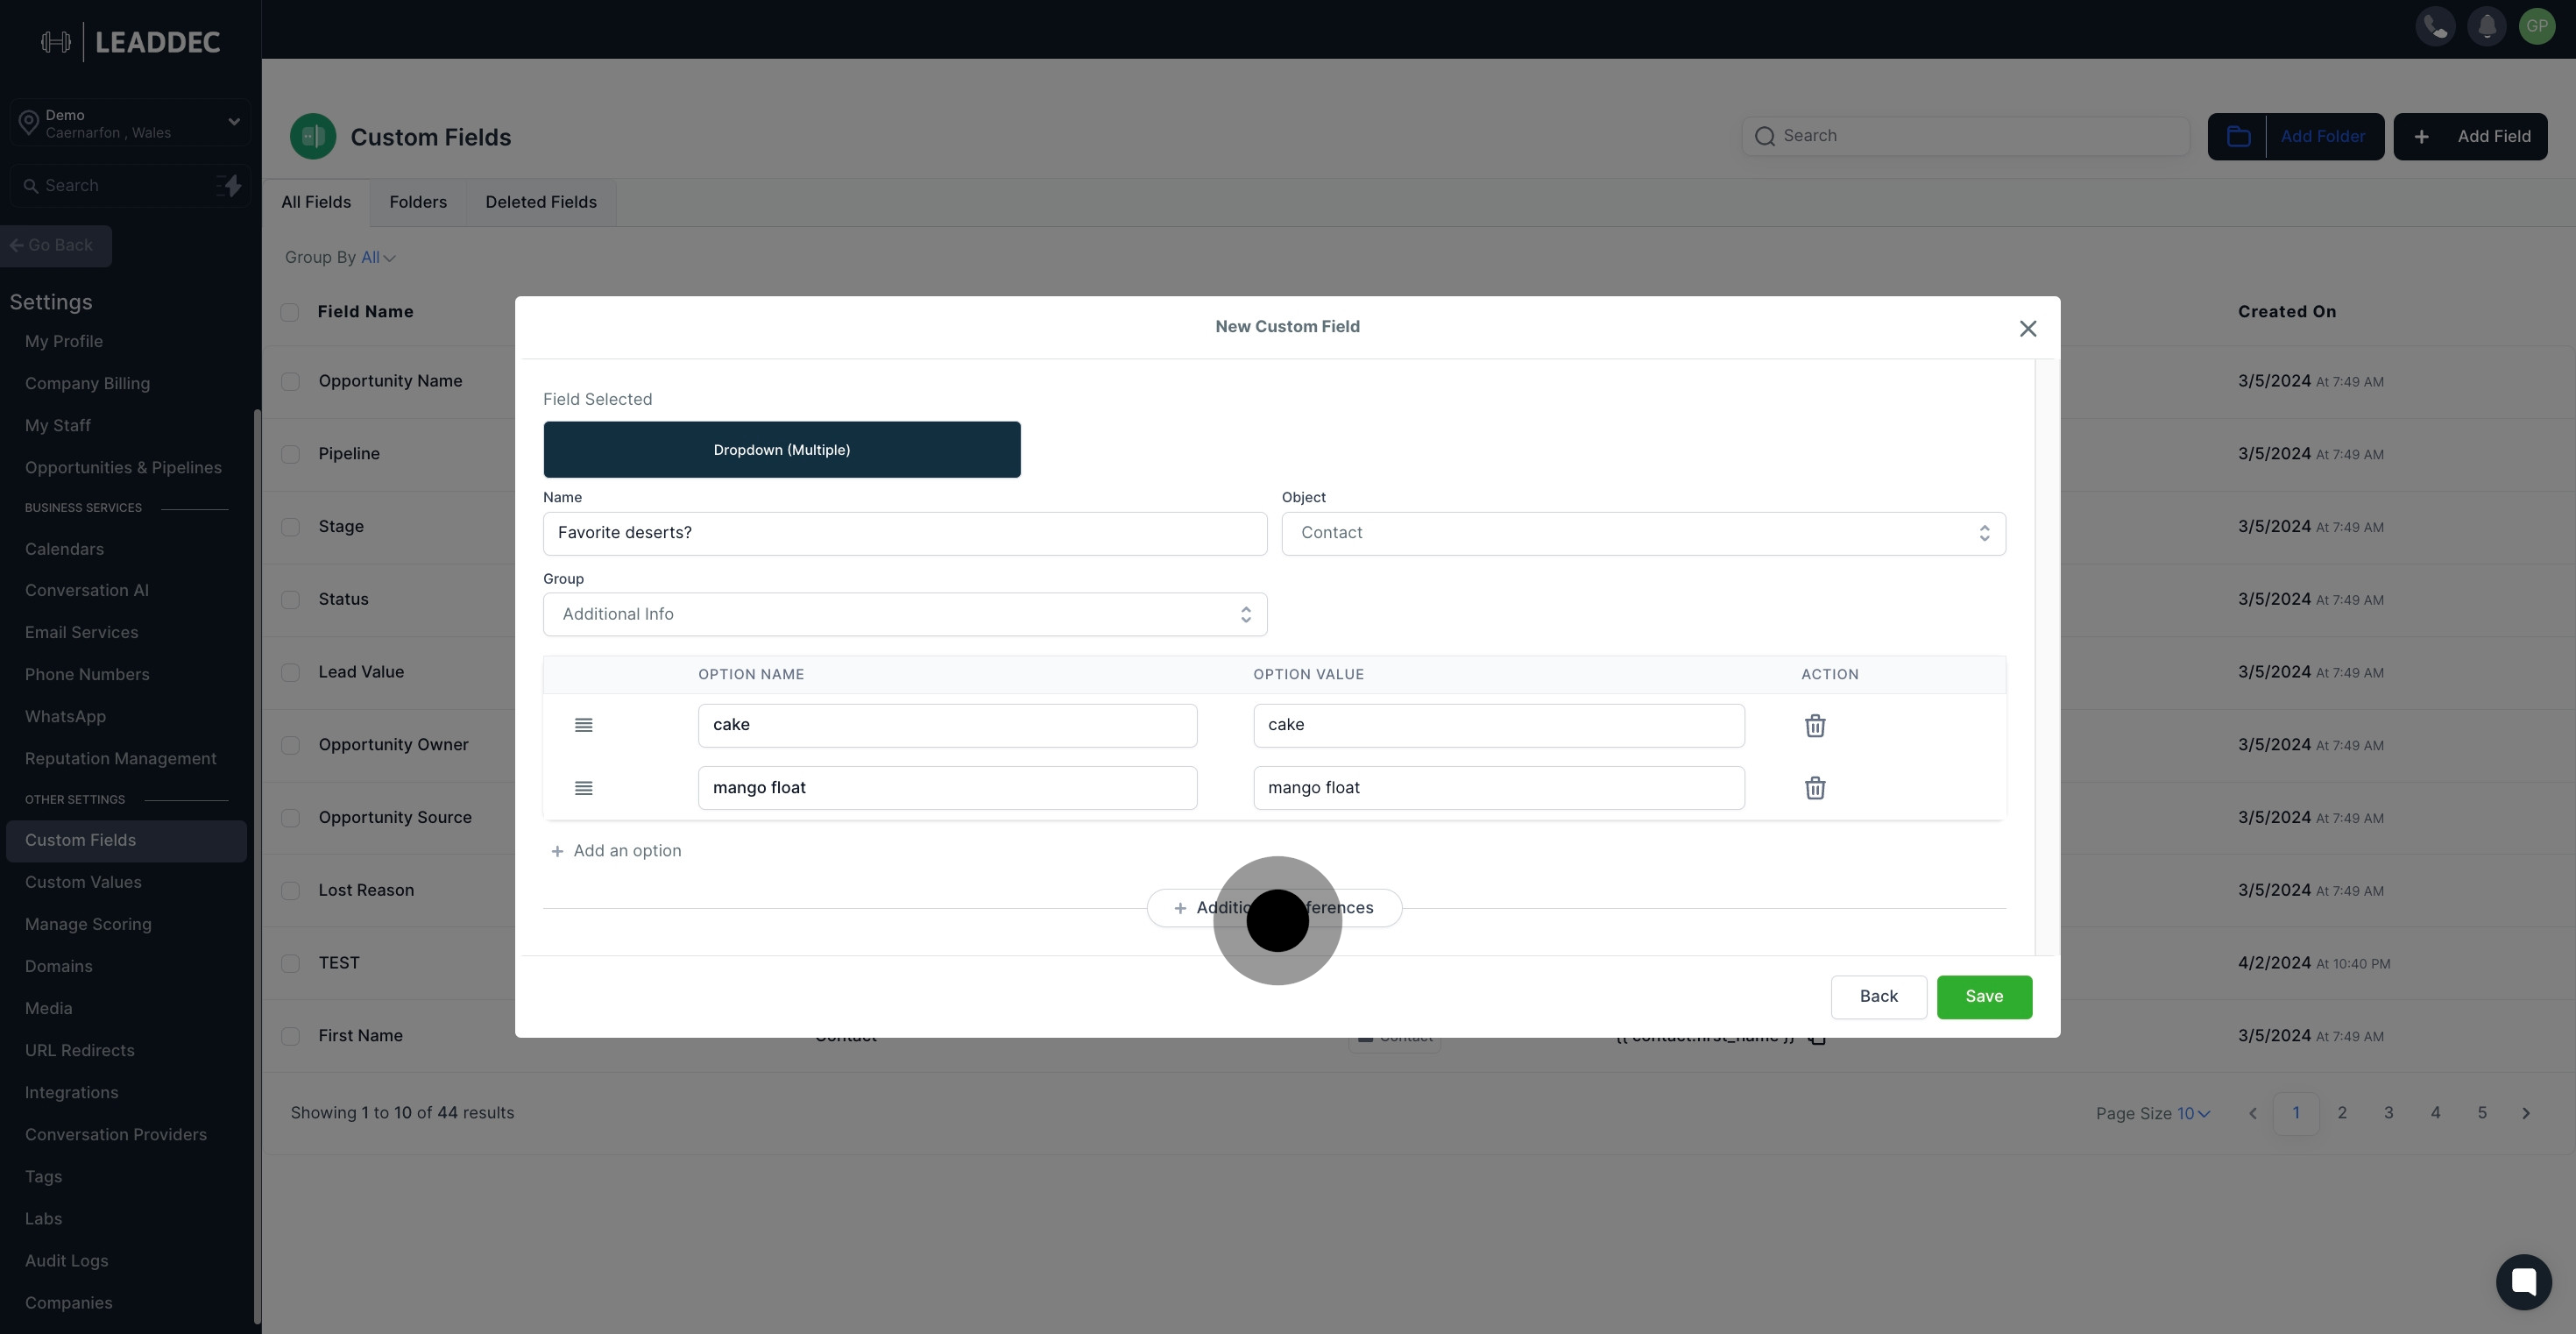
14 Then, click here.

15. Customize the unique key for your field, if necessary.
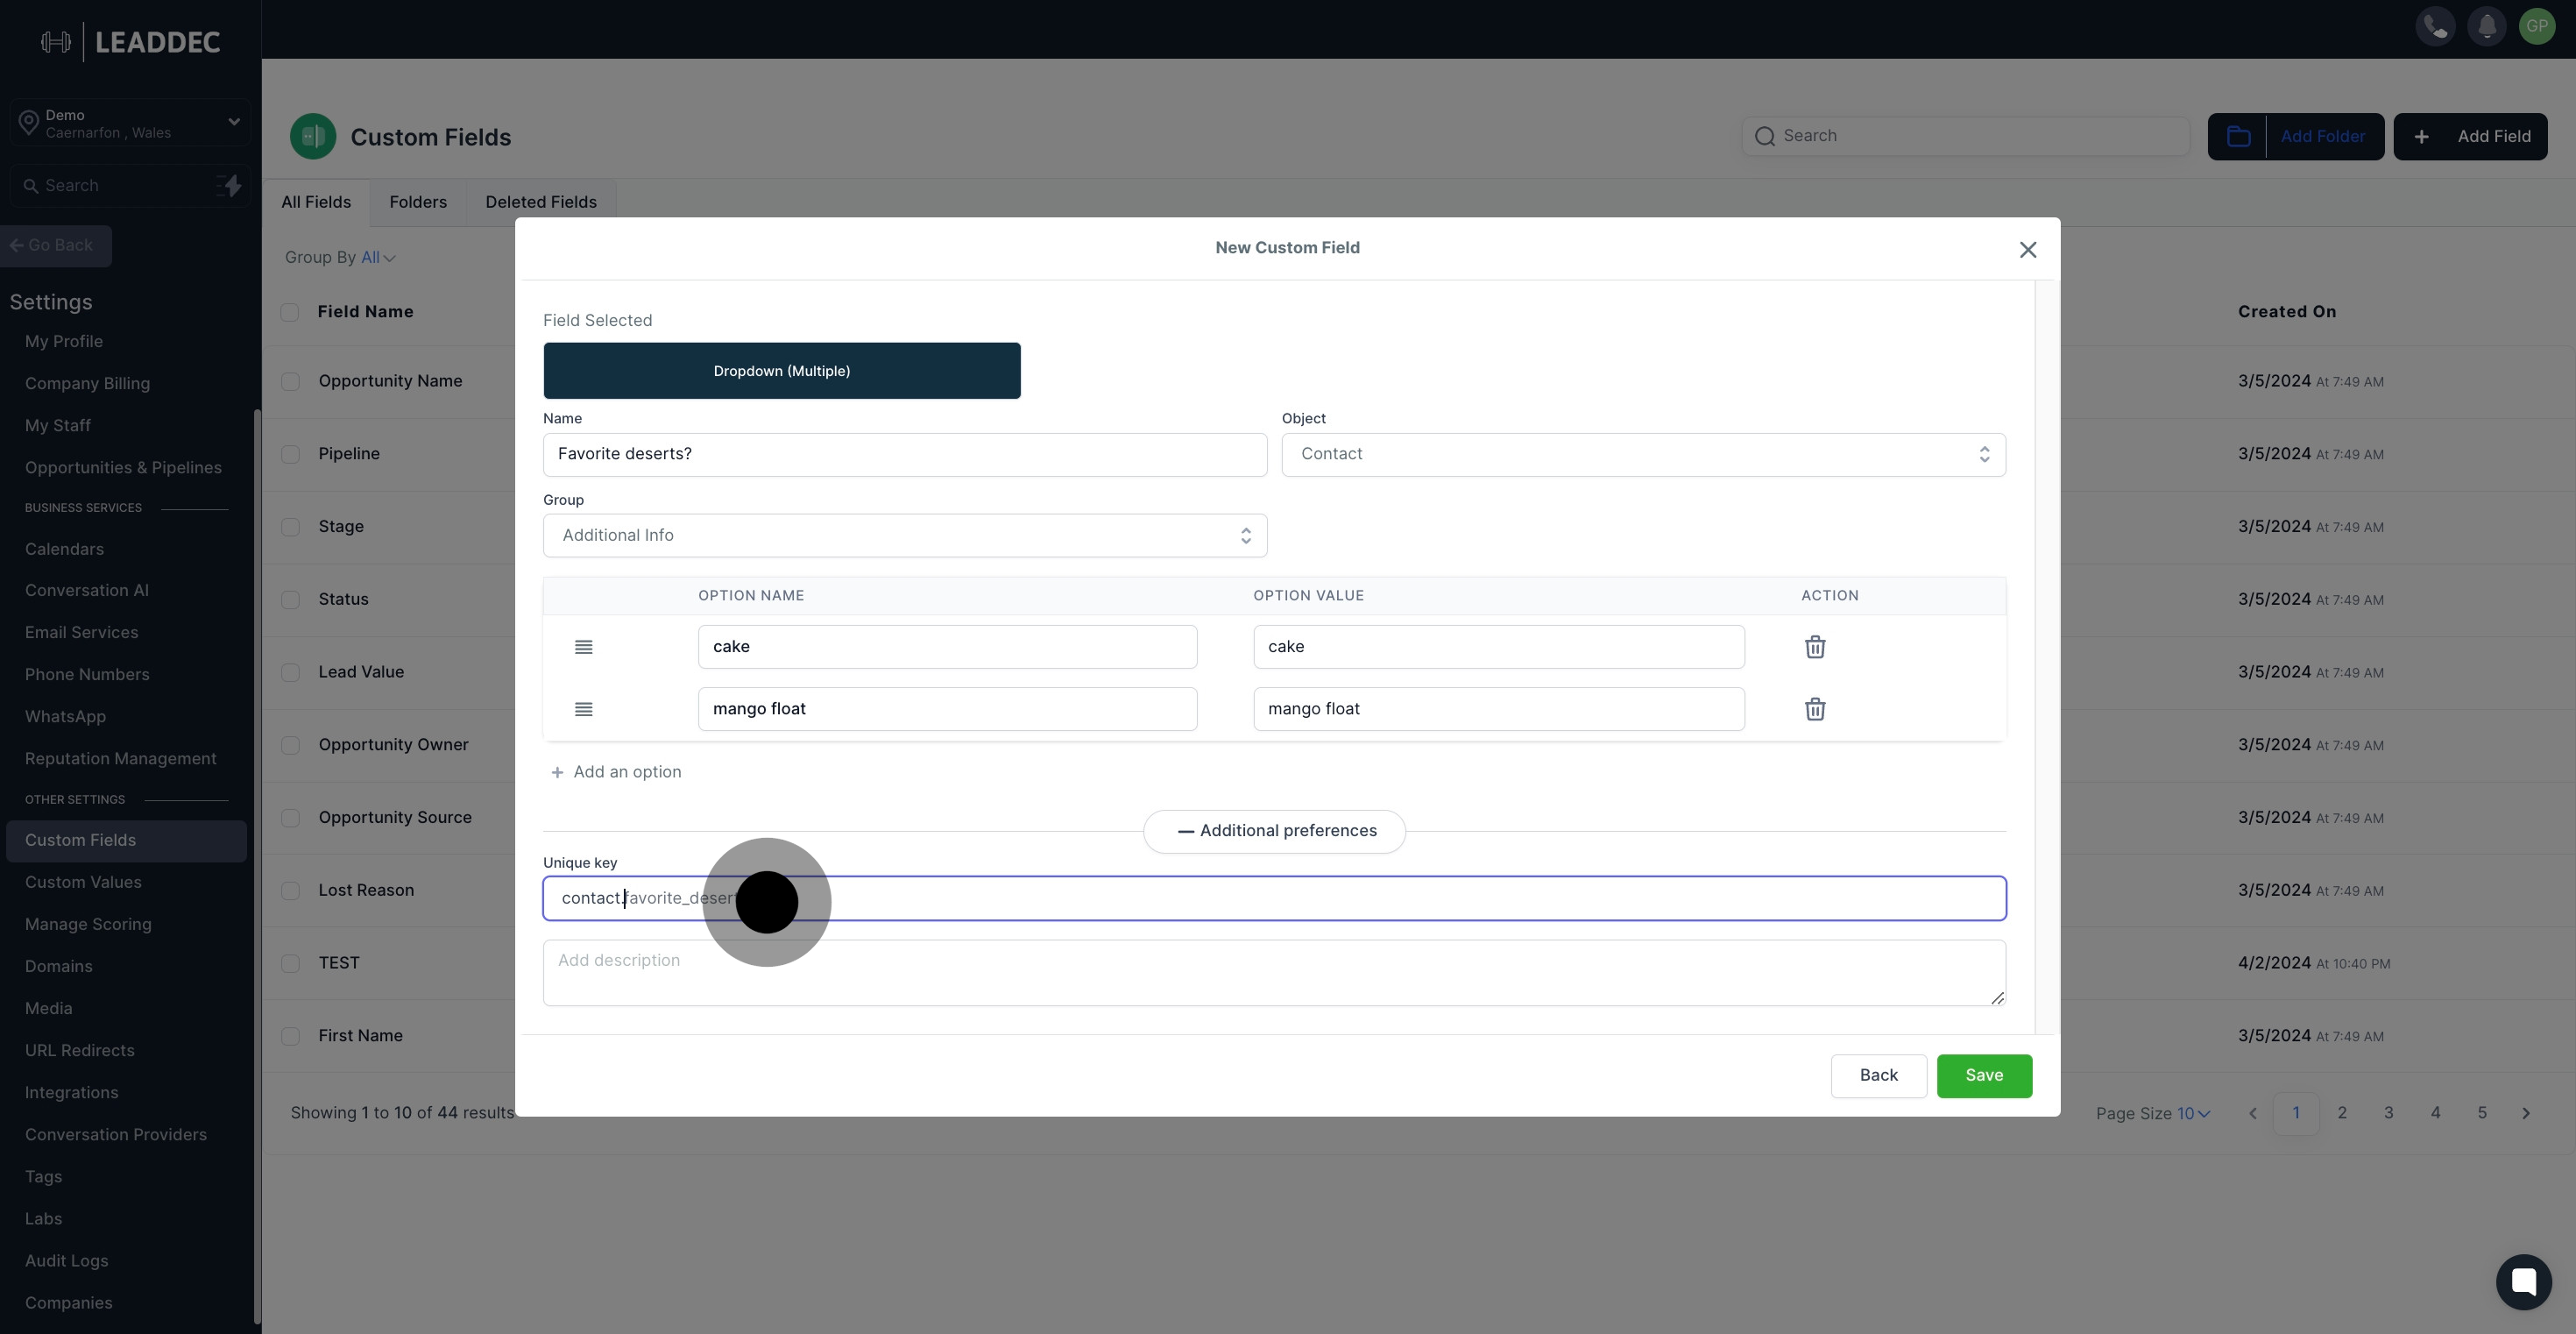
15 Once that's done, click on the element.

16. Provide a description for the field in the text area.
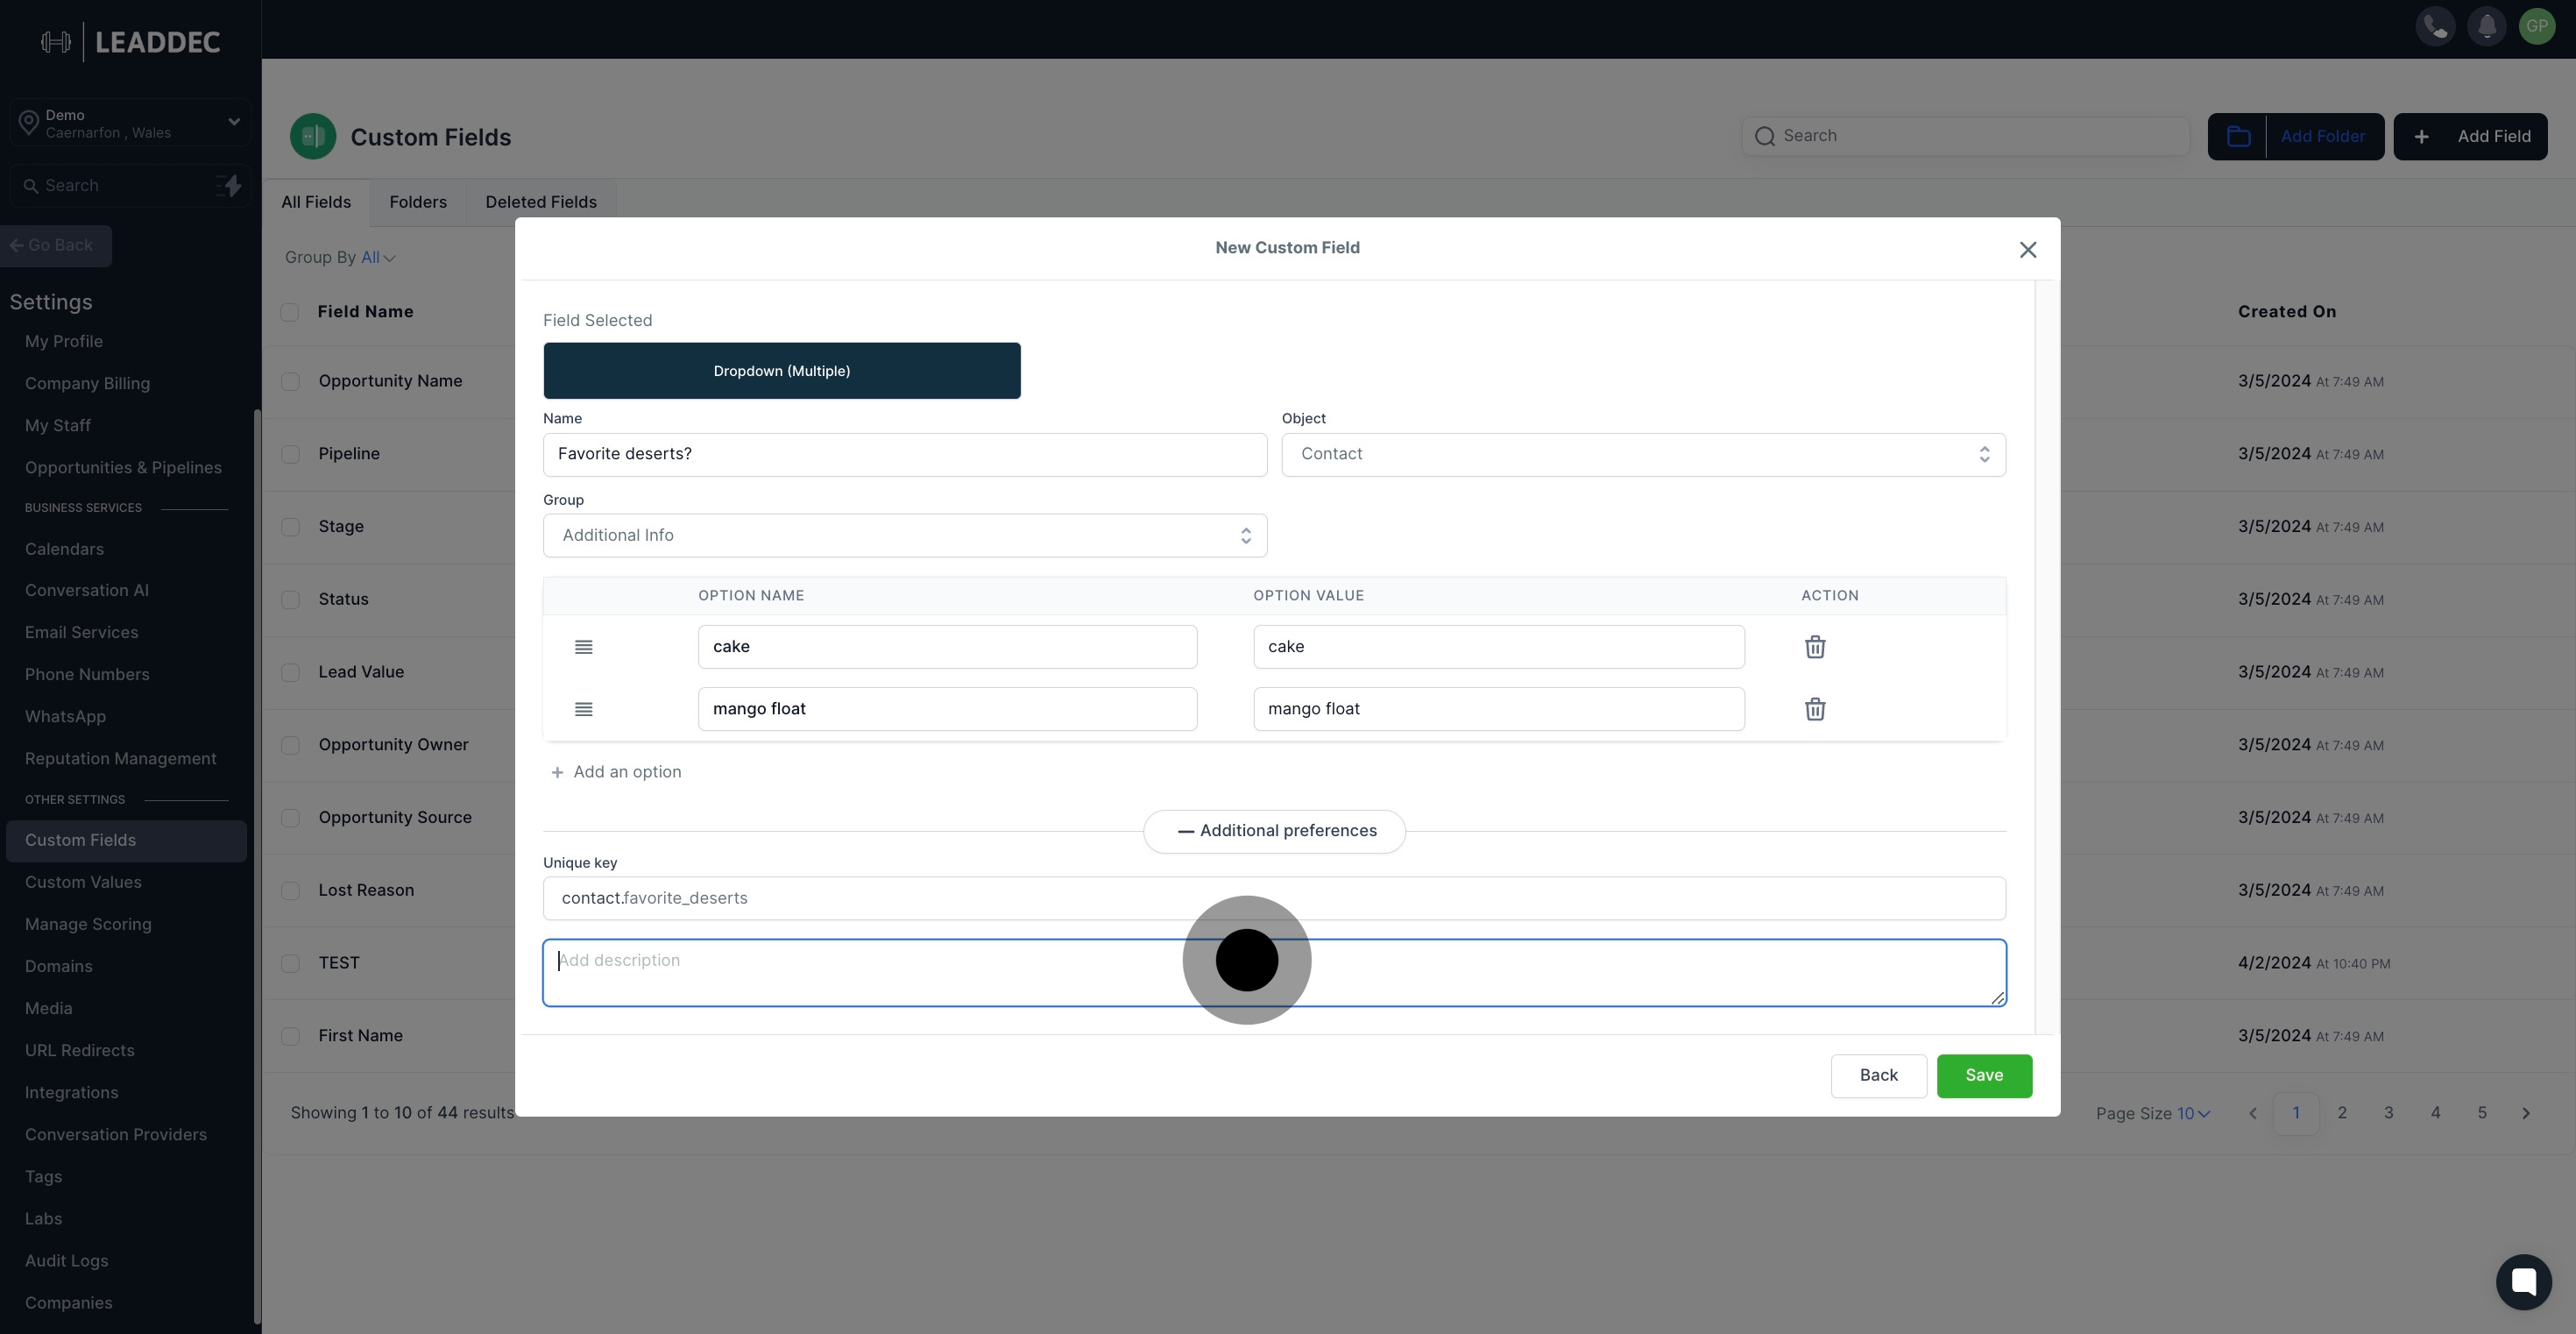
16 Click here.

17. Finally, save your custom field by clicking 'Save'.
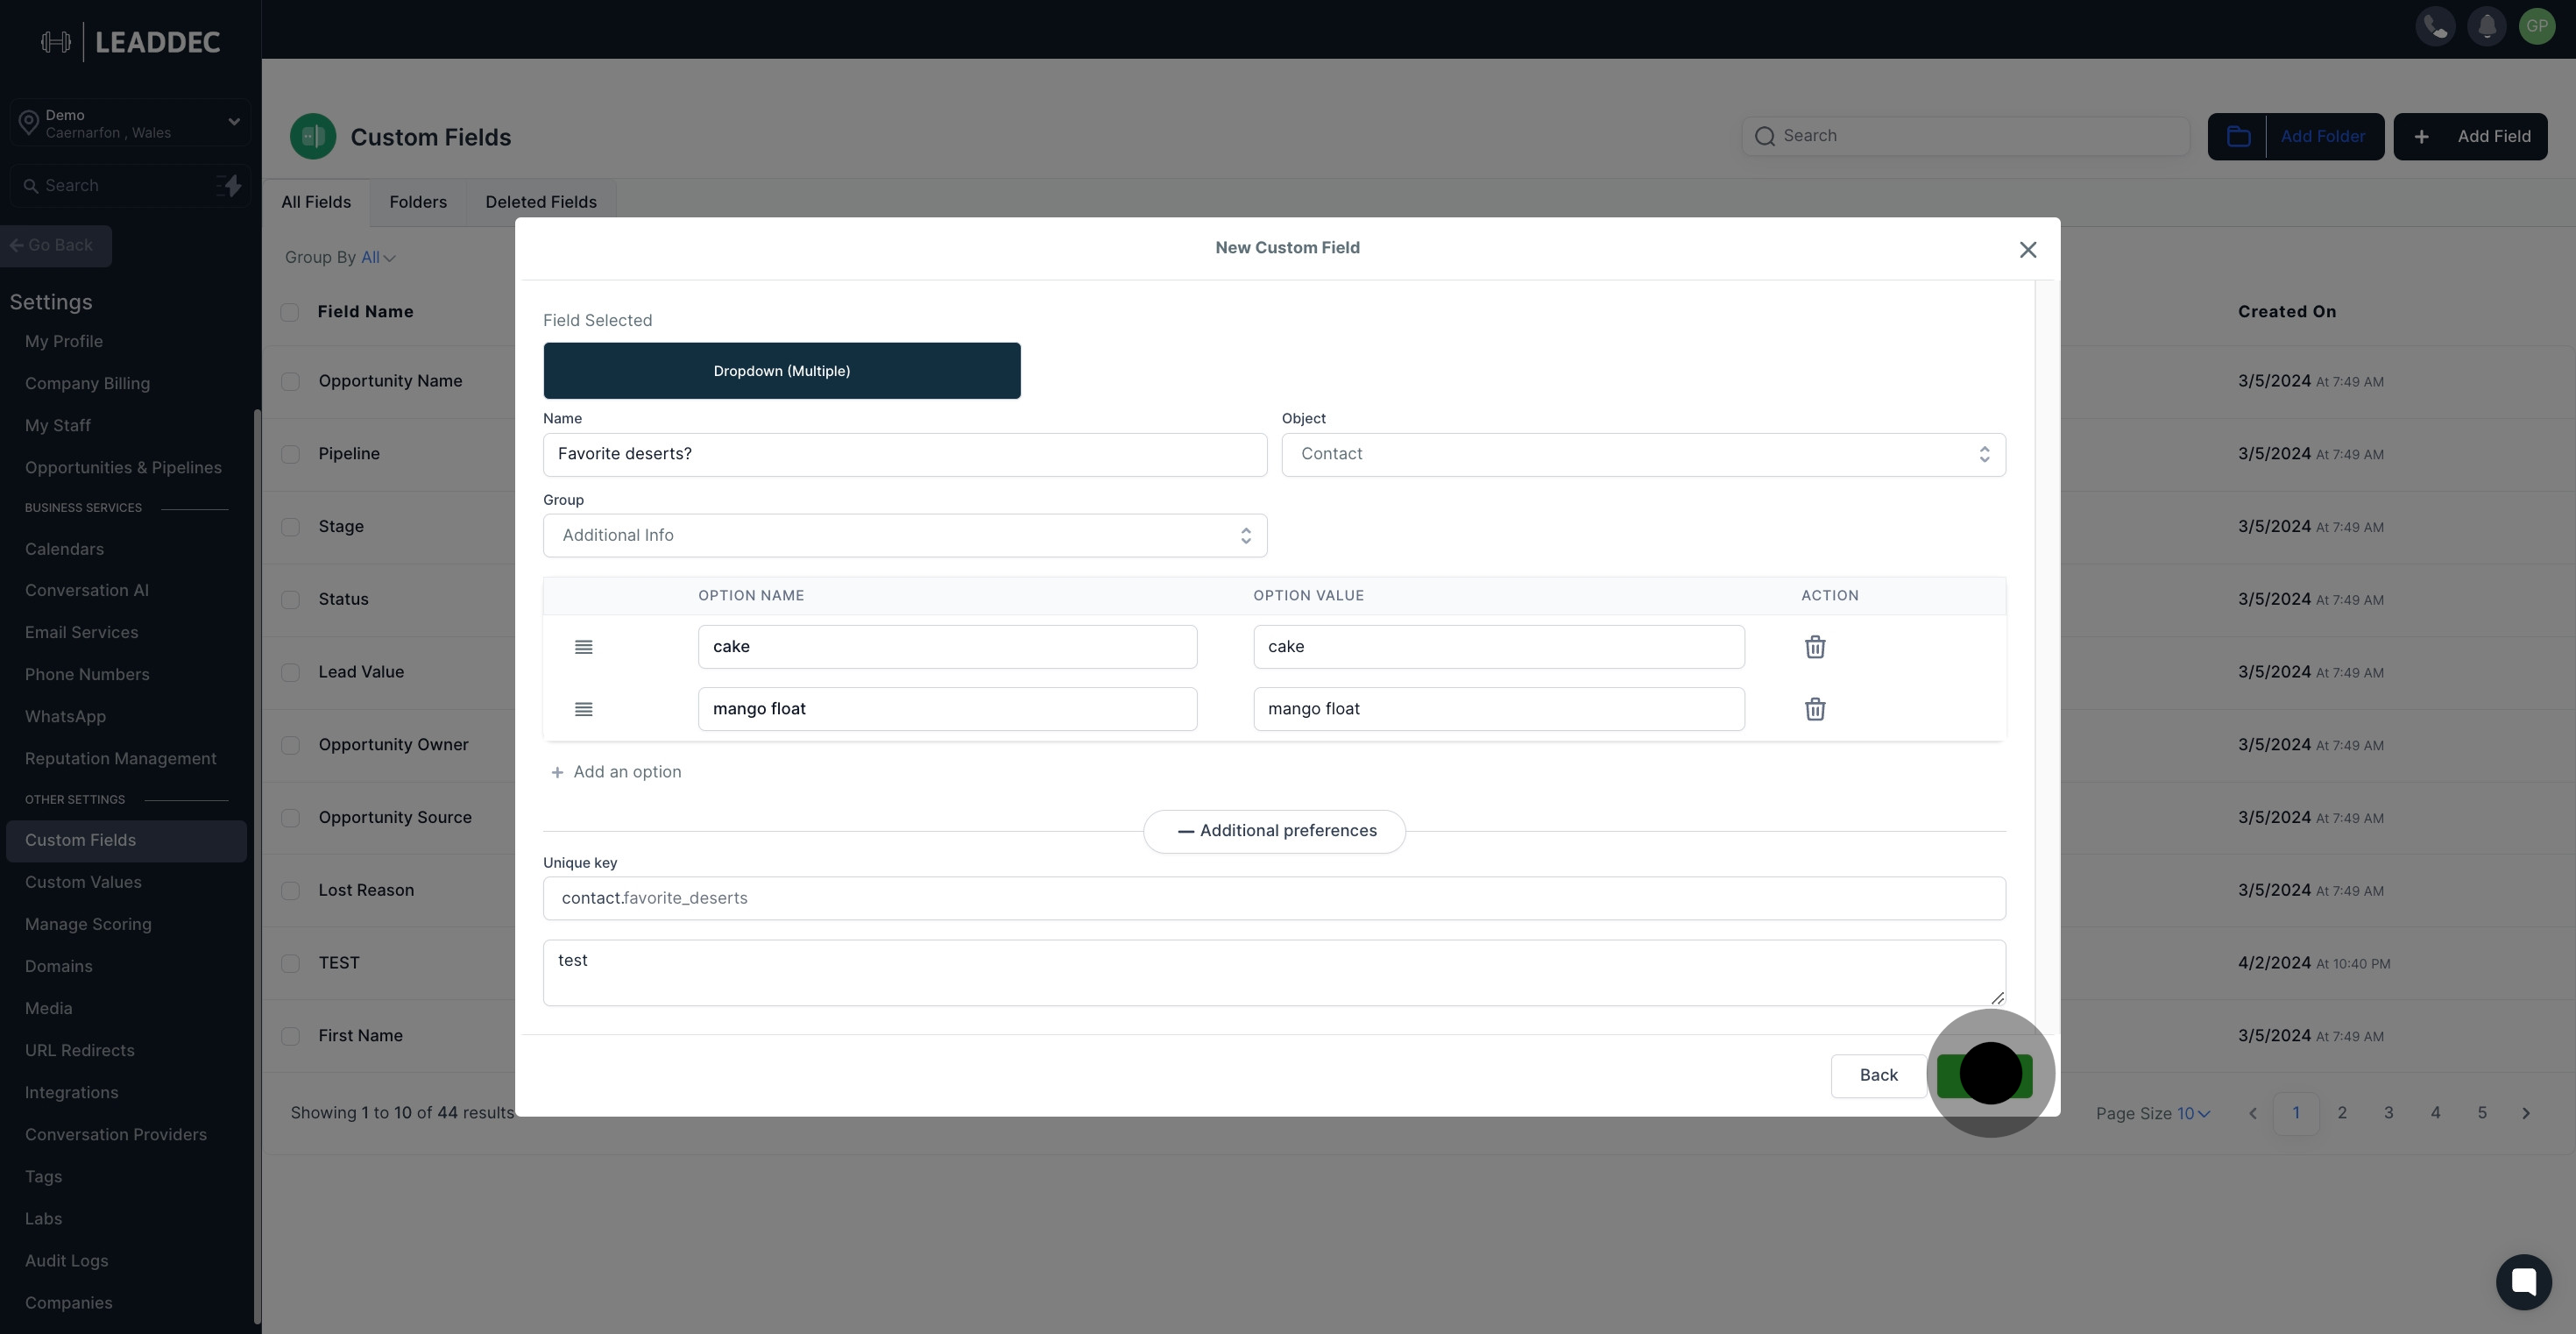
17 Next, click on "Save".

Did this answer your question?
😞
😐
😁