Creating a File Upload Custom Field in LeadDec

Facilitate an efficient way for users to submit documents and images through your LeadDec forms by setting up a file upload custom field. This guide will walk you through the process of adding a file upload option, allowing for easy collection of various file types directly from your forms. Ideal for applications, registrations, or any scenario requiring document submission, discover how to enhance your forms' functionality and user experience with this versatile feature.


1. First, visit the settings page.

1 Click here.

2. Next, navigate to the 'Custom Fields' section.
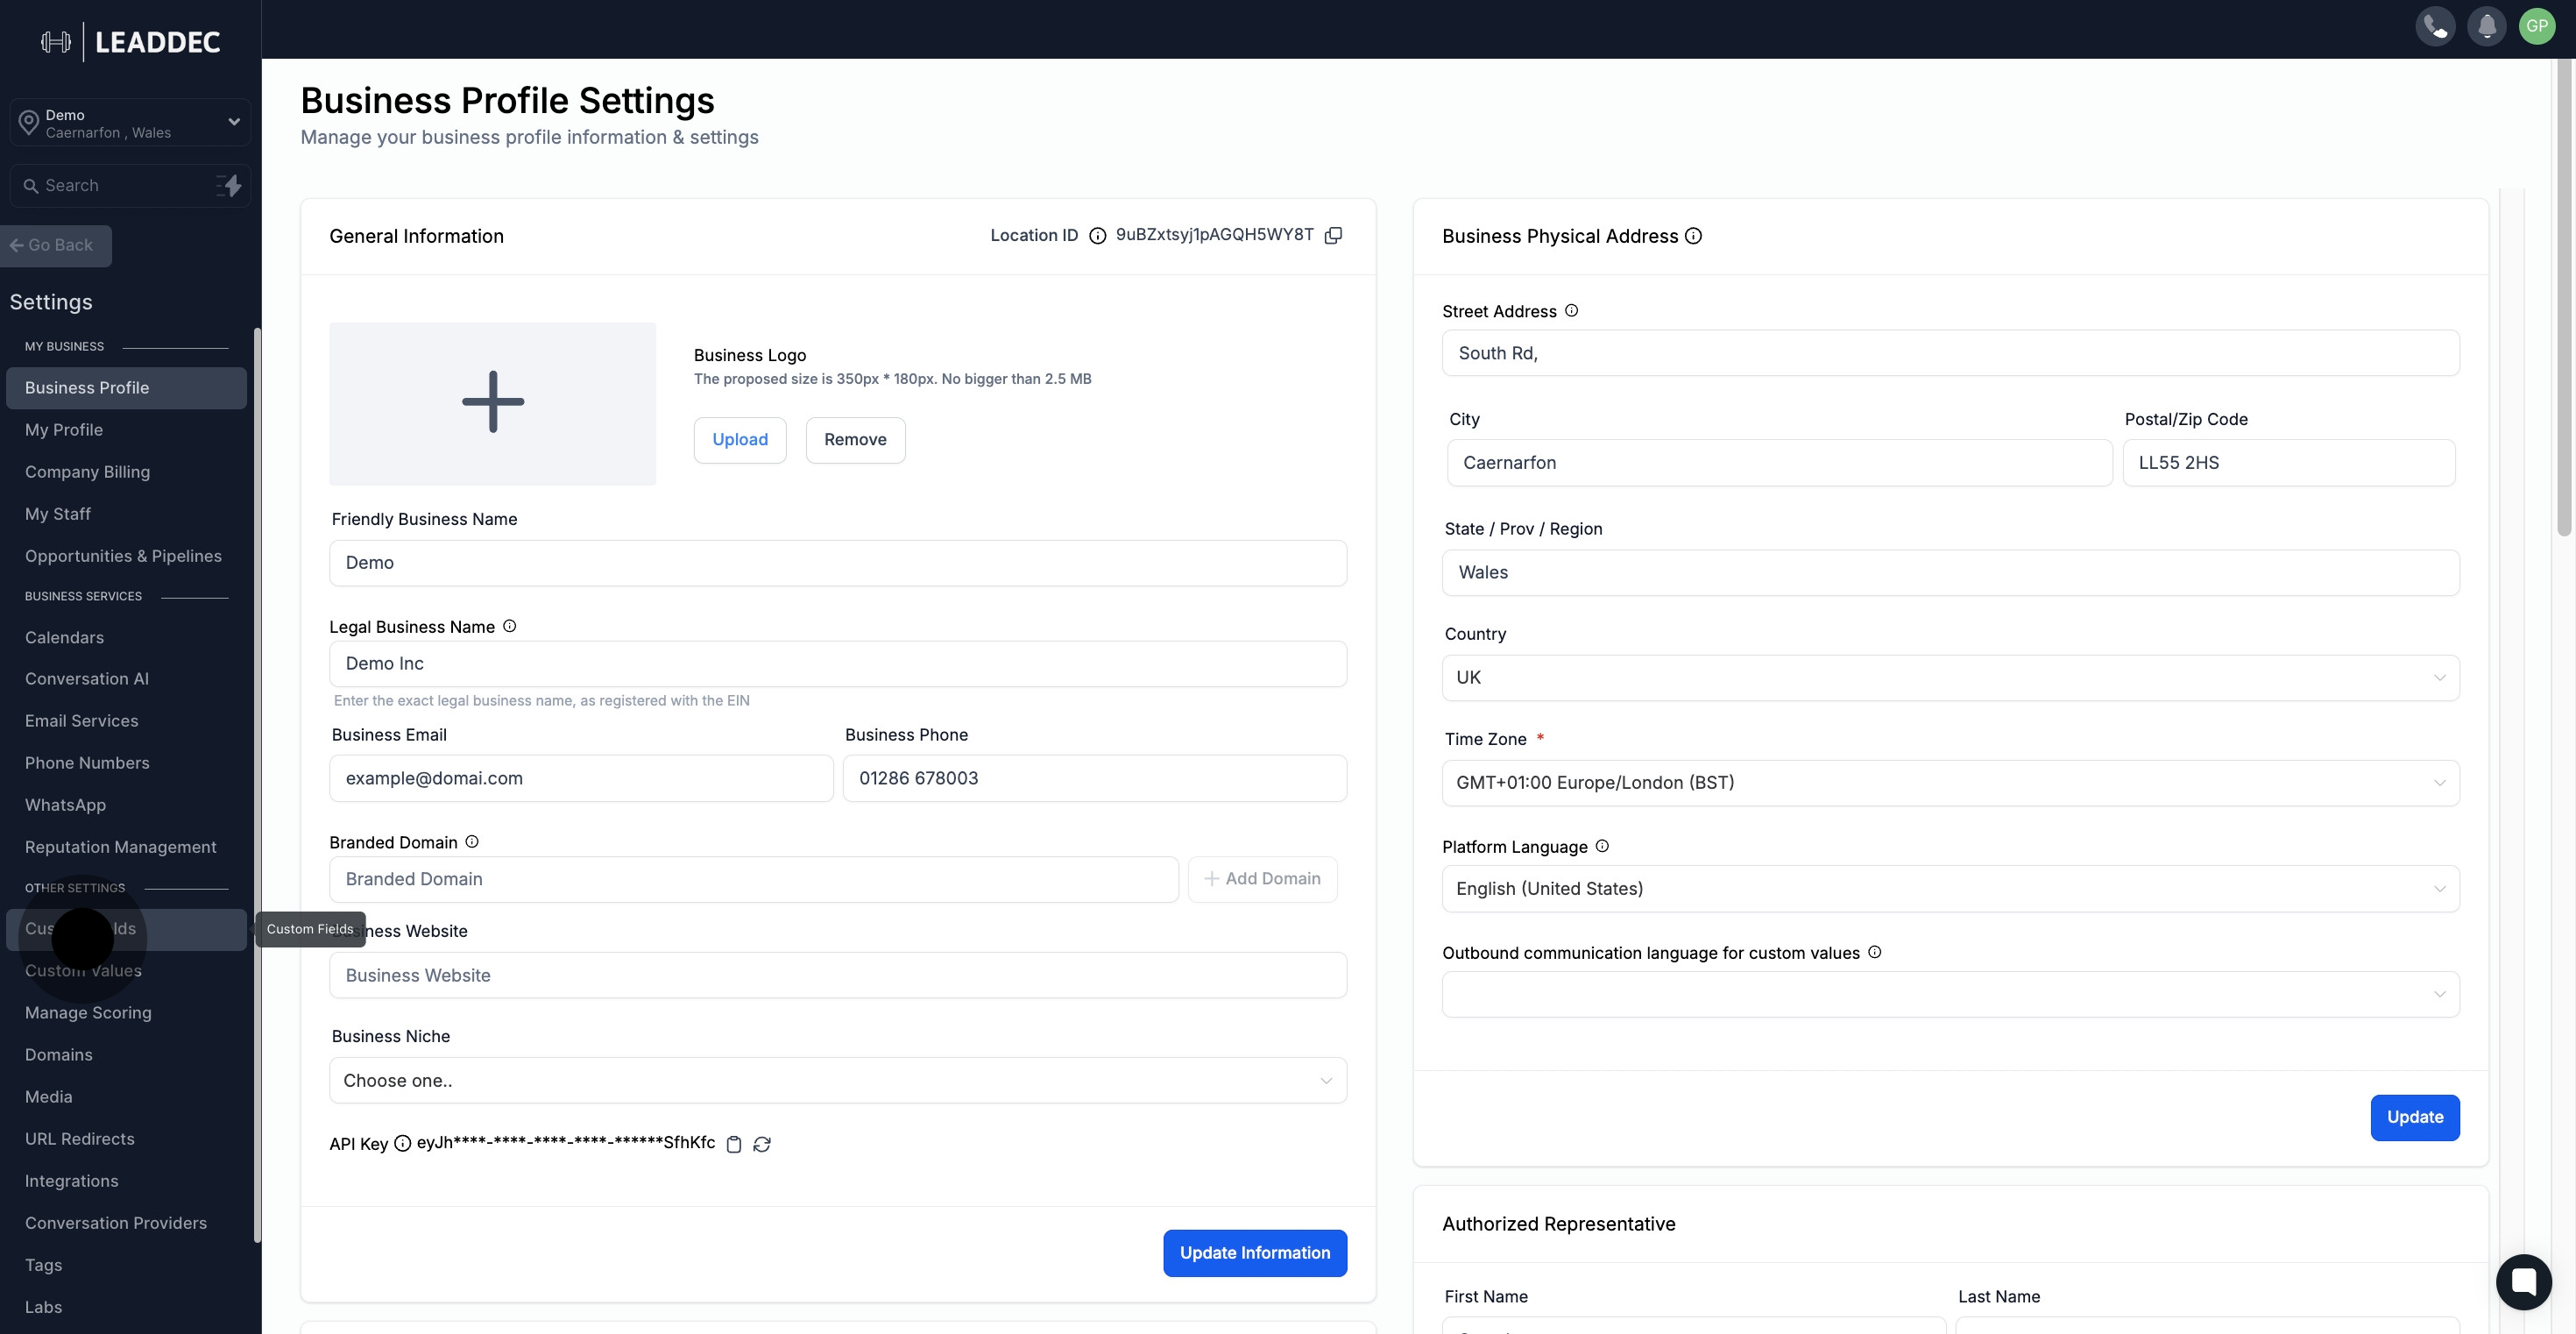
2 Click on "Custom Fields".

3. Now, select 'Add Field' to start creating a new field.
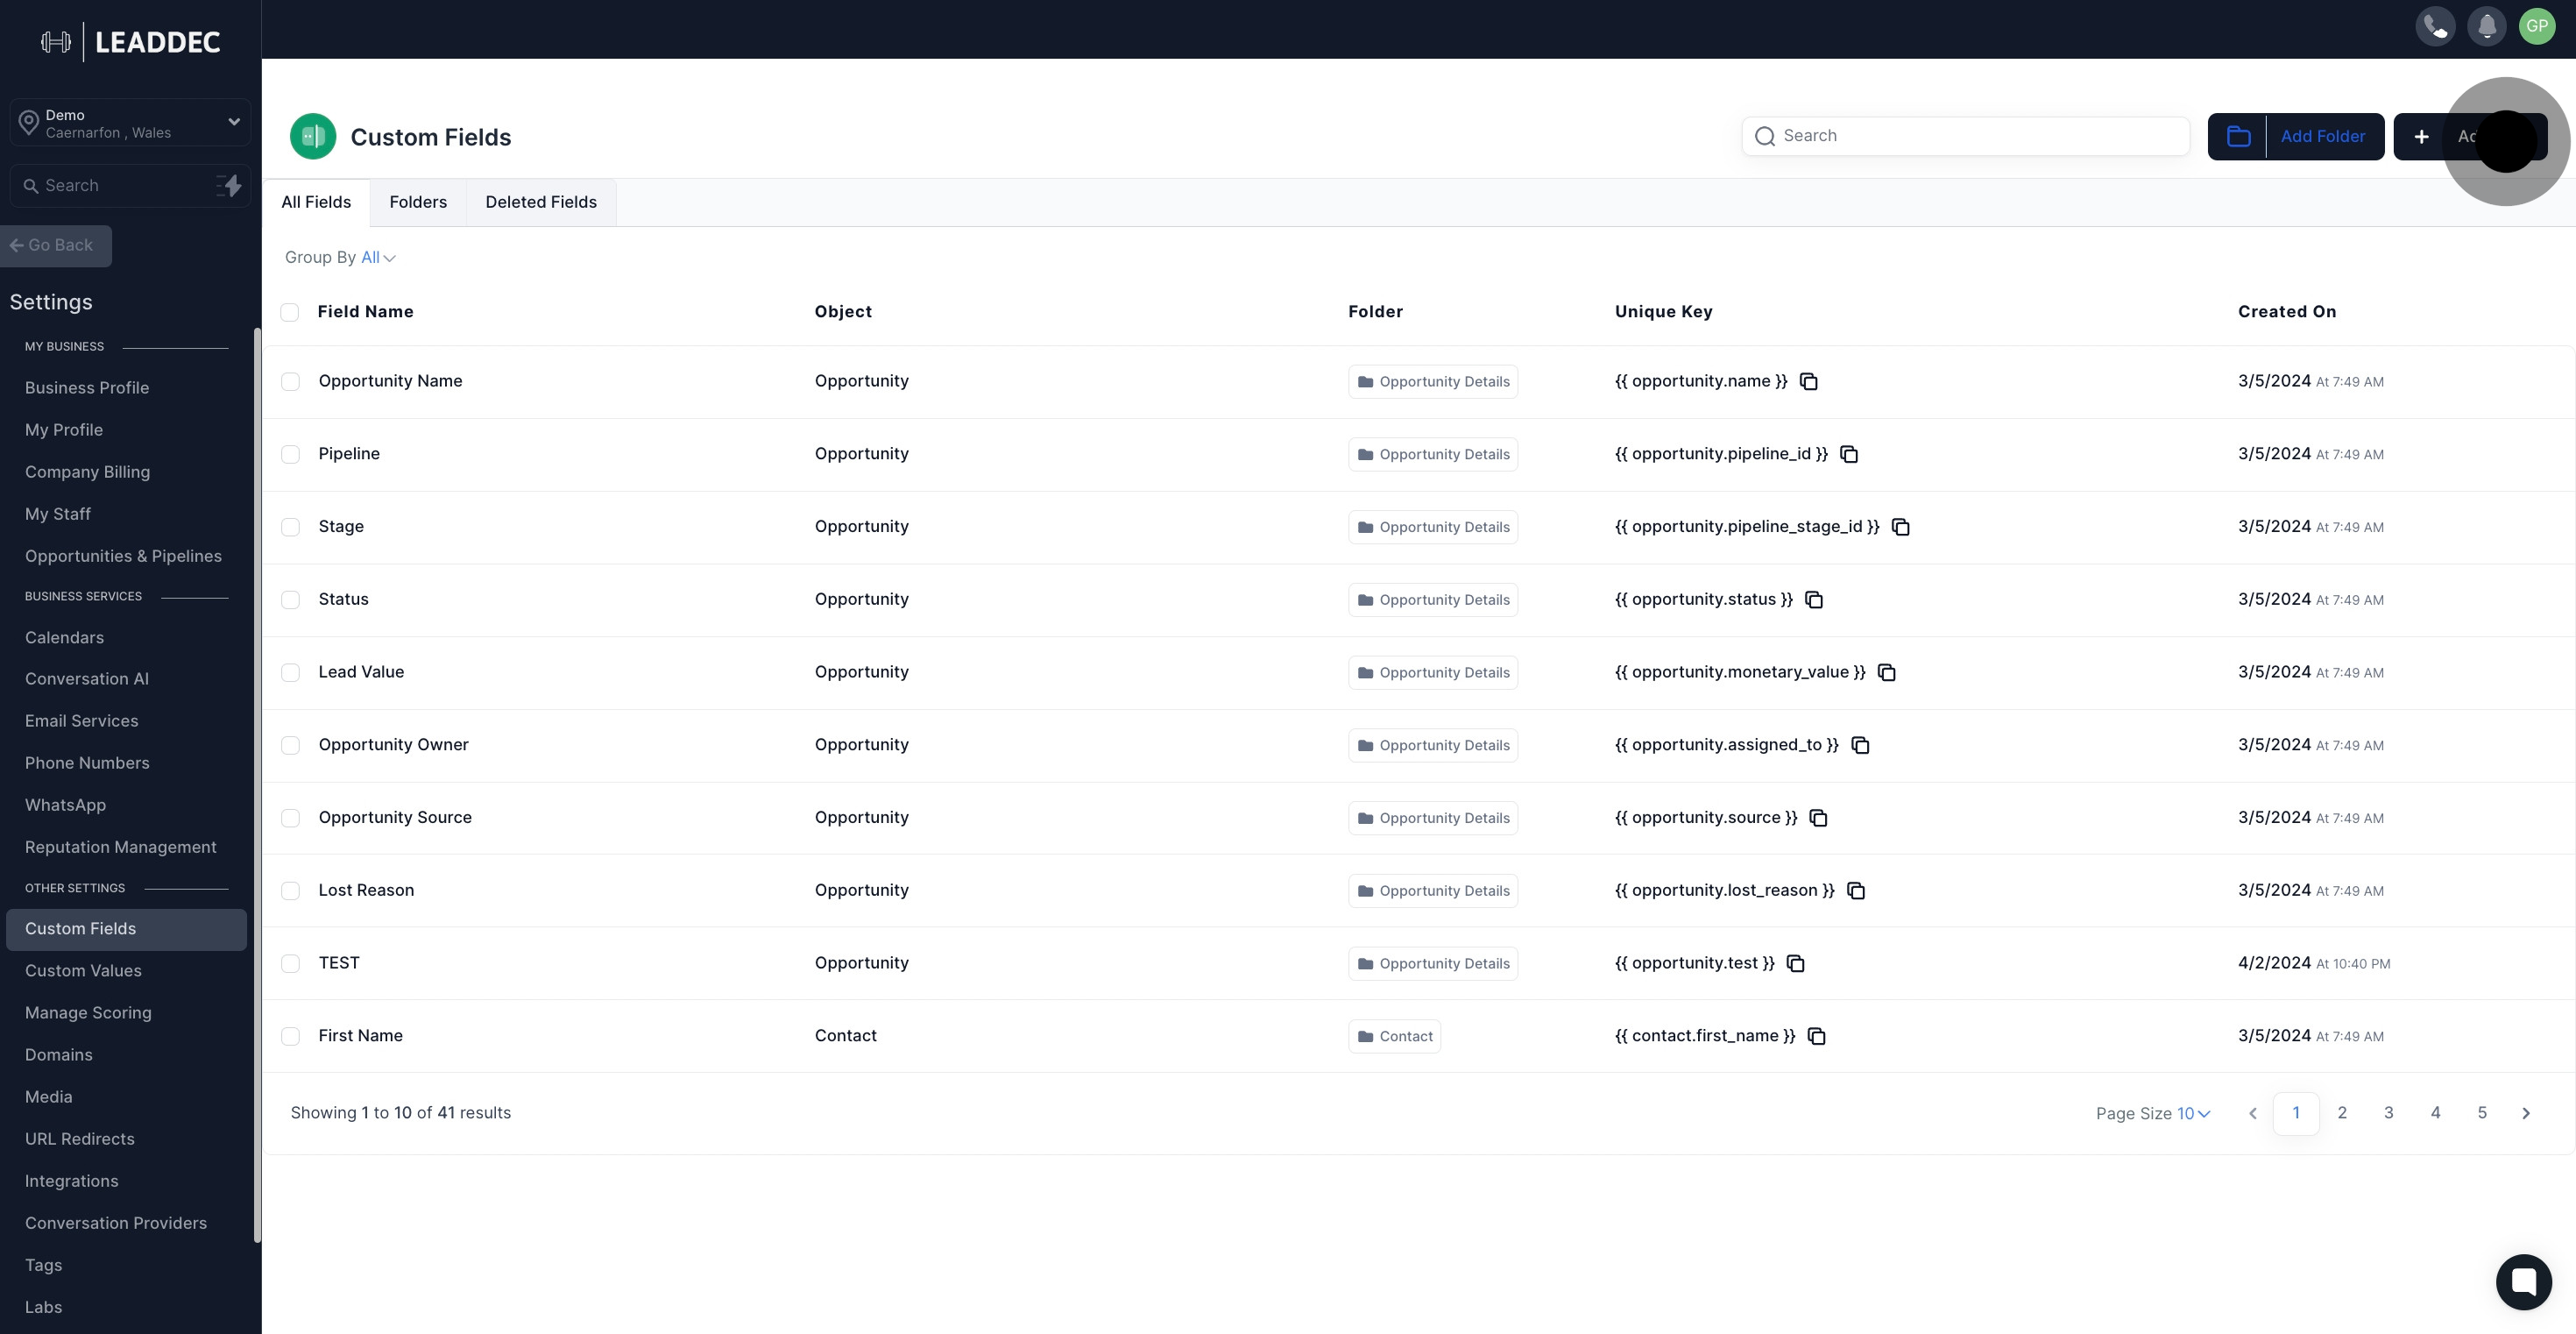
3 Next up, click on "Add Field".

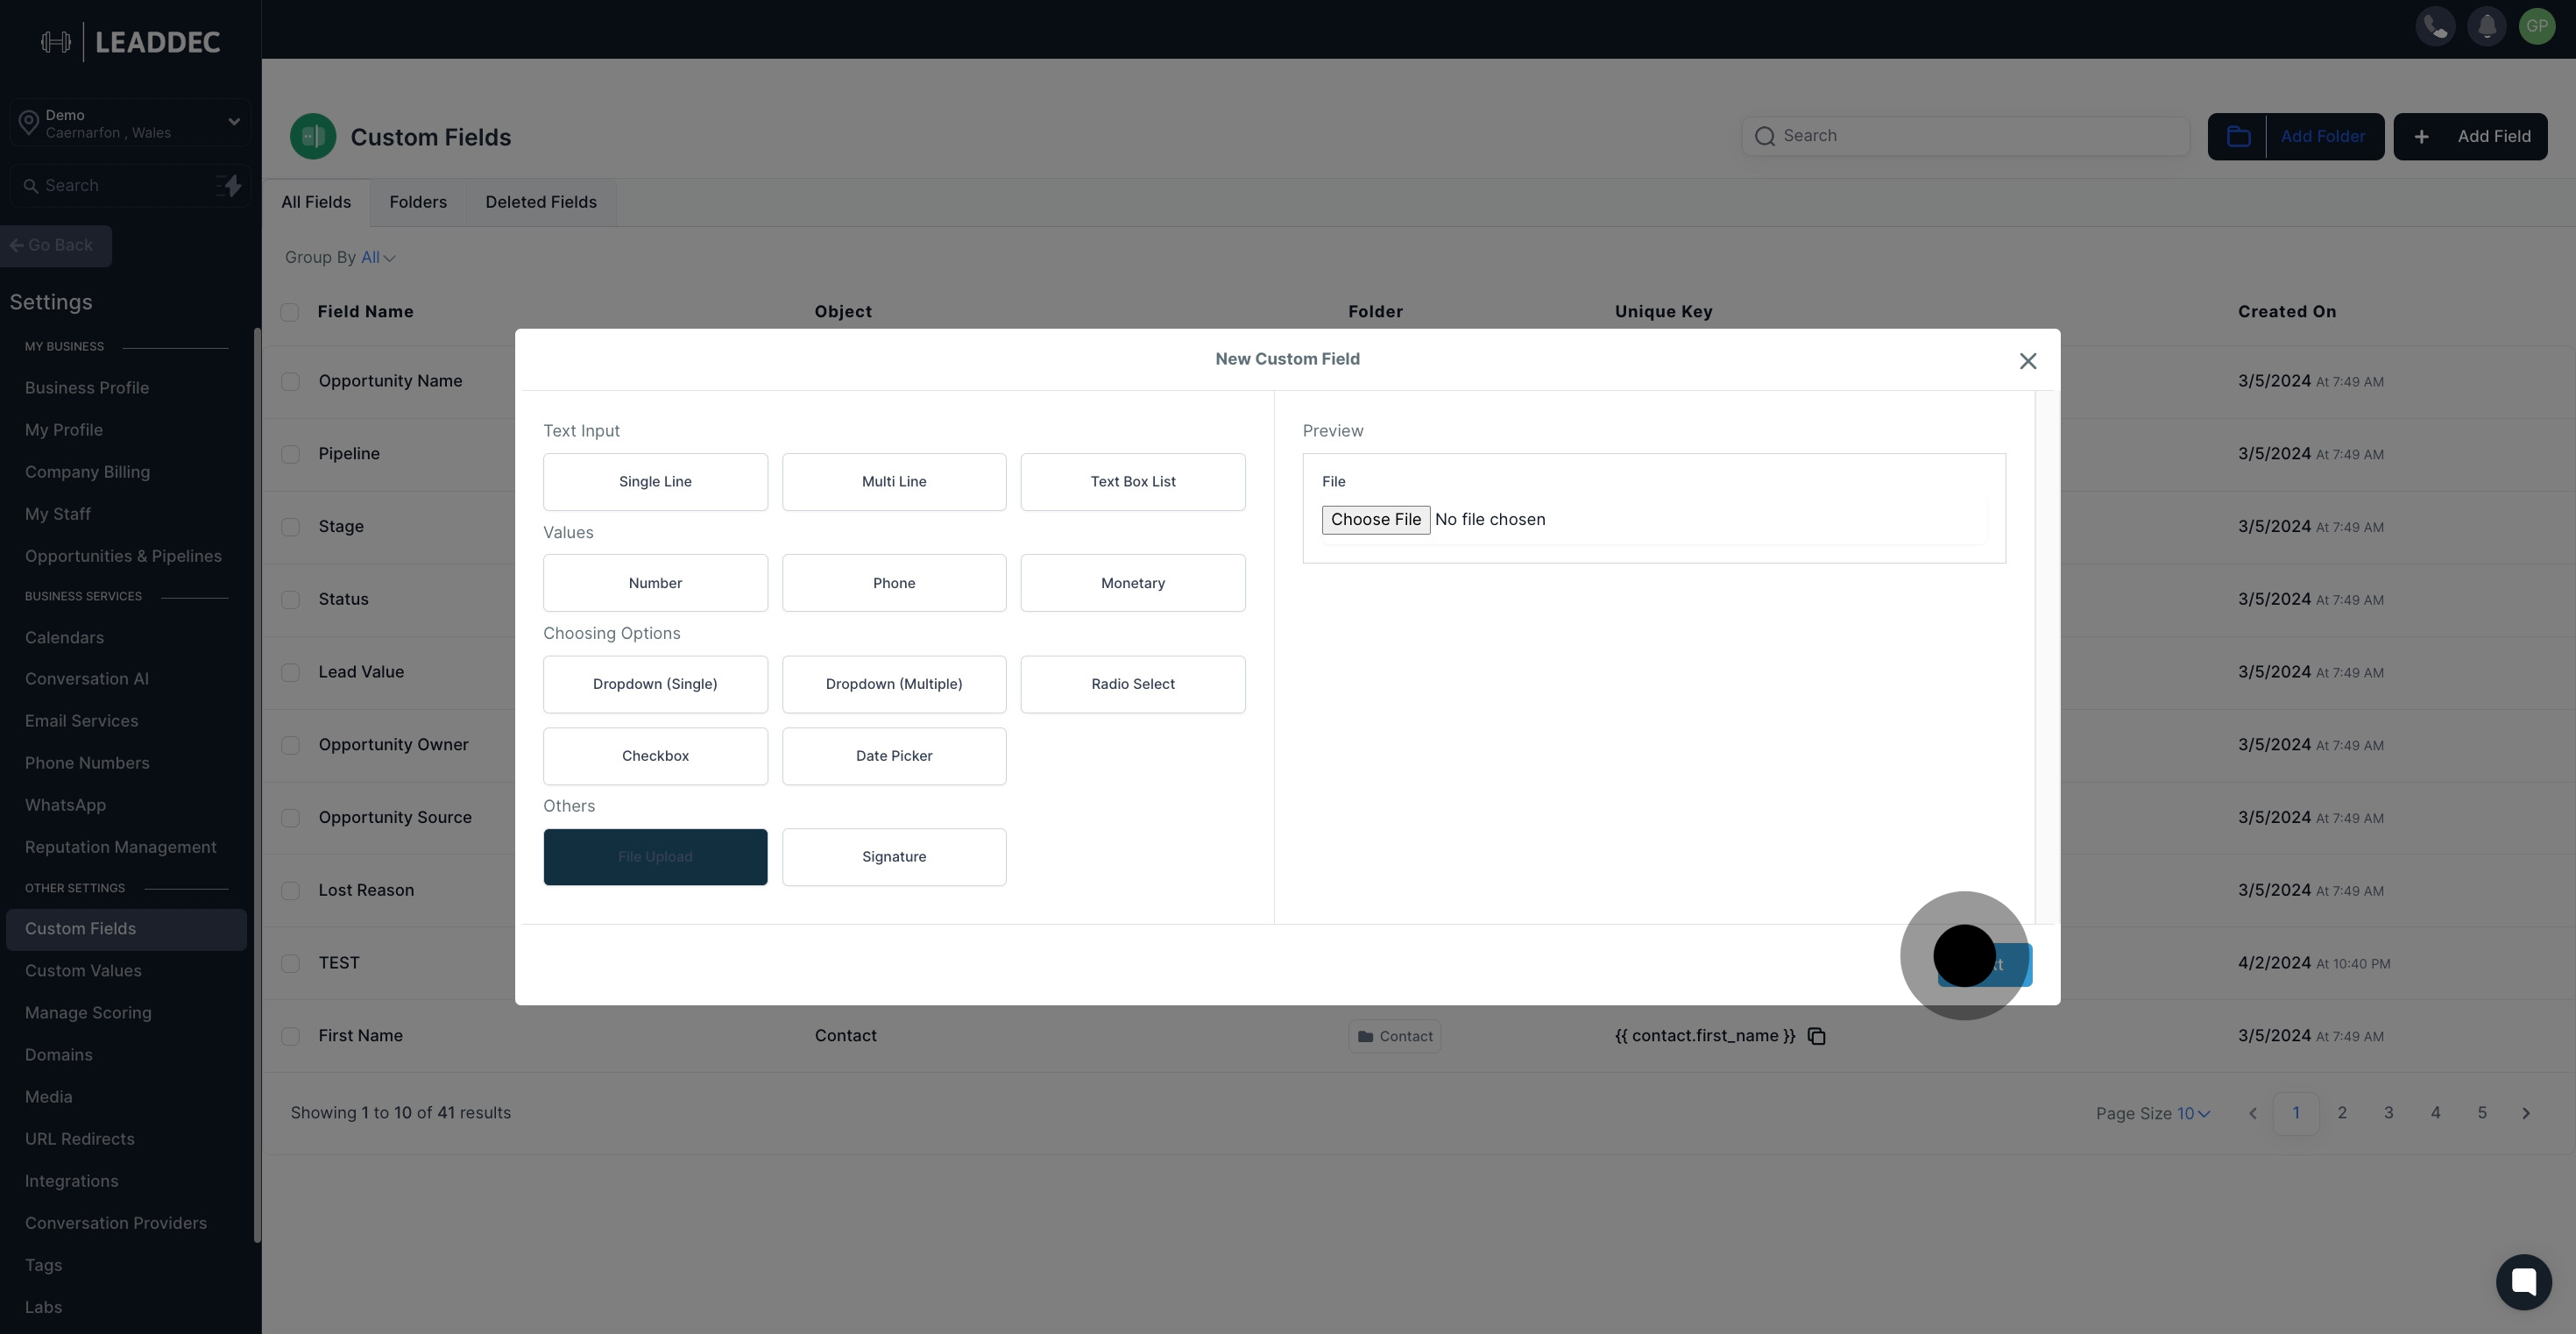
4. Choose 'File Upload' as the type of your new field.
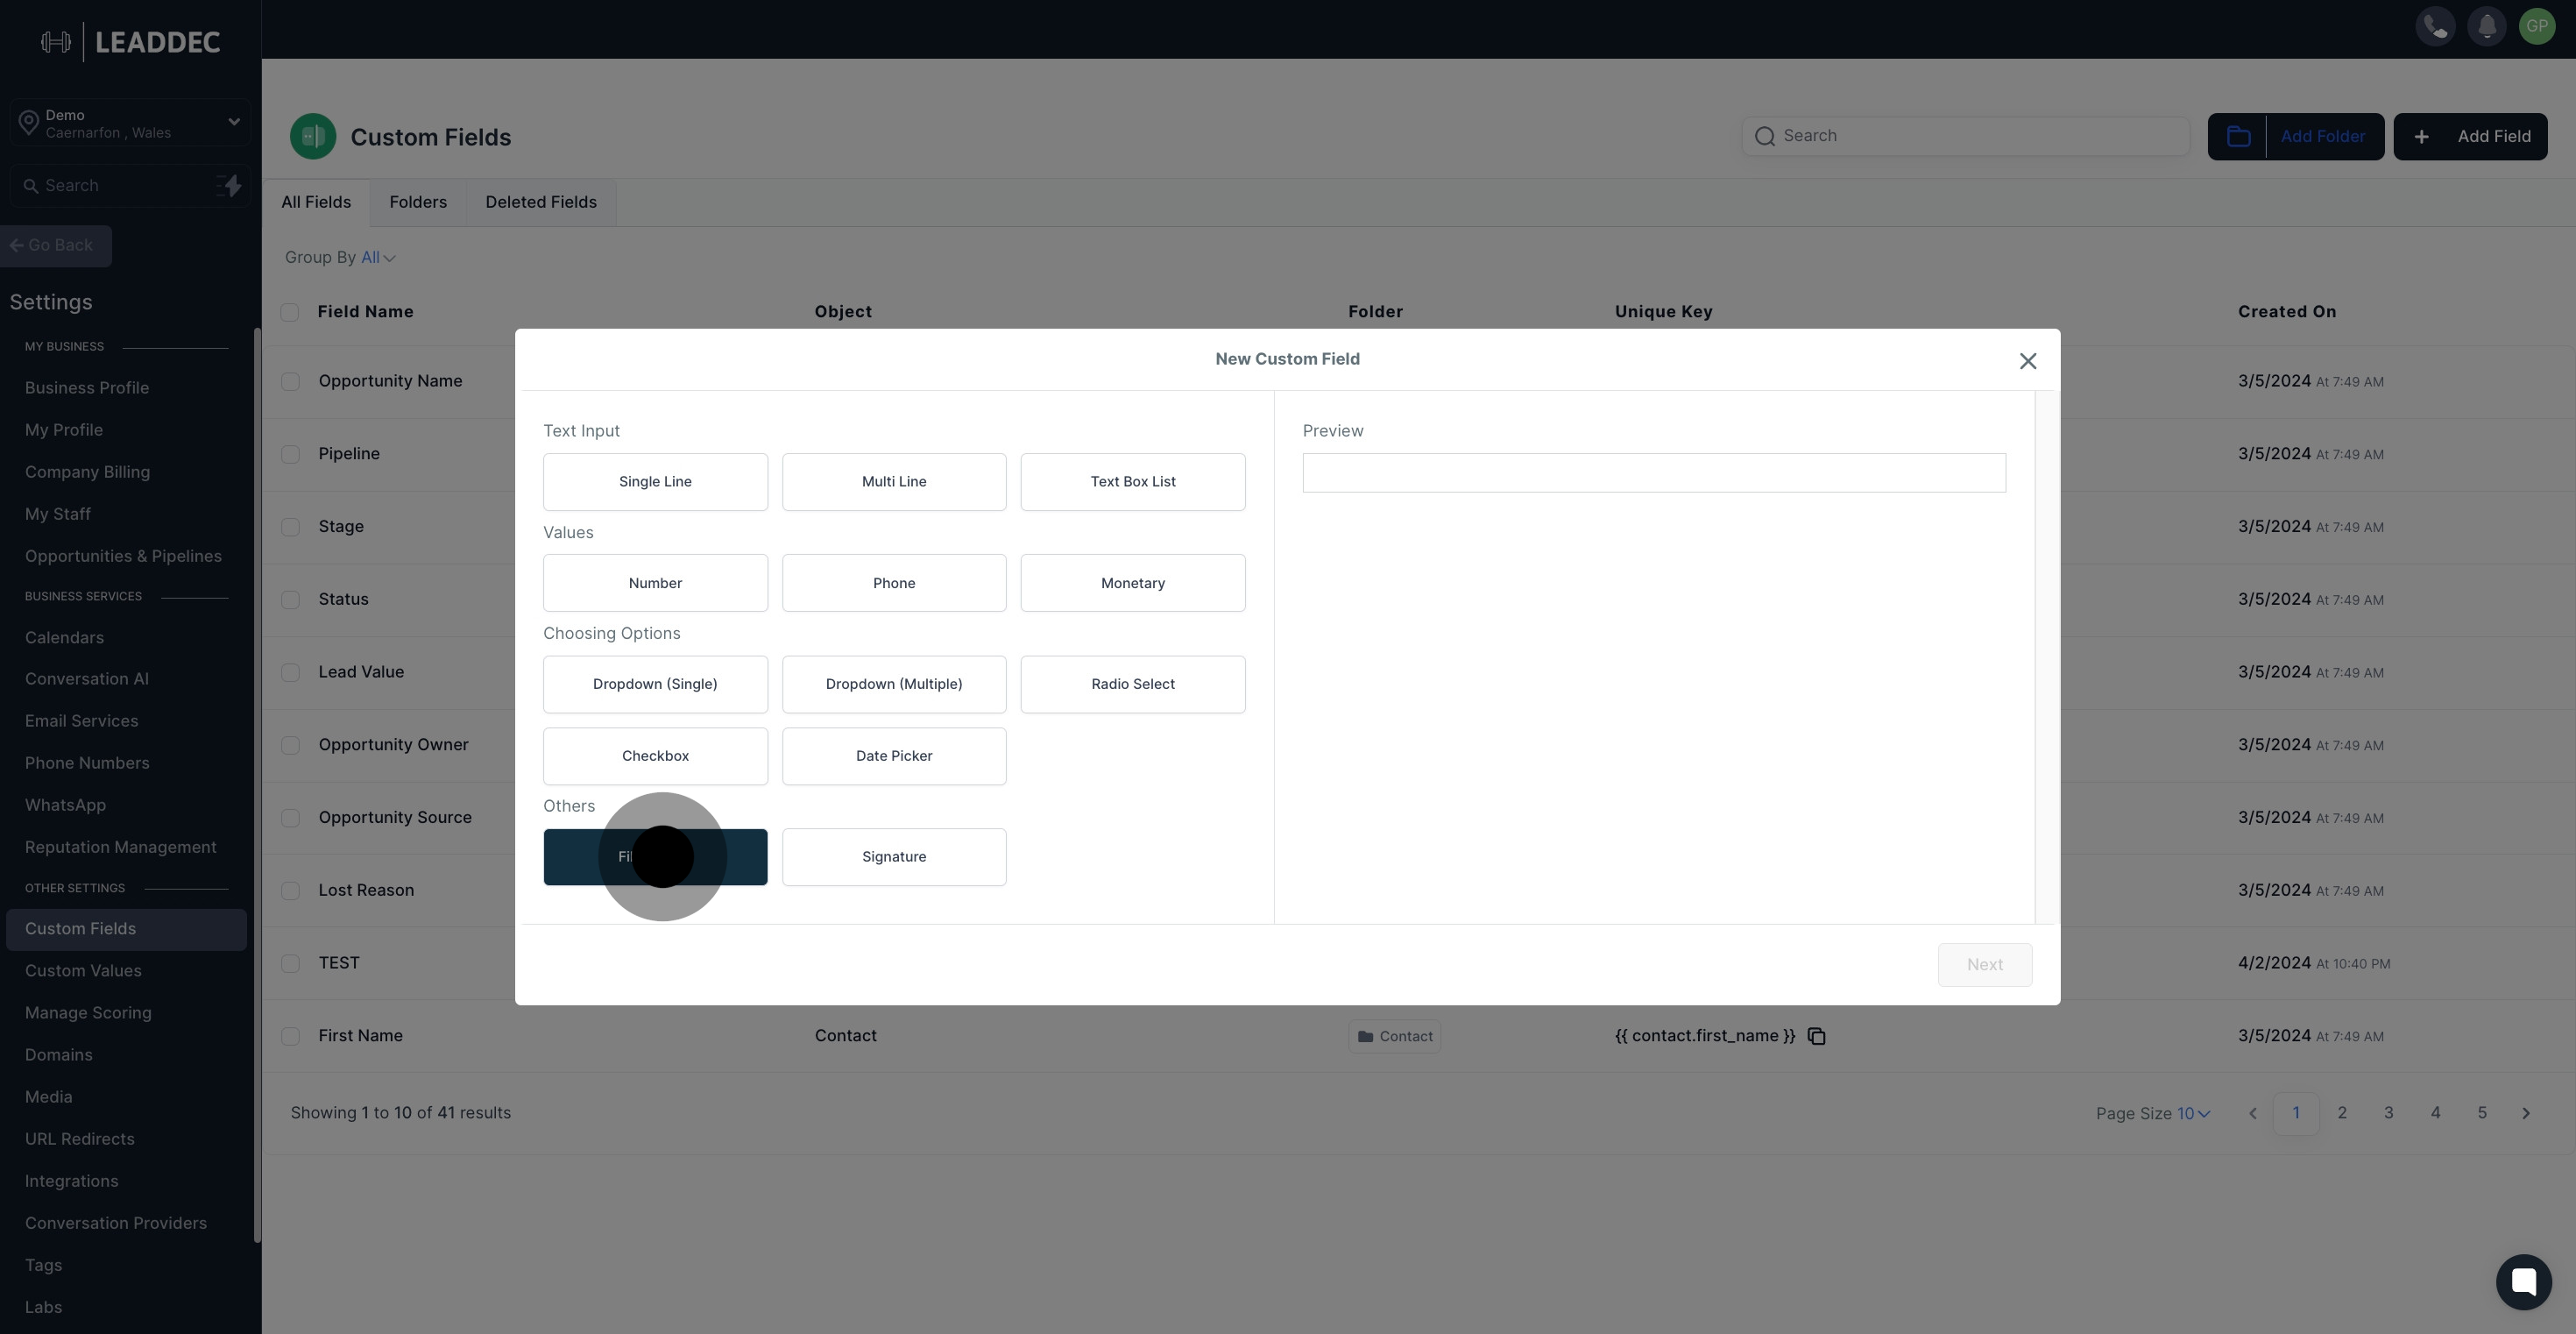
4 After, click on "File Upload".

5. View the preview of the selected custom field.
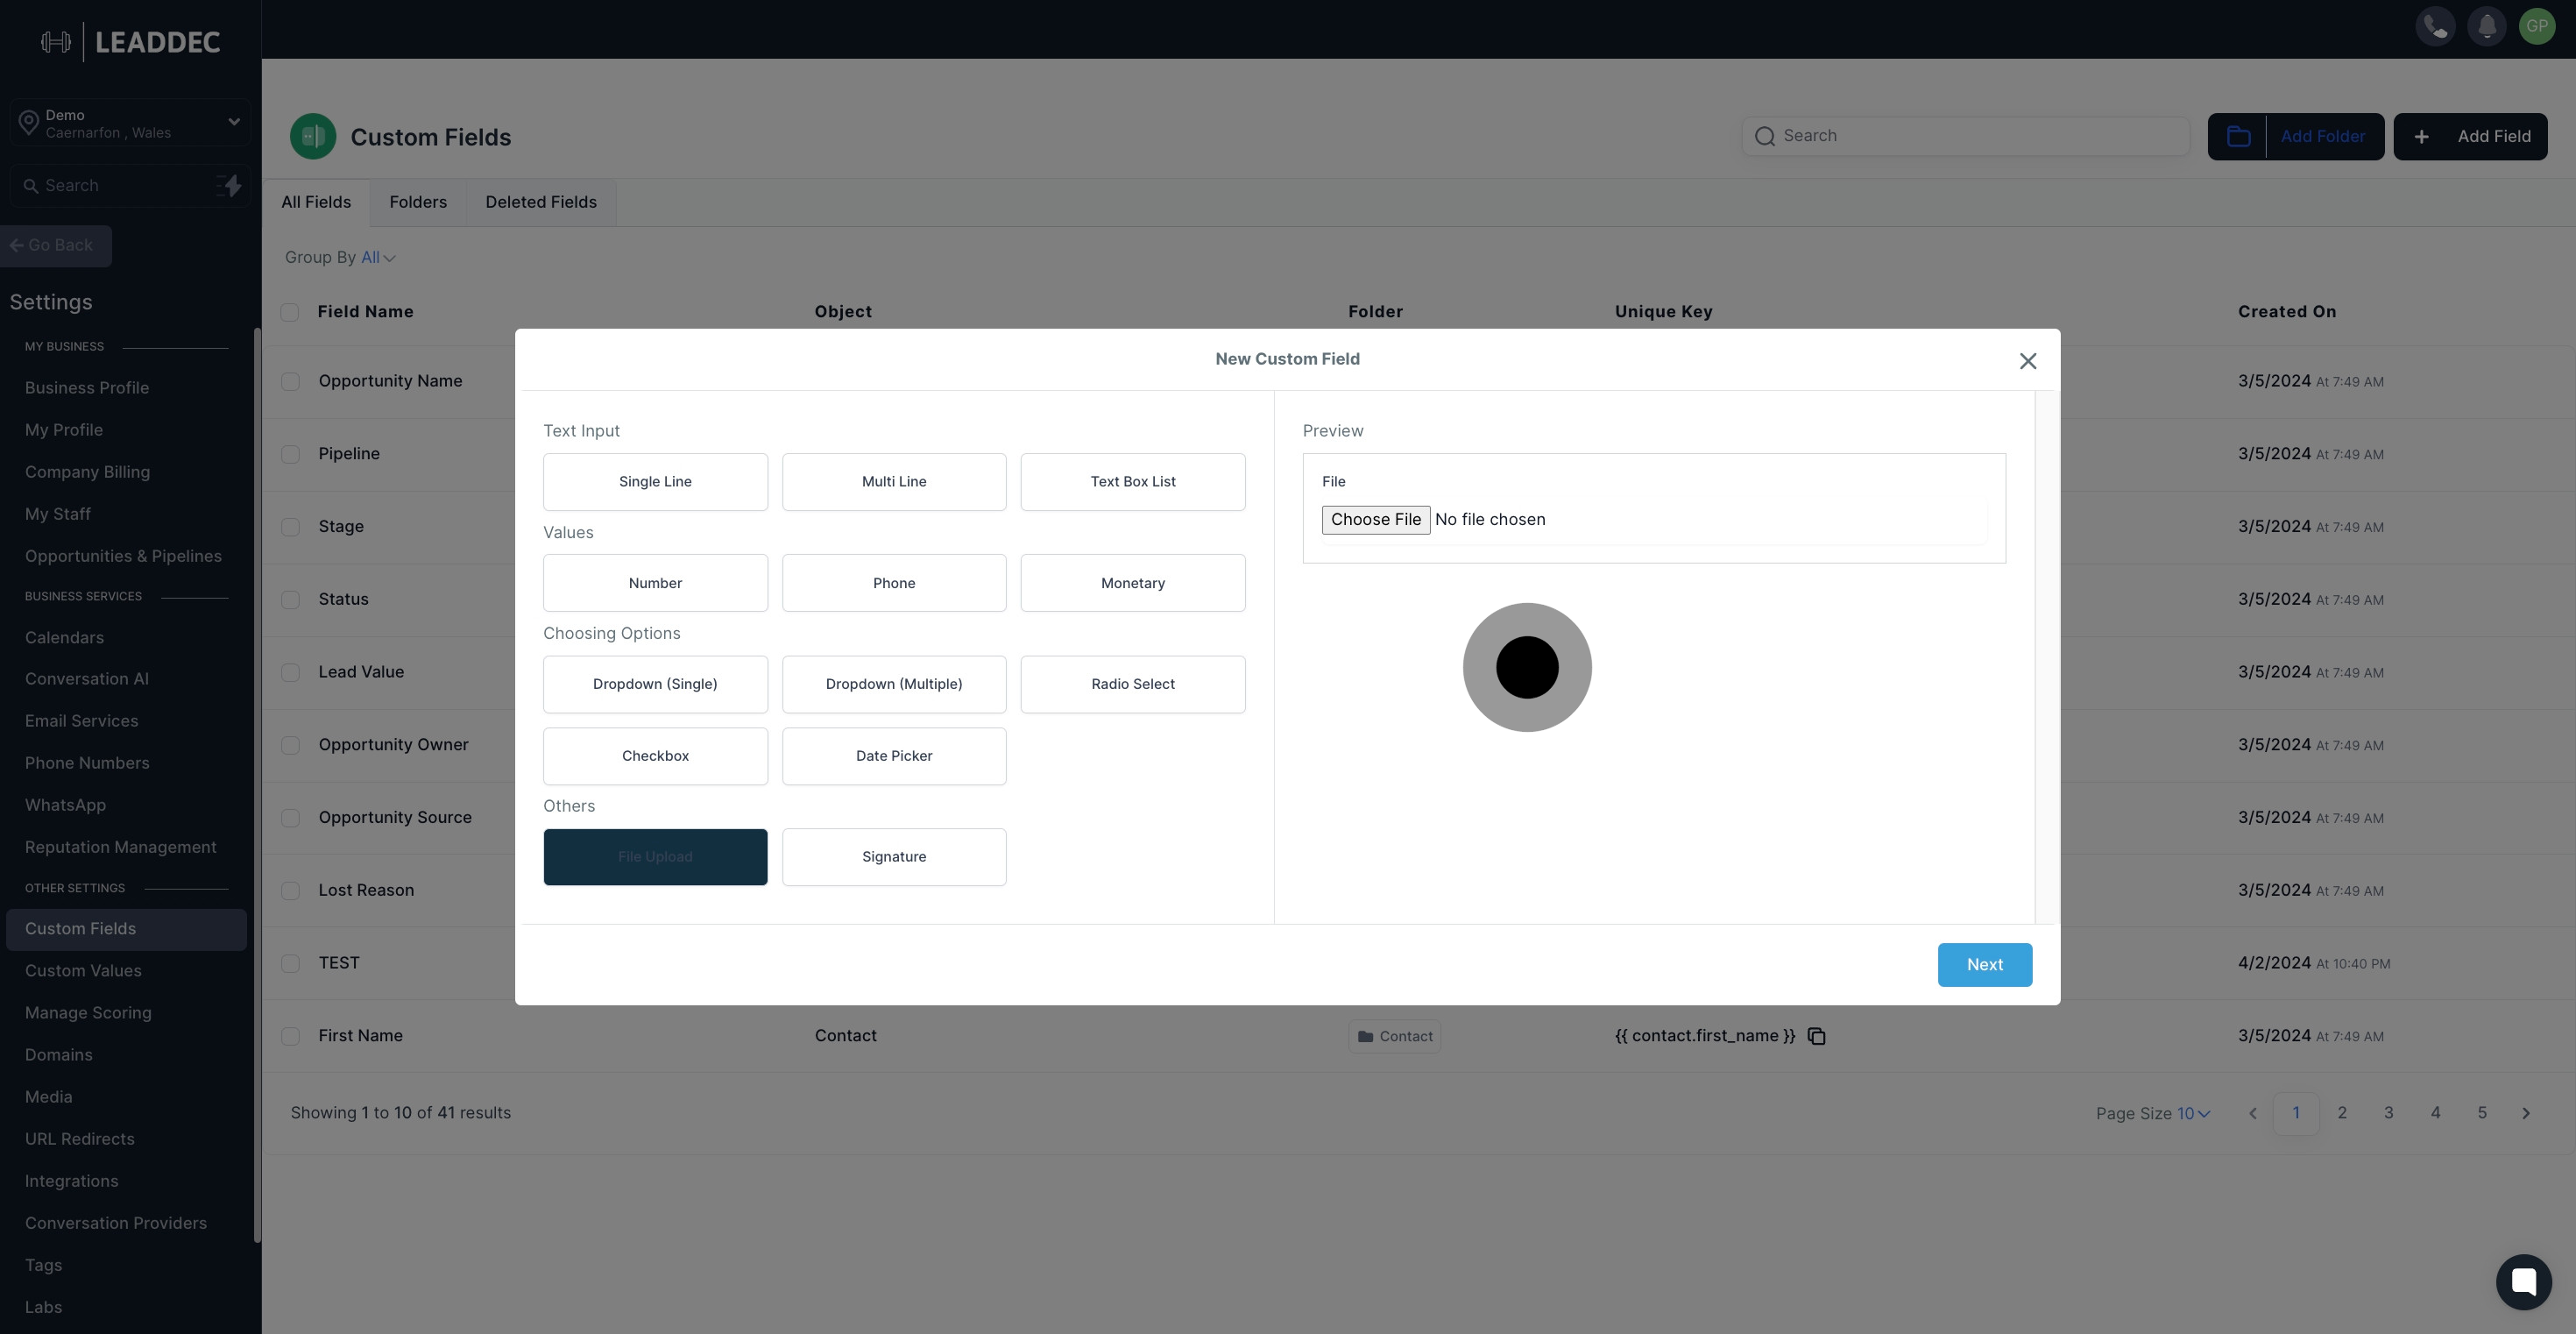
5 Once that's done, click on "Preview".

6. Press 'Next' to proceed.

6 After, click on "Next".

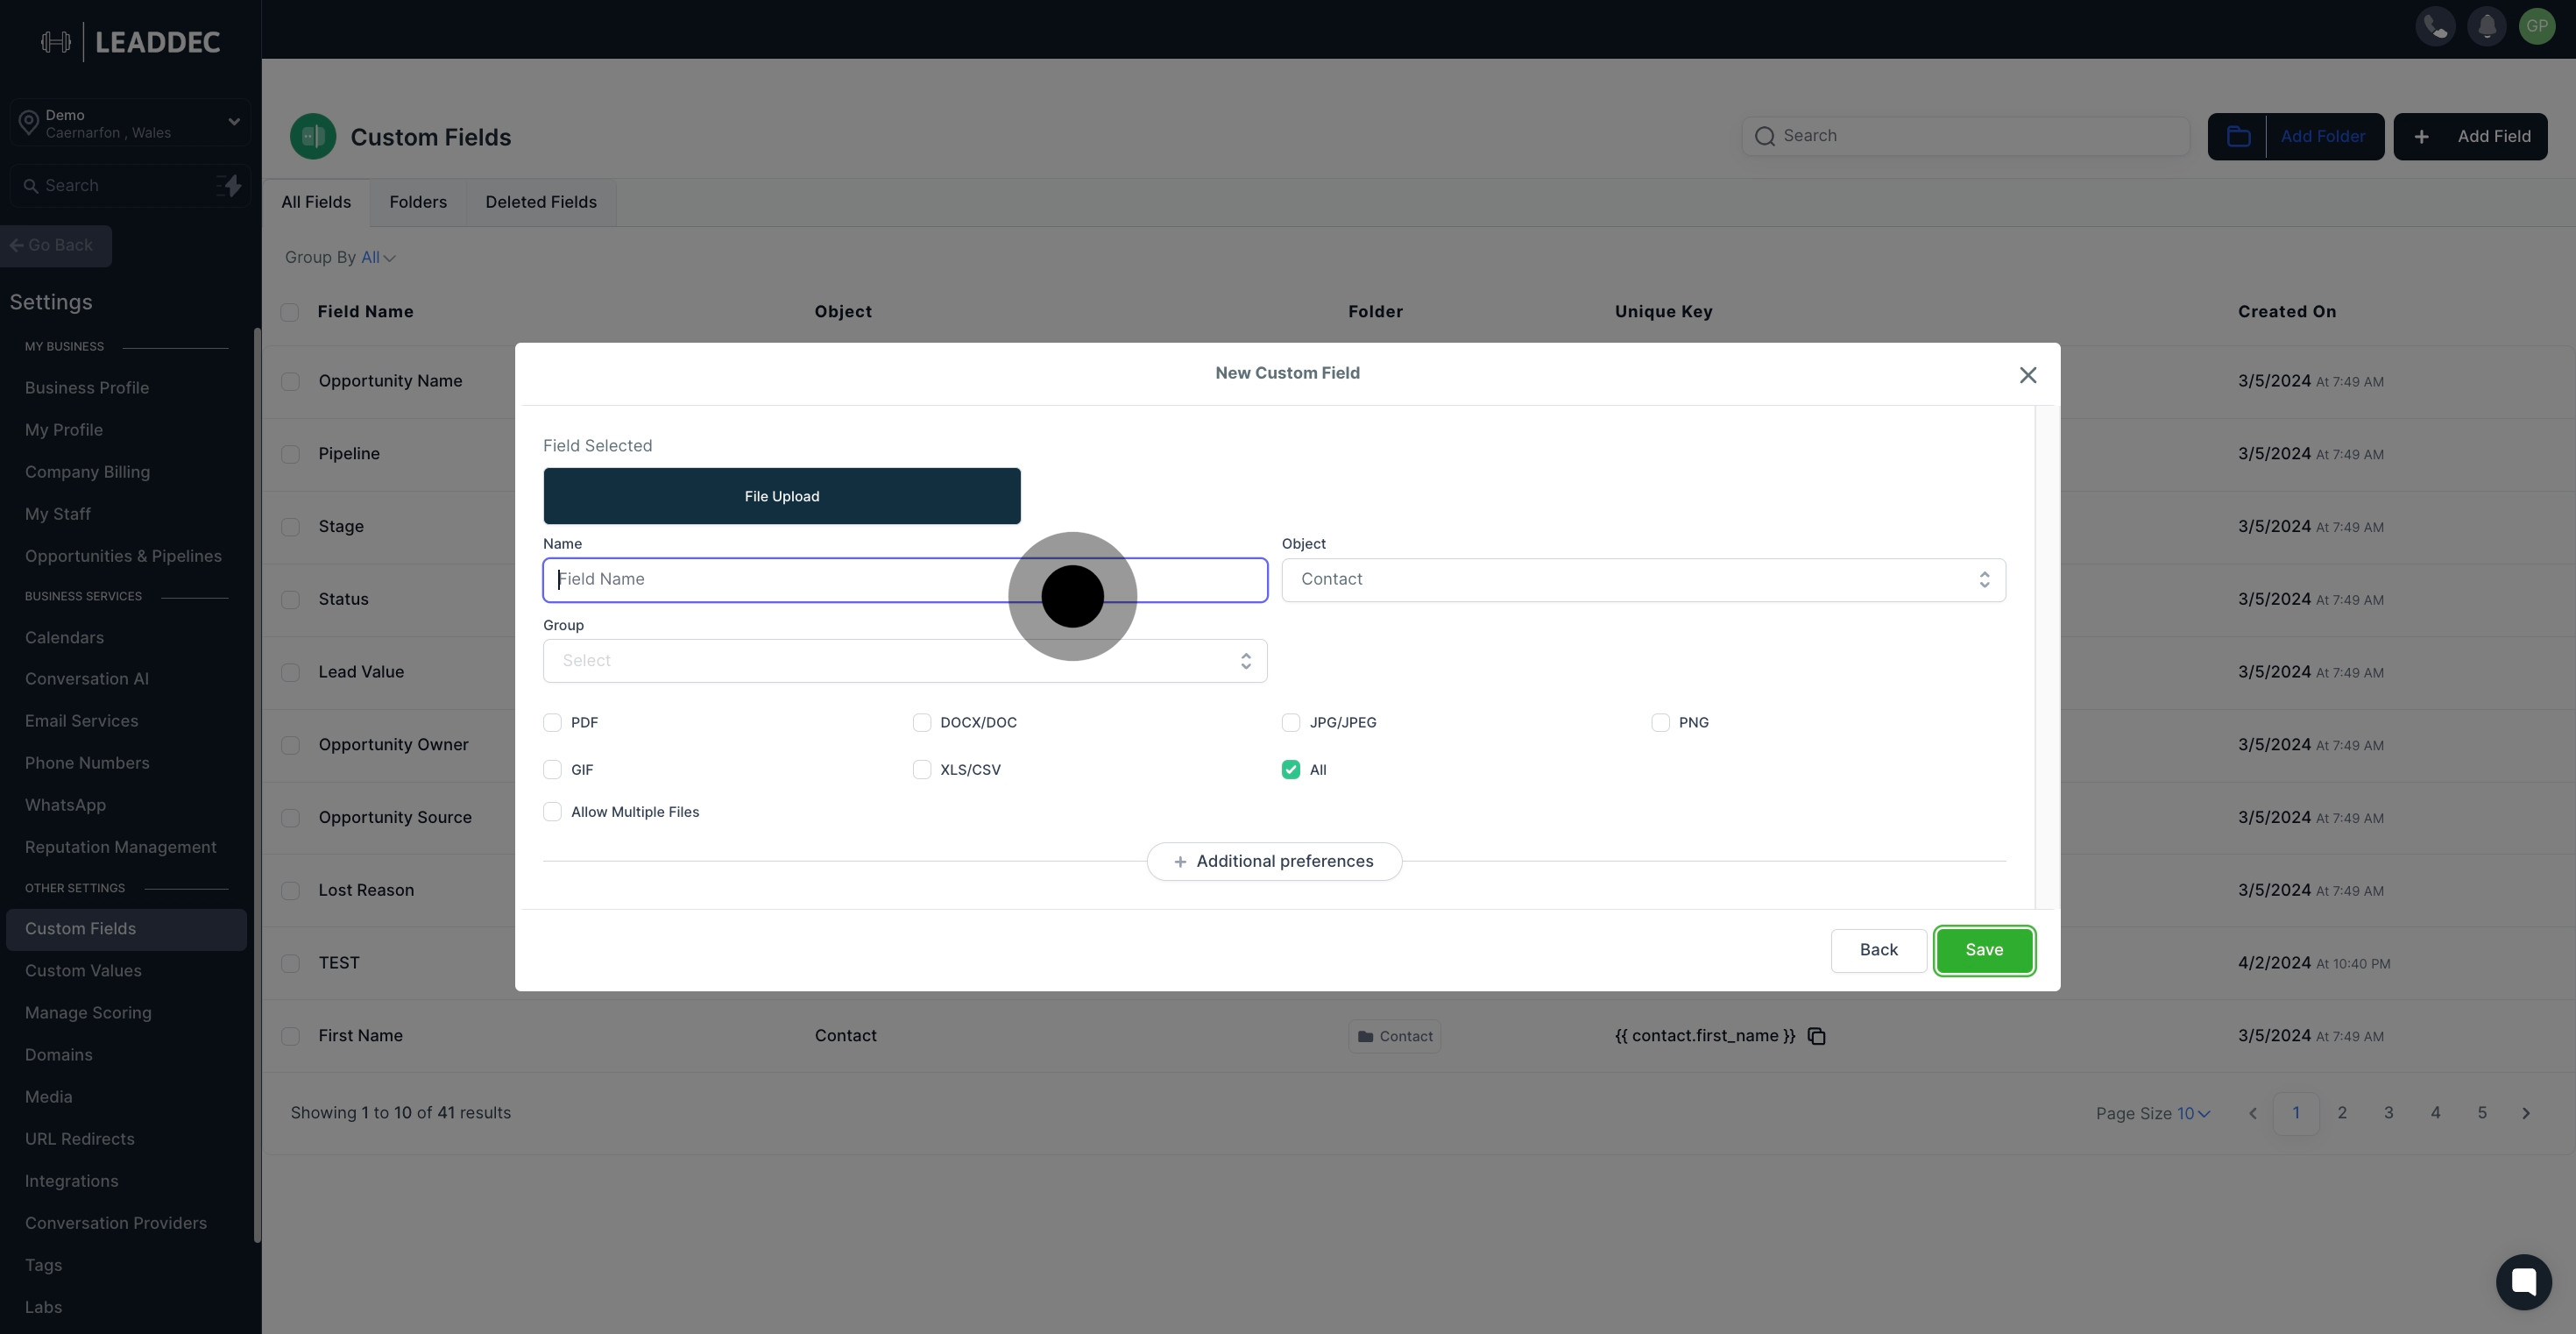
7. Enter your preferred field name.

7 Click on the element.

8. Select the 'Group' dropdown to categorize your field.
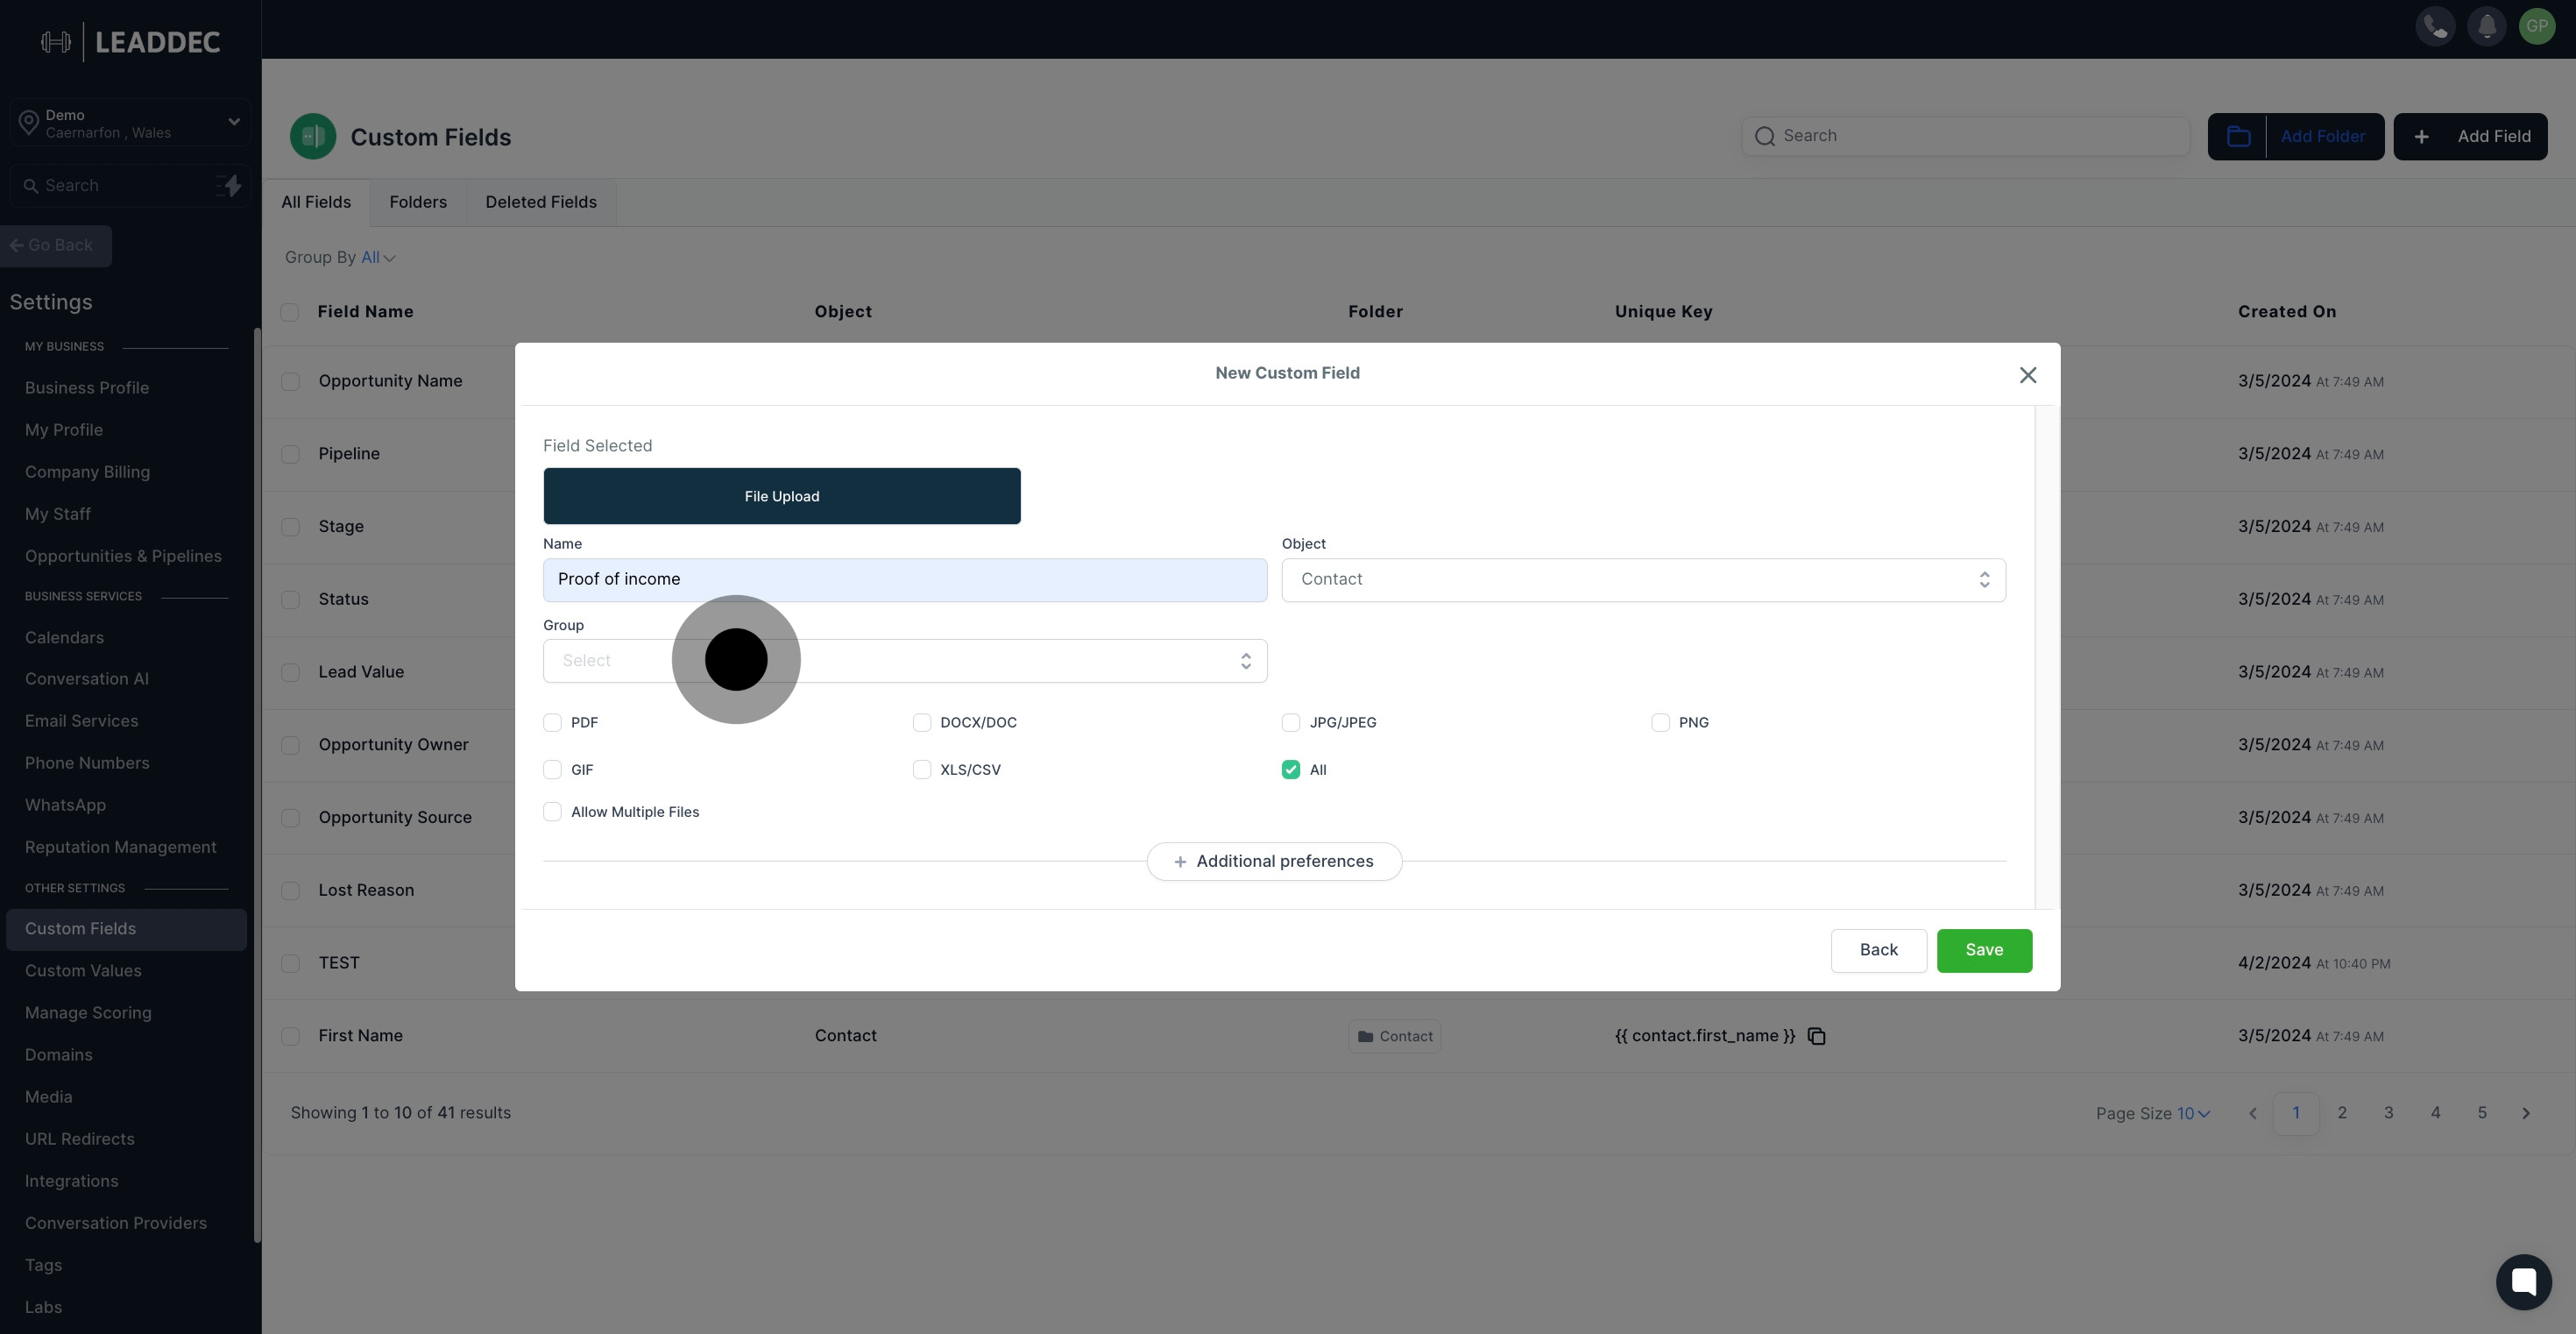
8 Click on "Select".

9. Choose the allowed file type for upload.
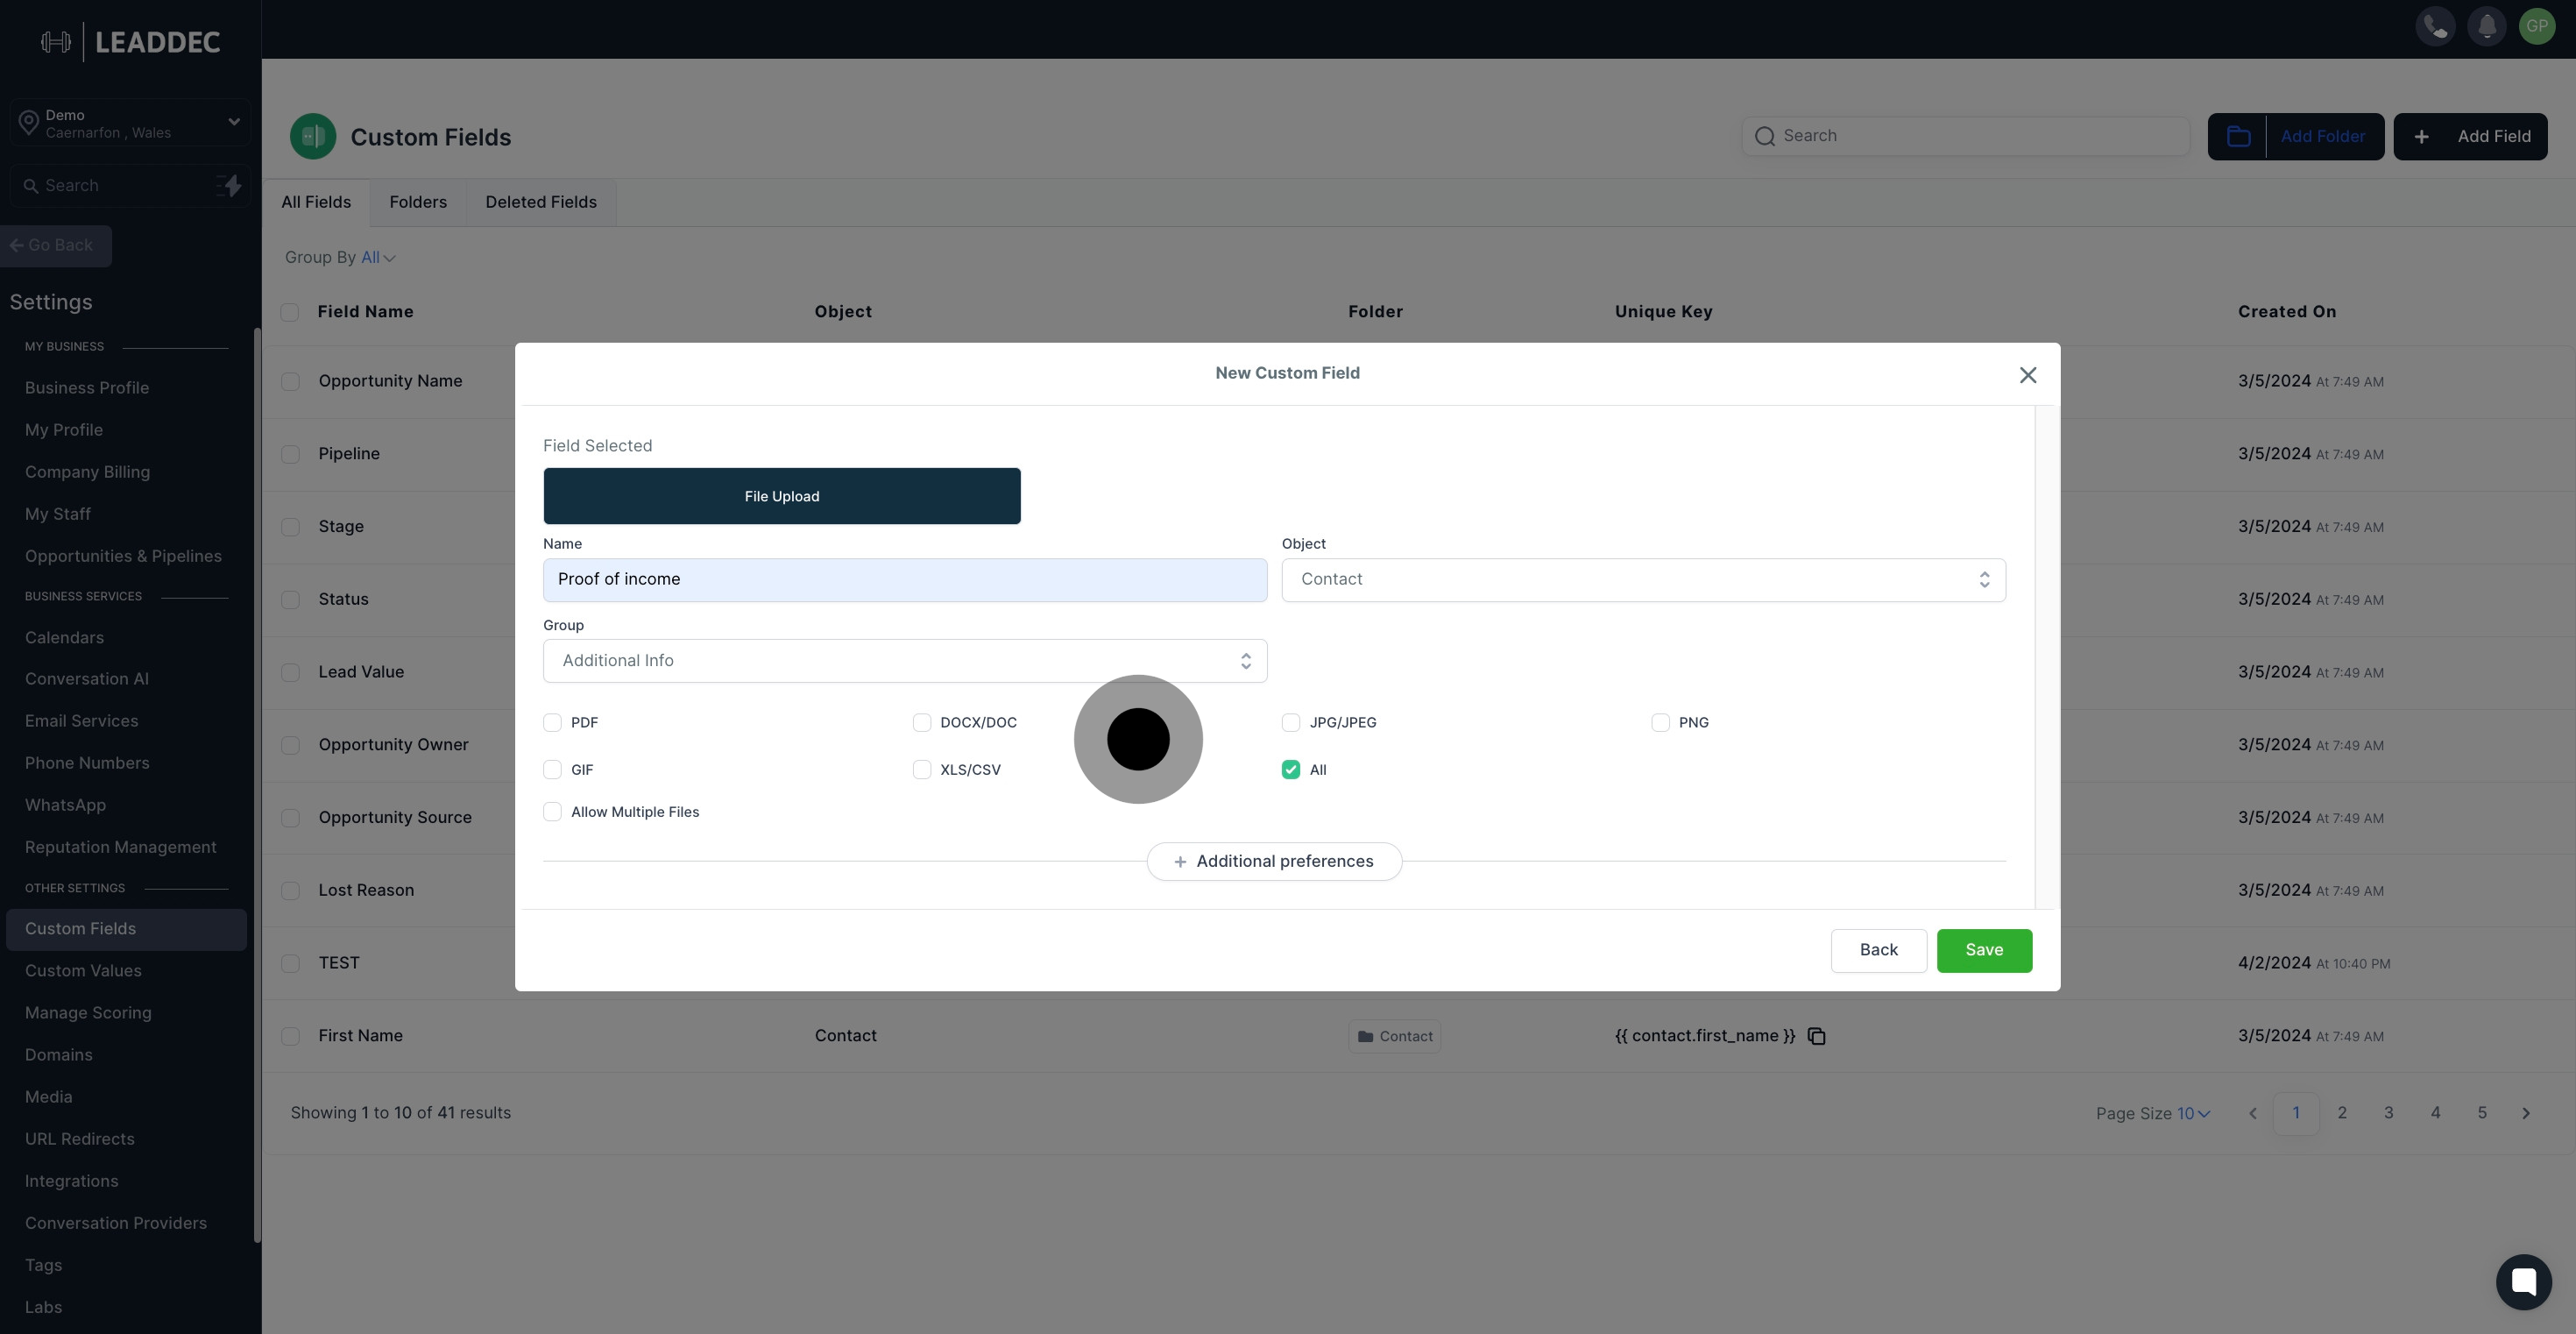
9 Click here.

10. Check the box if you want to allow multiple file uploads.
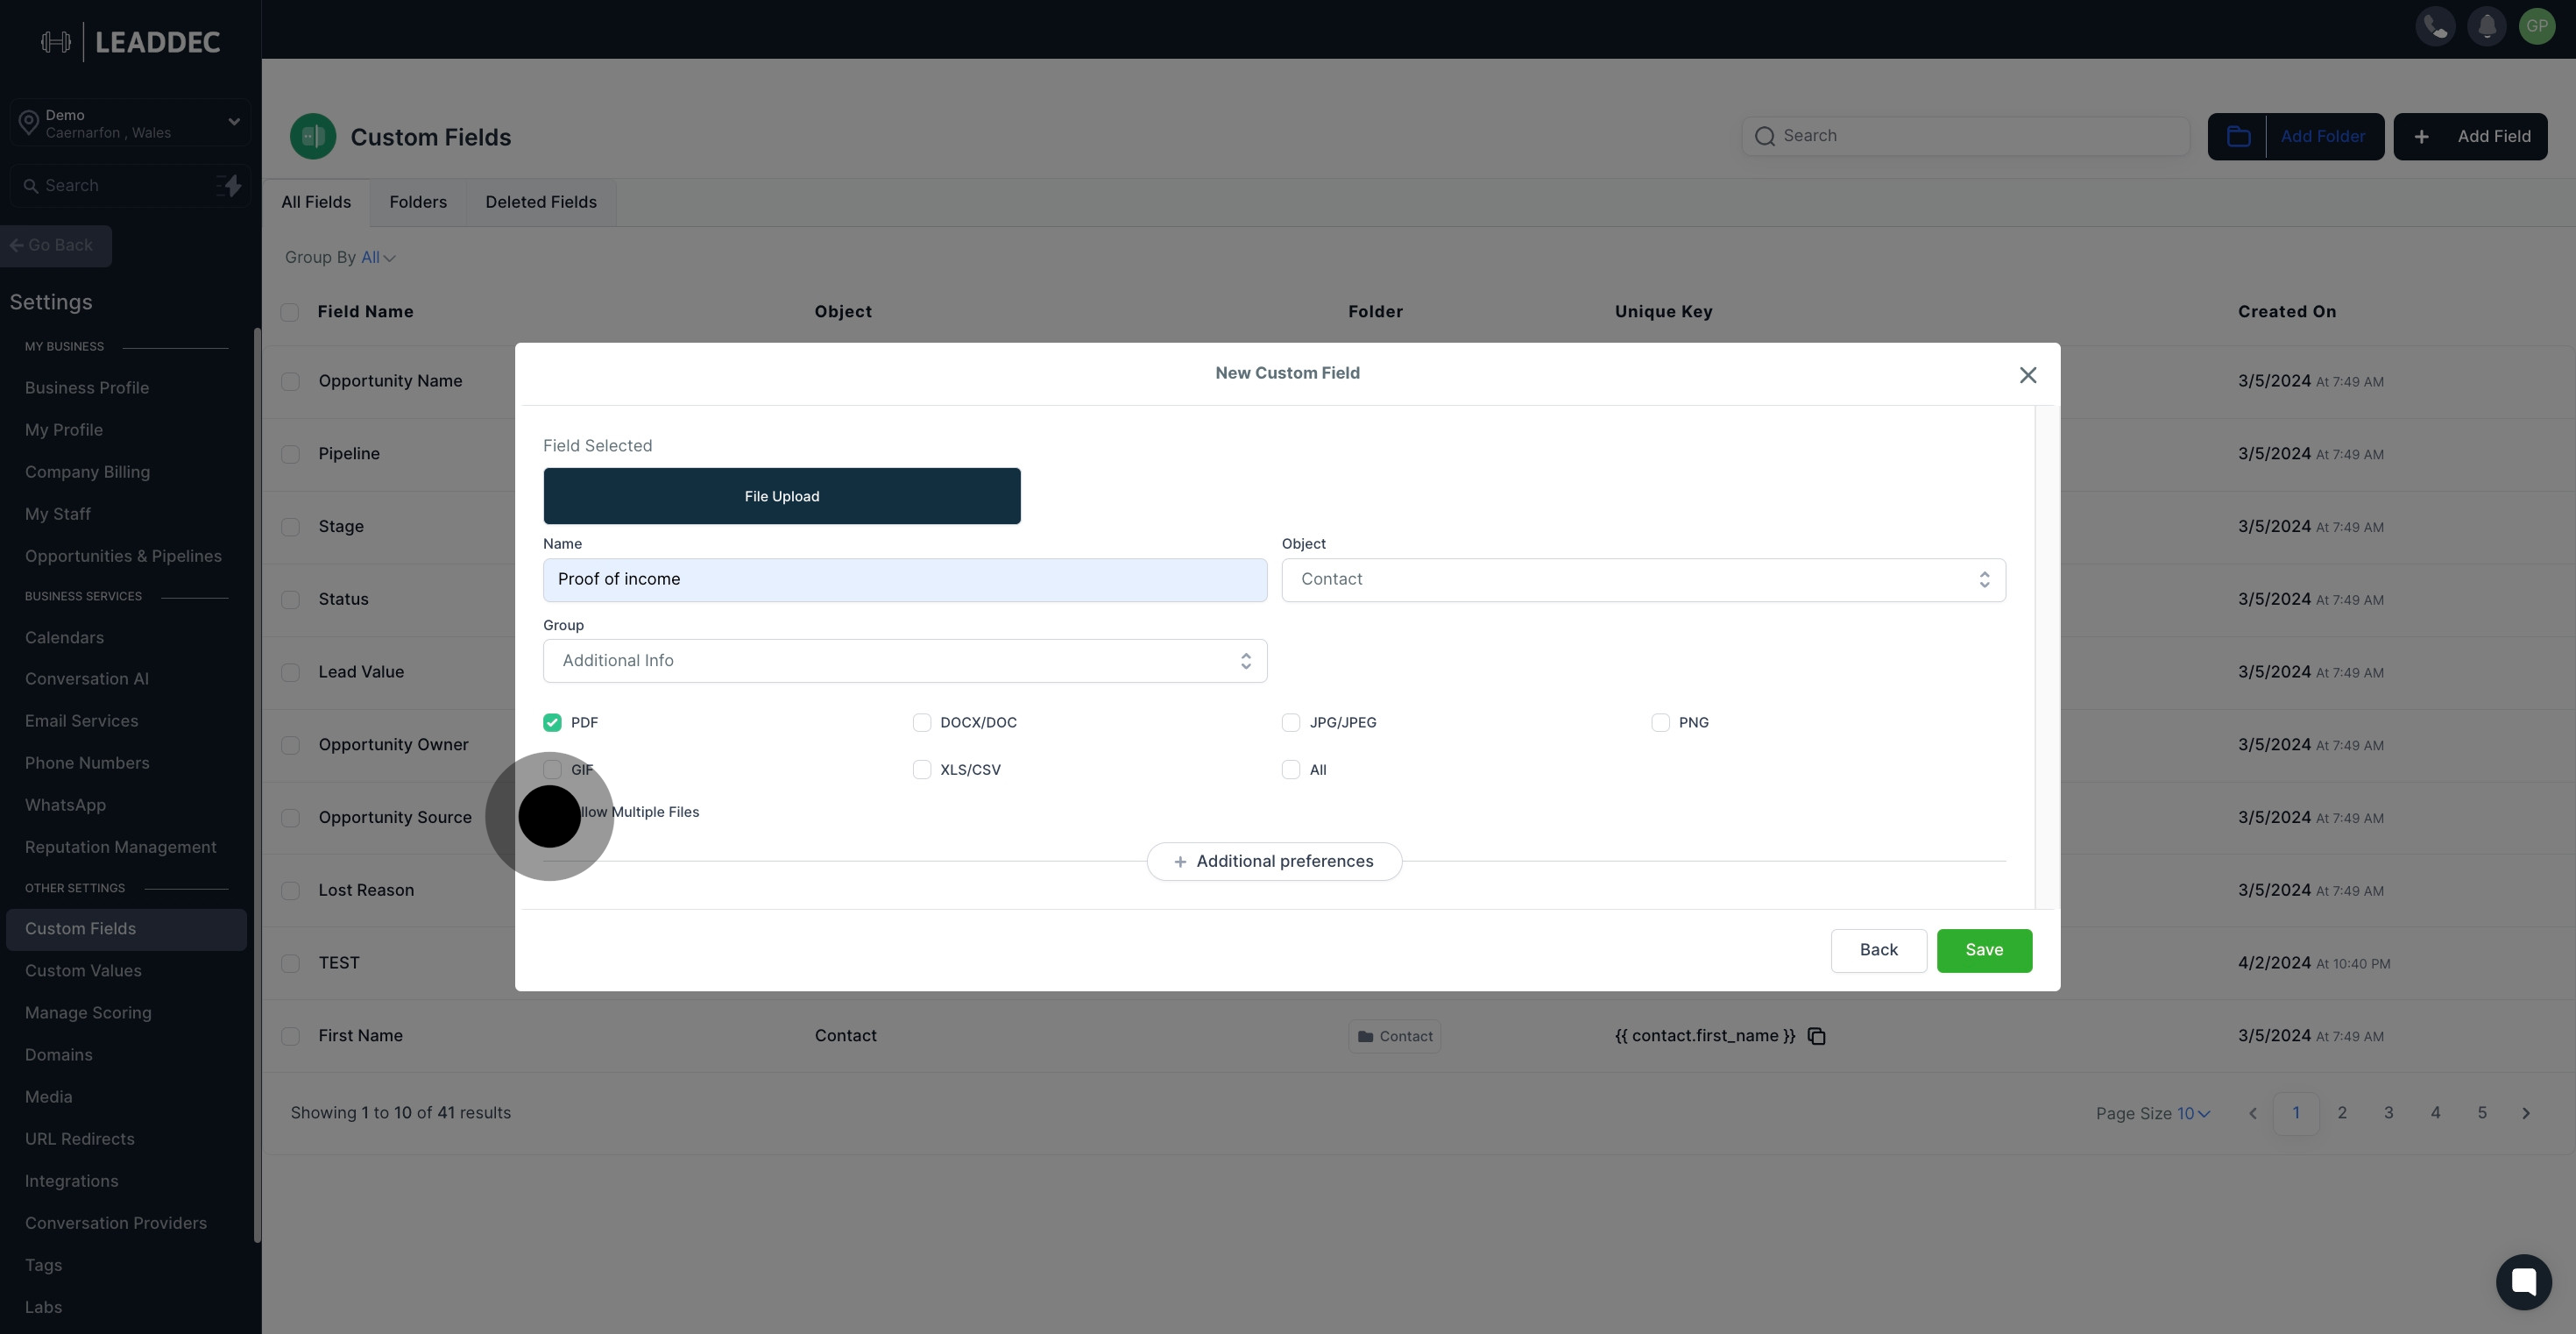
10 Now, click on the element.

11. Input the maximum file limit, if needed.
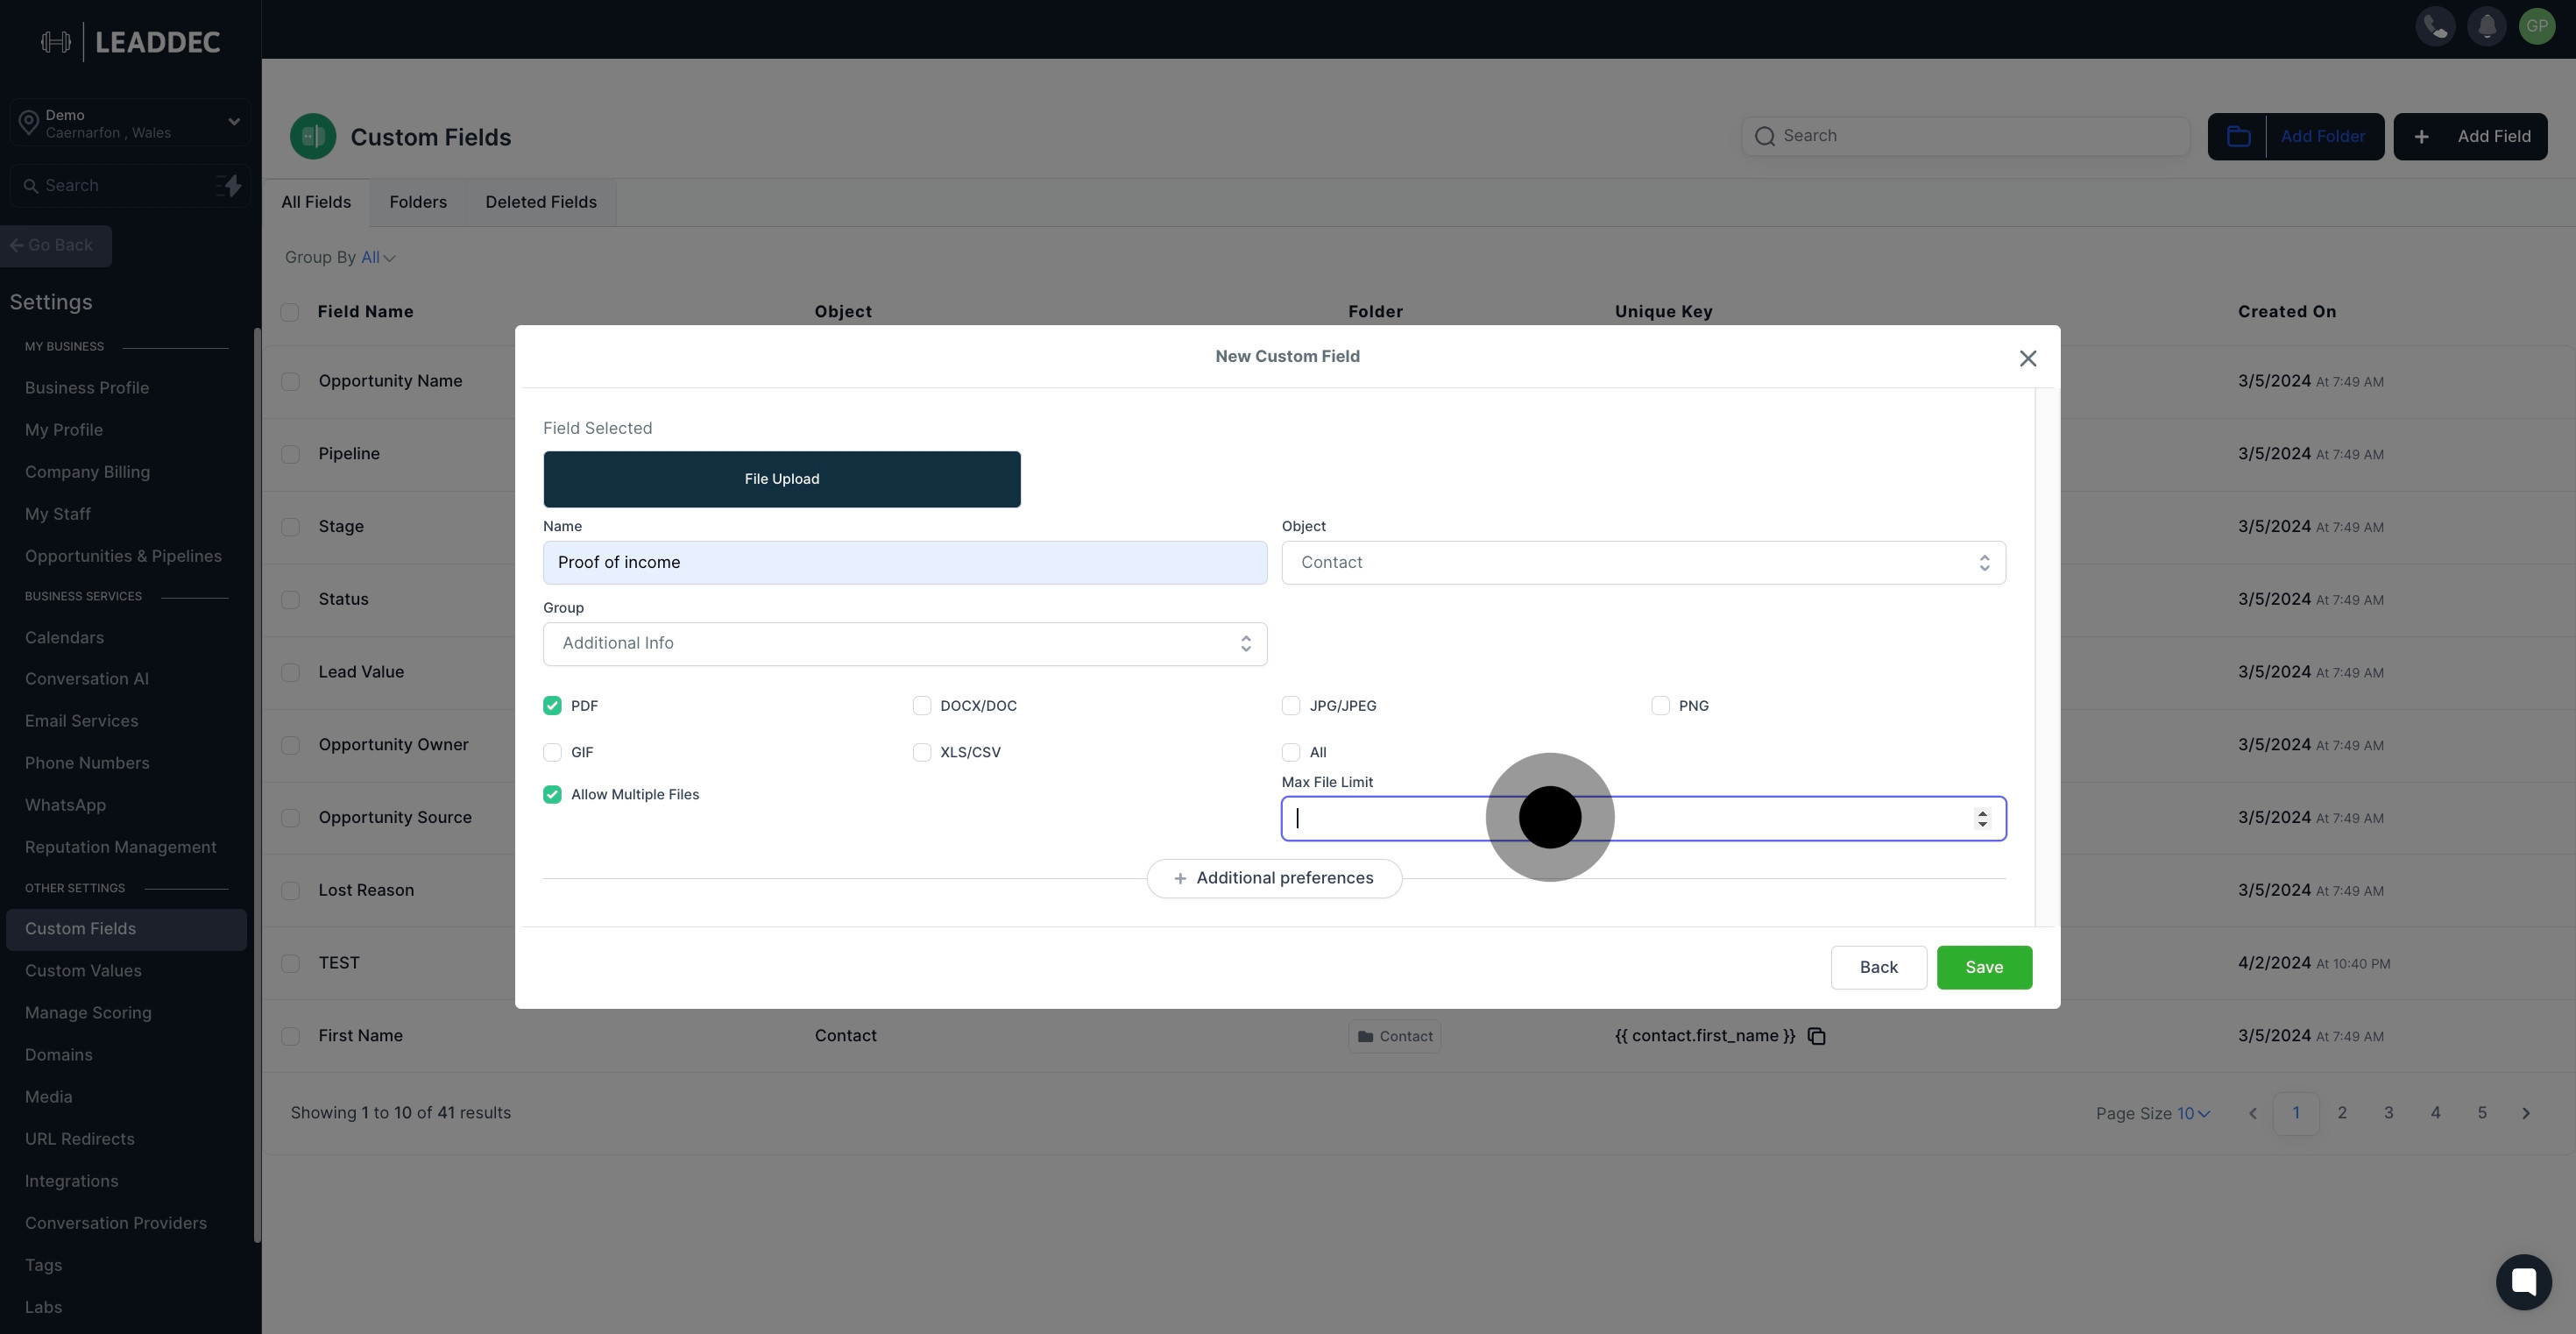
11 Click here.

12. Click here to add 'Additional Preferences'
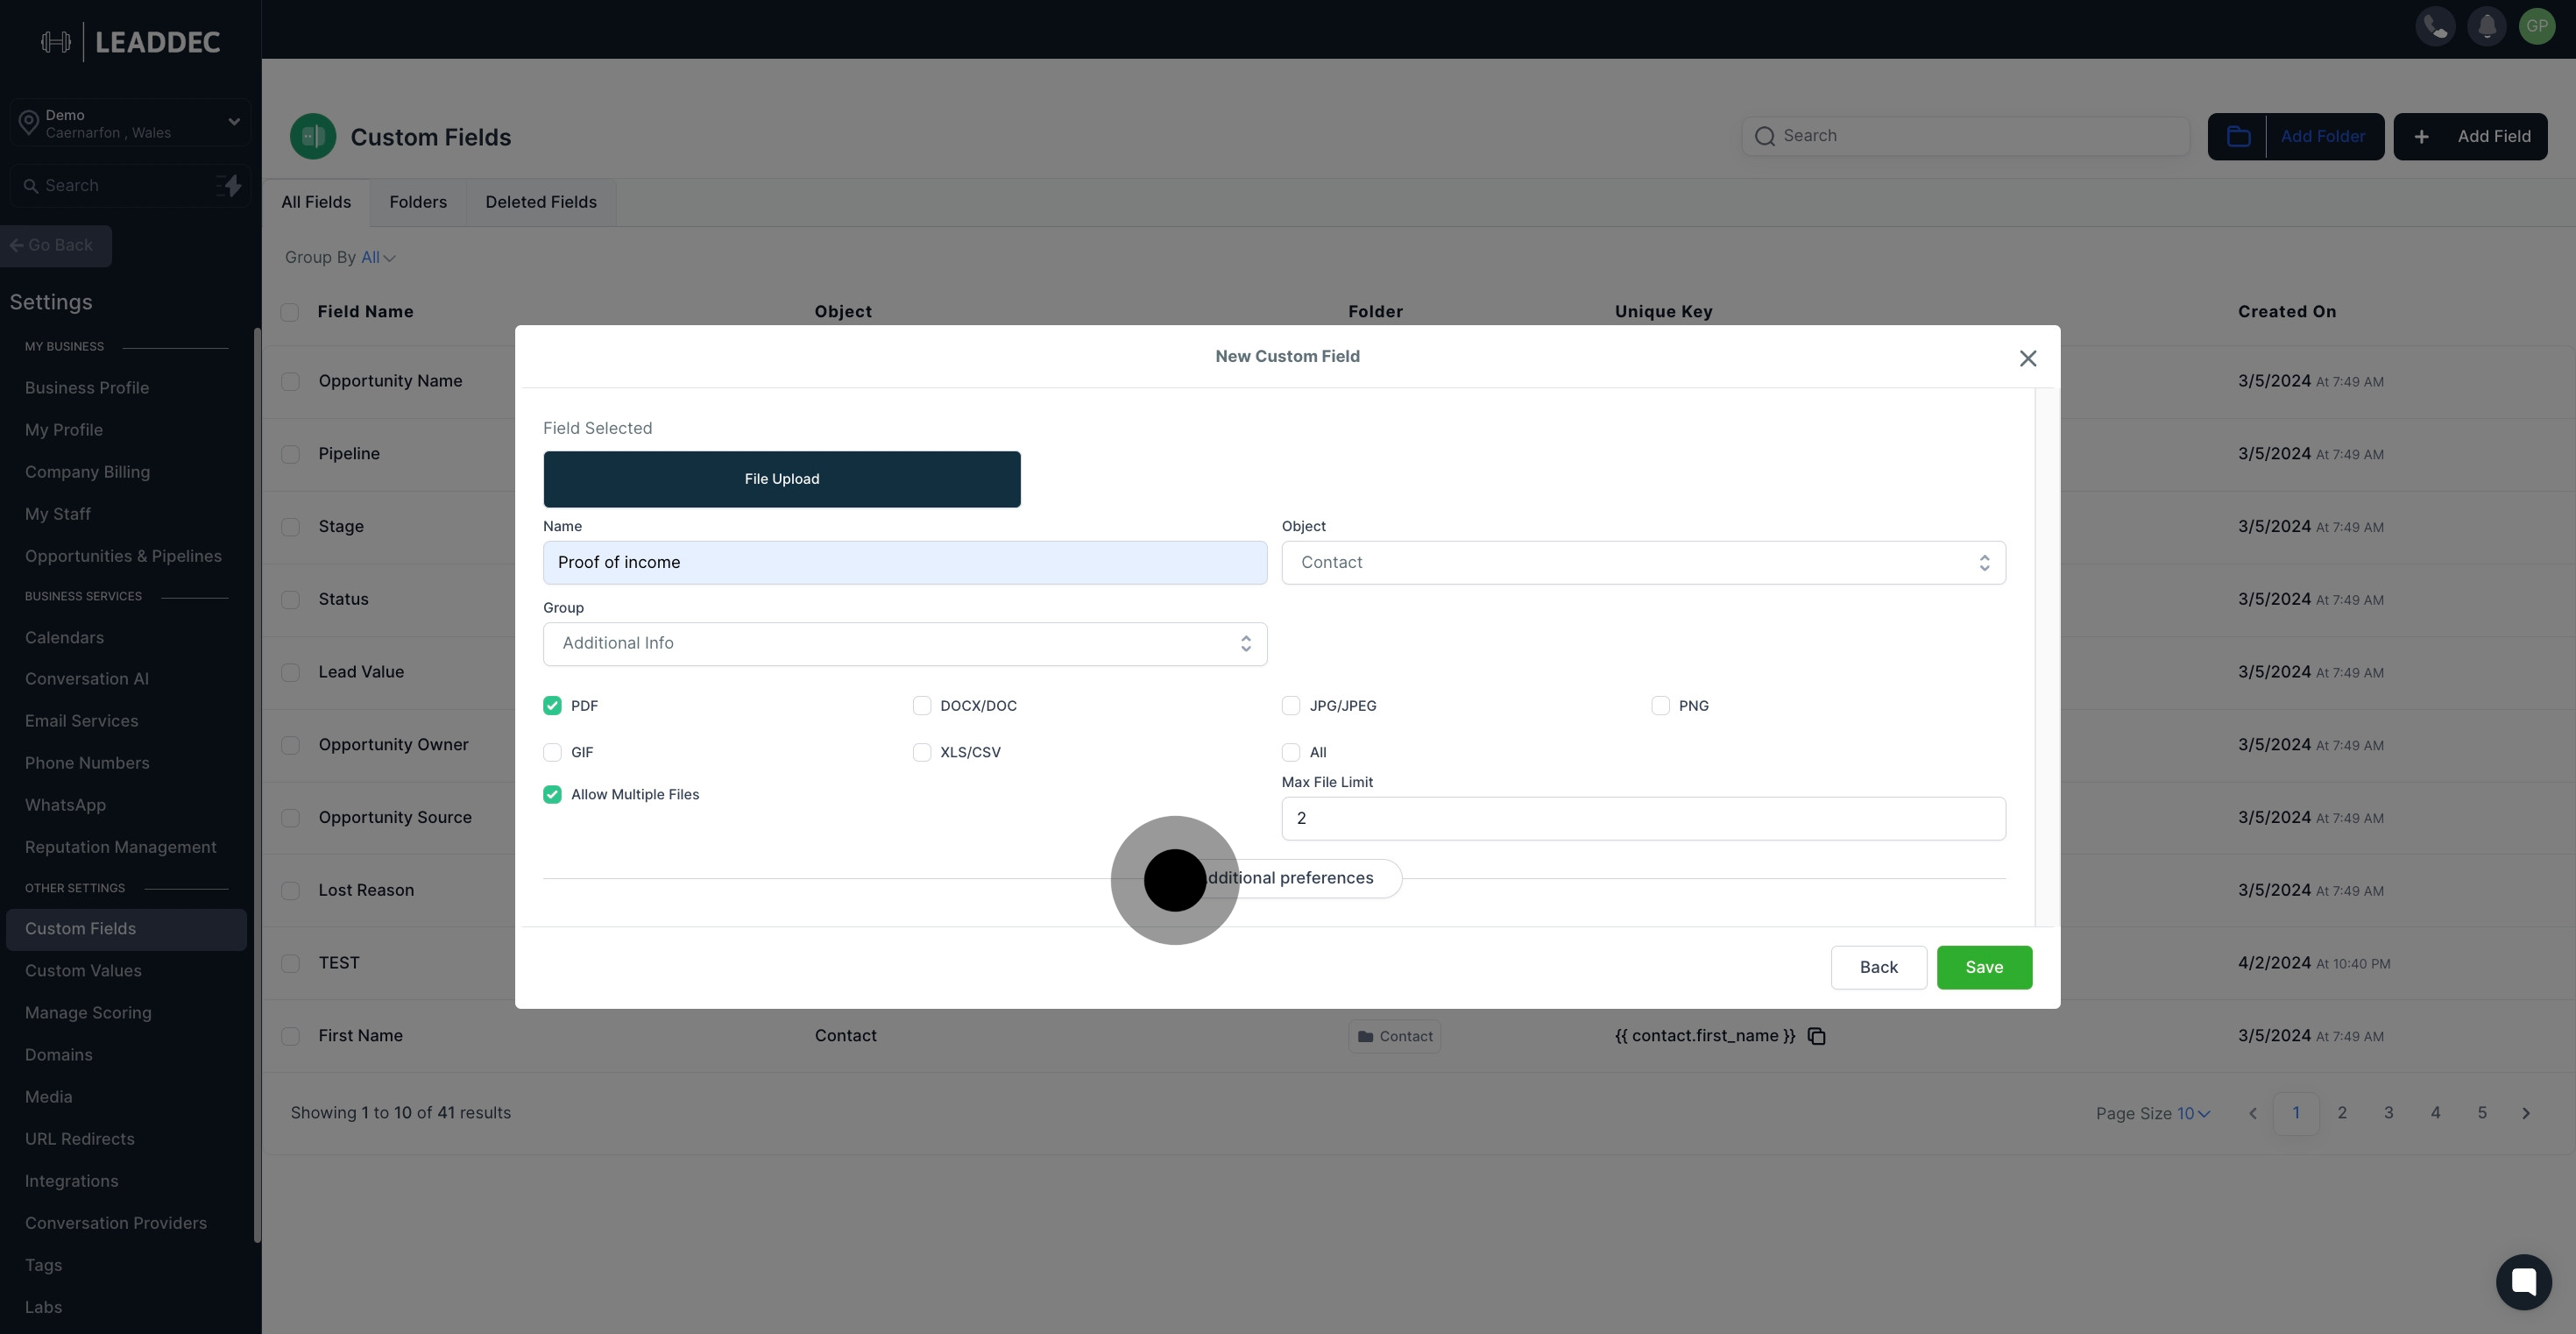
12 Click here.

13. Customize a unique key for your new field.
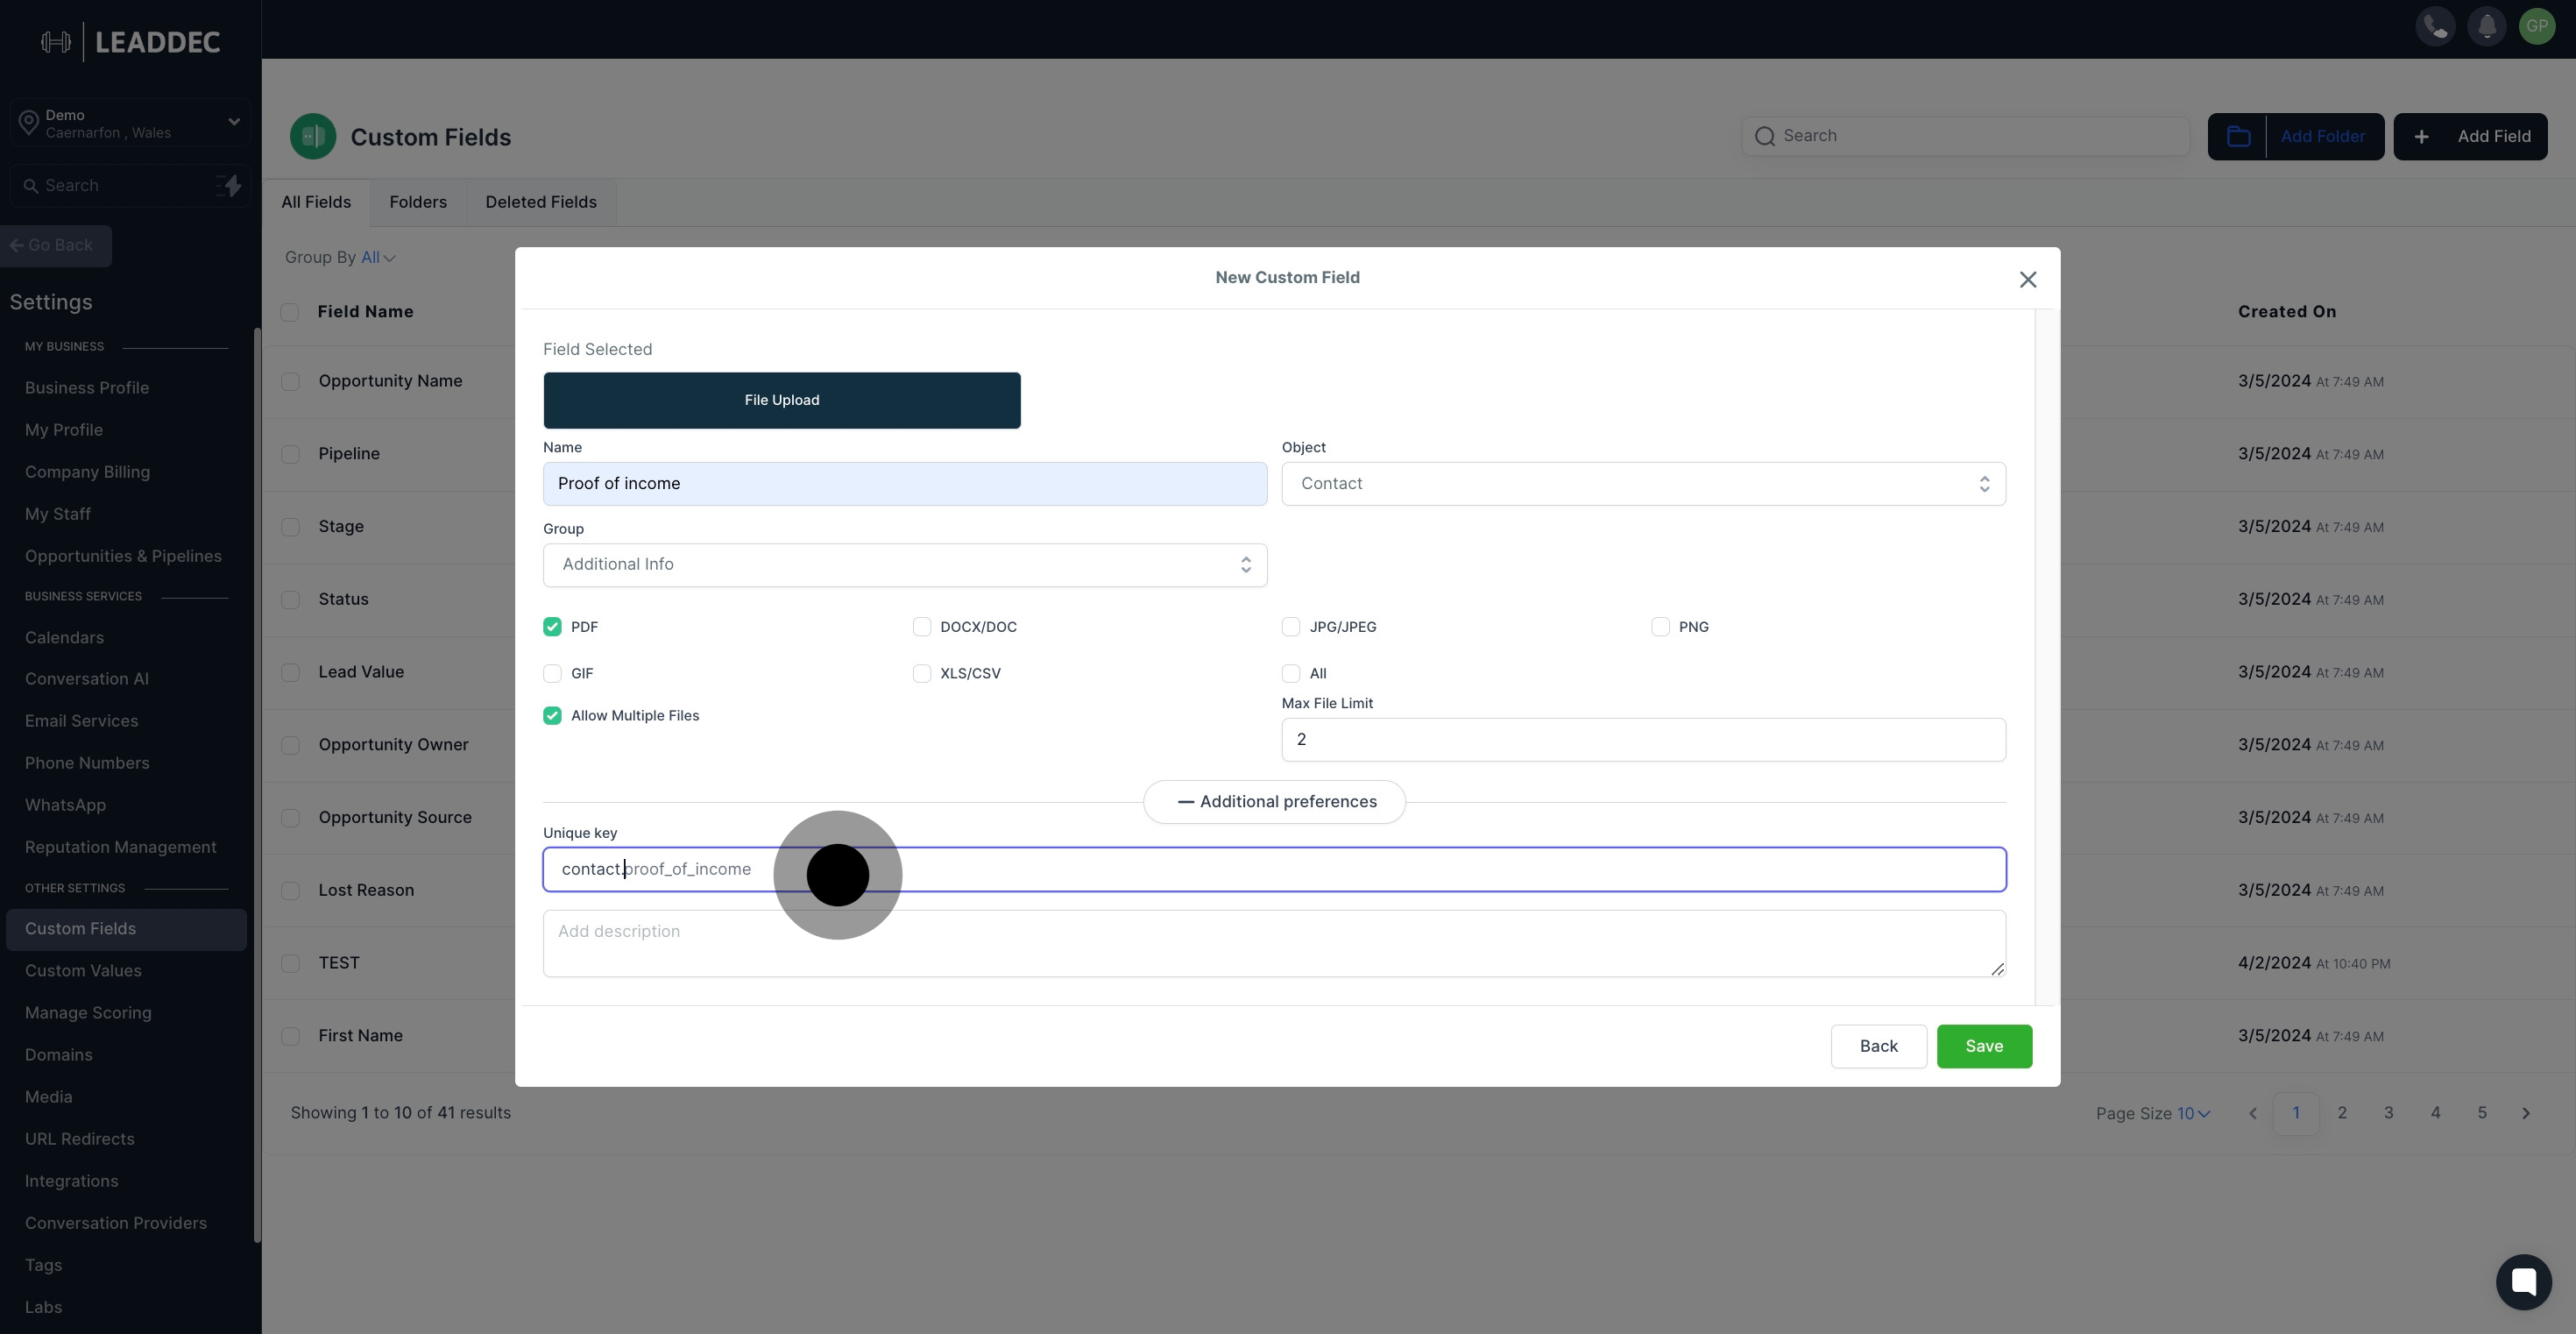
13 Click on the element.

14. Write a fitting description for your field.

14 Next, click here.

15. Finally, save your new field by clicking 'Save'.
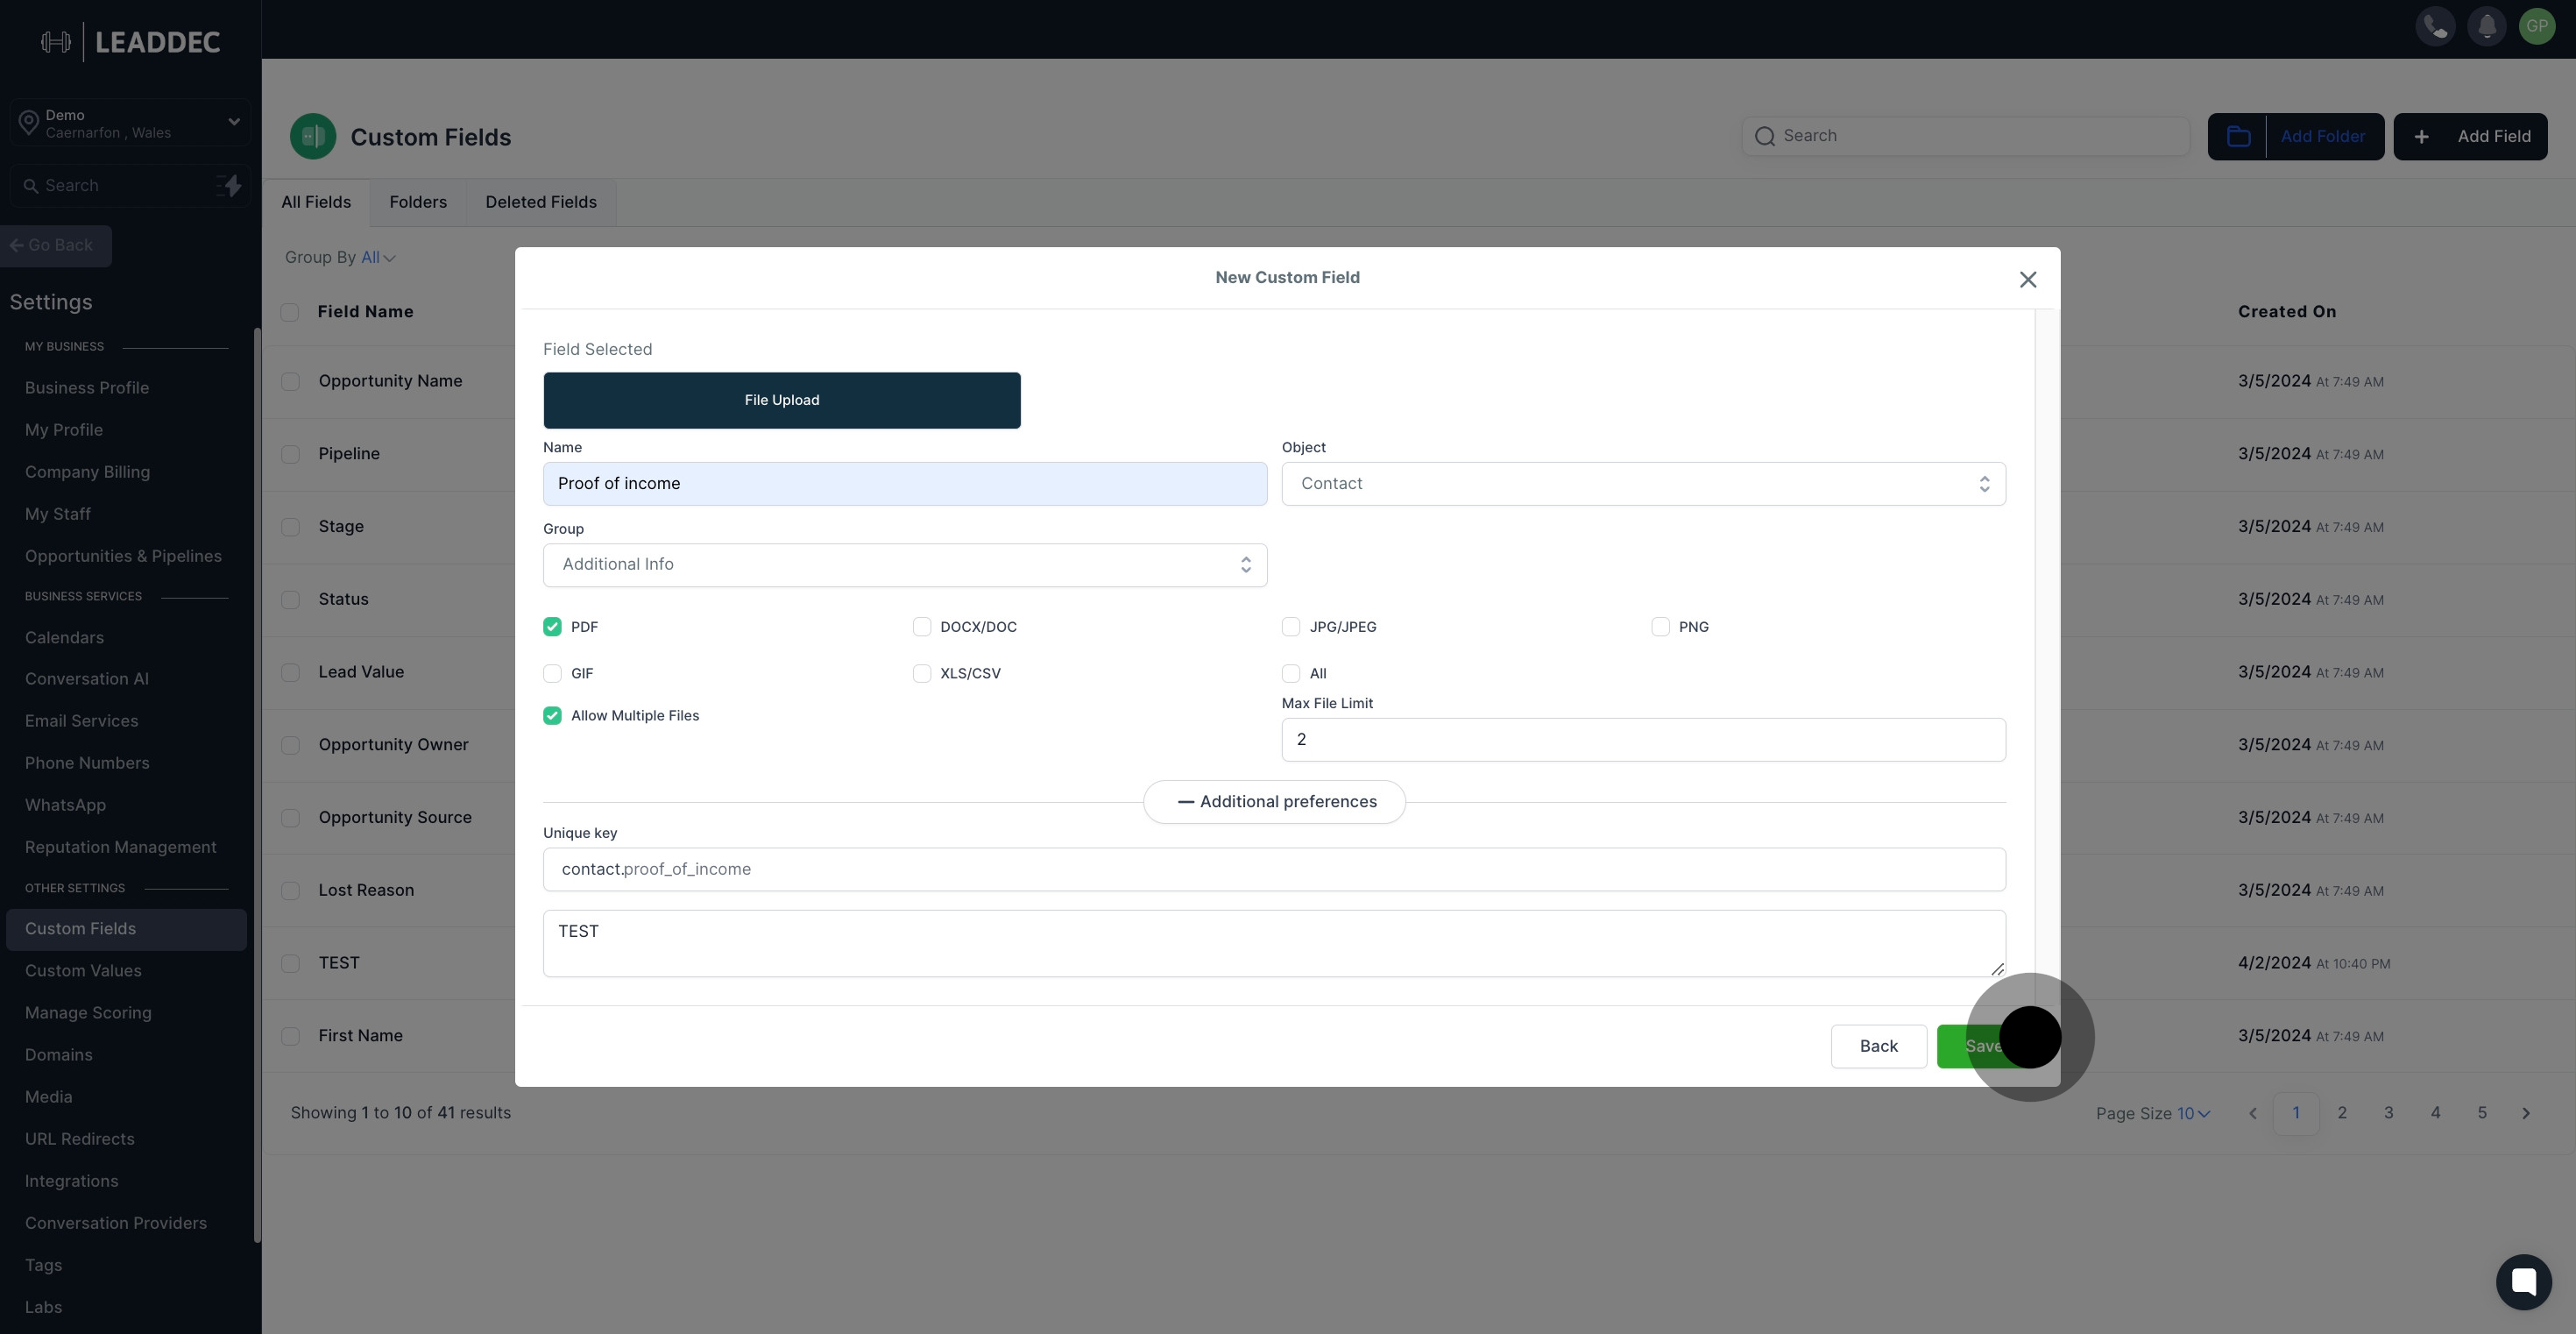
15 Click on "Save".

Did this answer your question?
😞
😐
😁