Adding Custom Values in LeadDec

Discover the power of customization in LeadDec with our comprehensive guide on adding new custom values. Learn how to tailor LeadDec to your specific needs, enhance your lead management process, and unlock new levels of efficiency and organization.


1. Start by selecting the Settings option.

1 Click on "Settings".

2. From the settings, navigate to the Custom Values section.
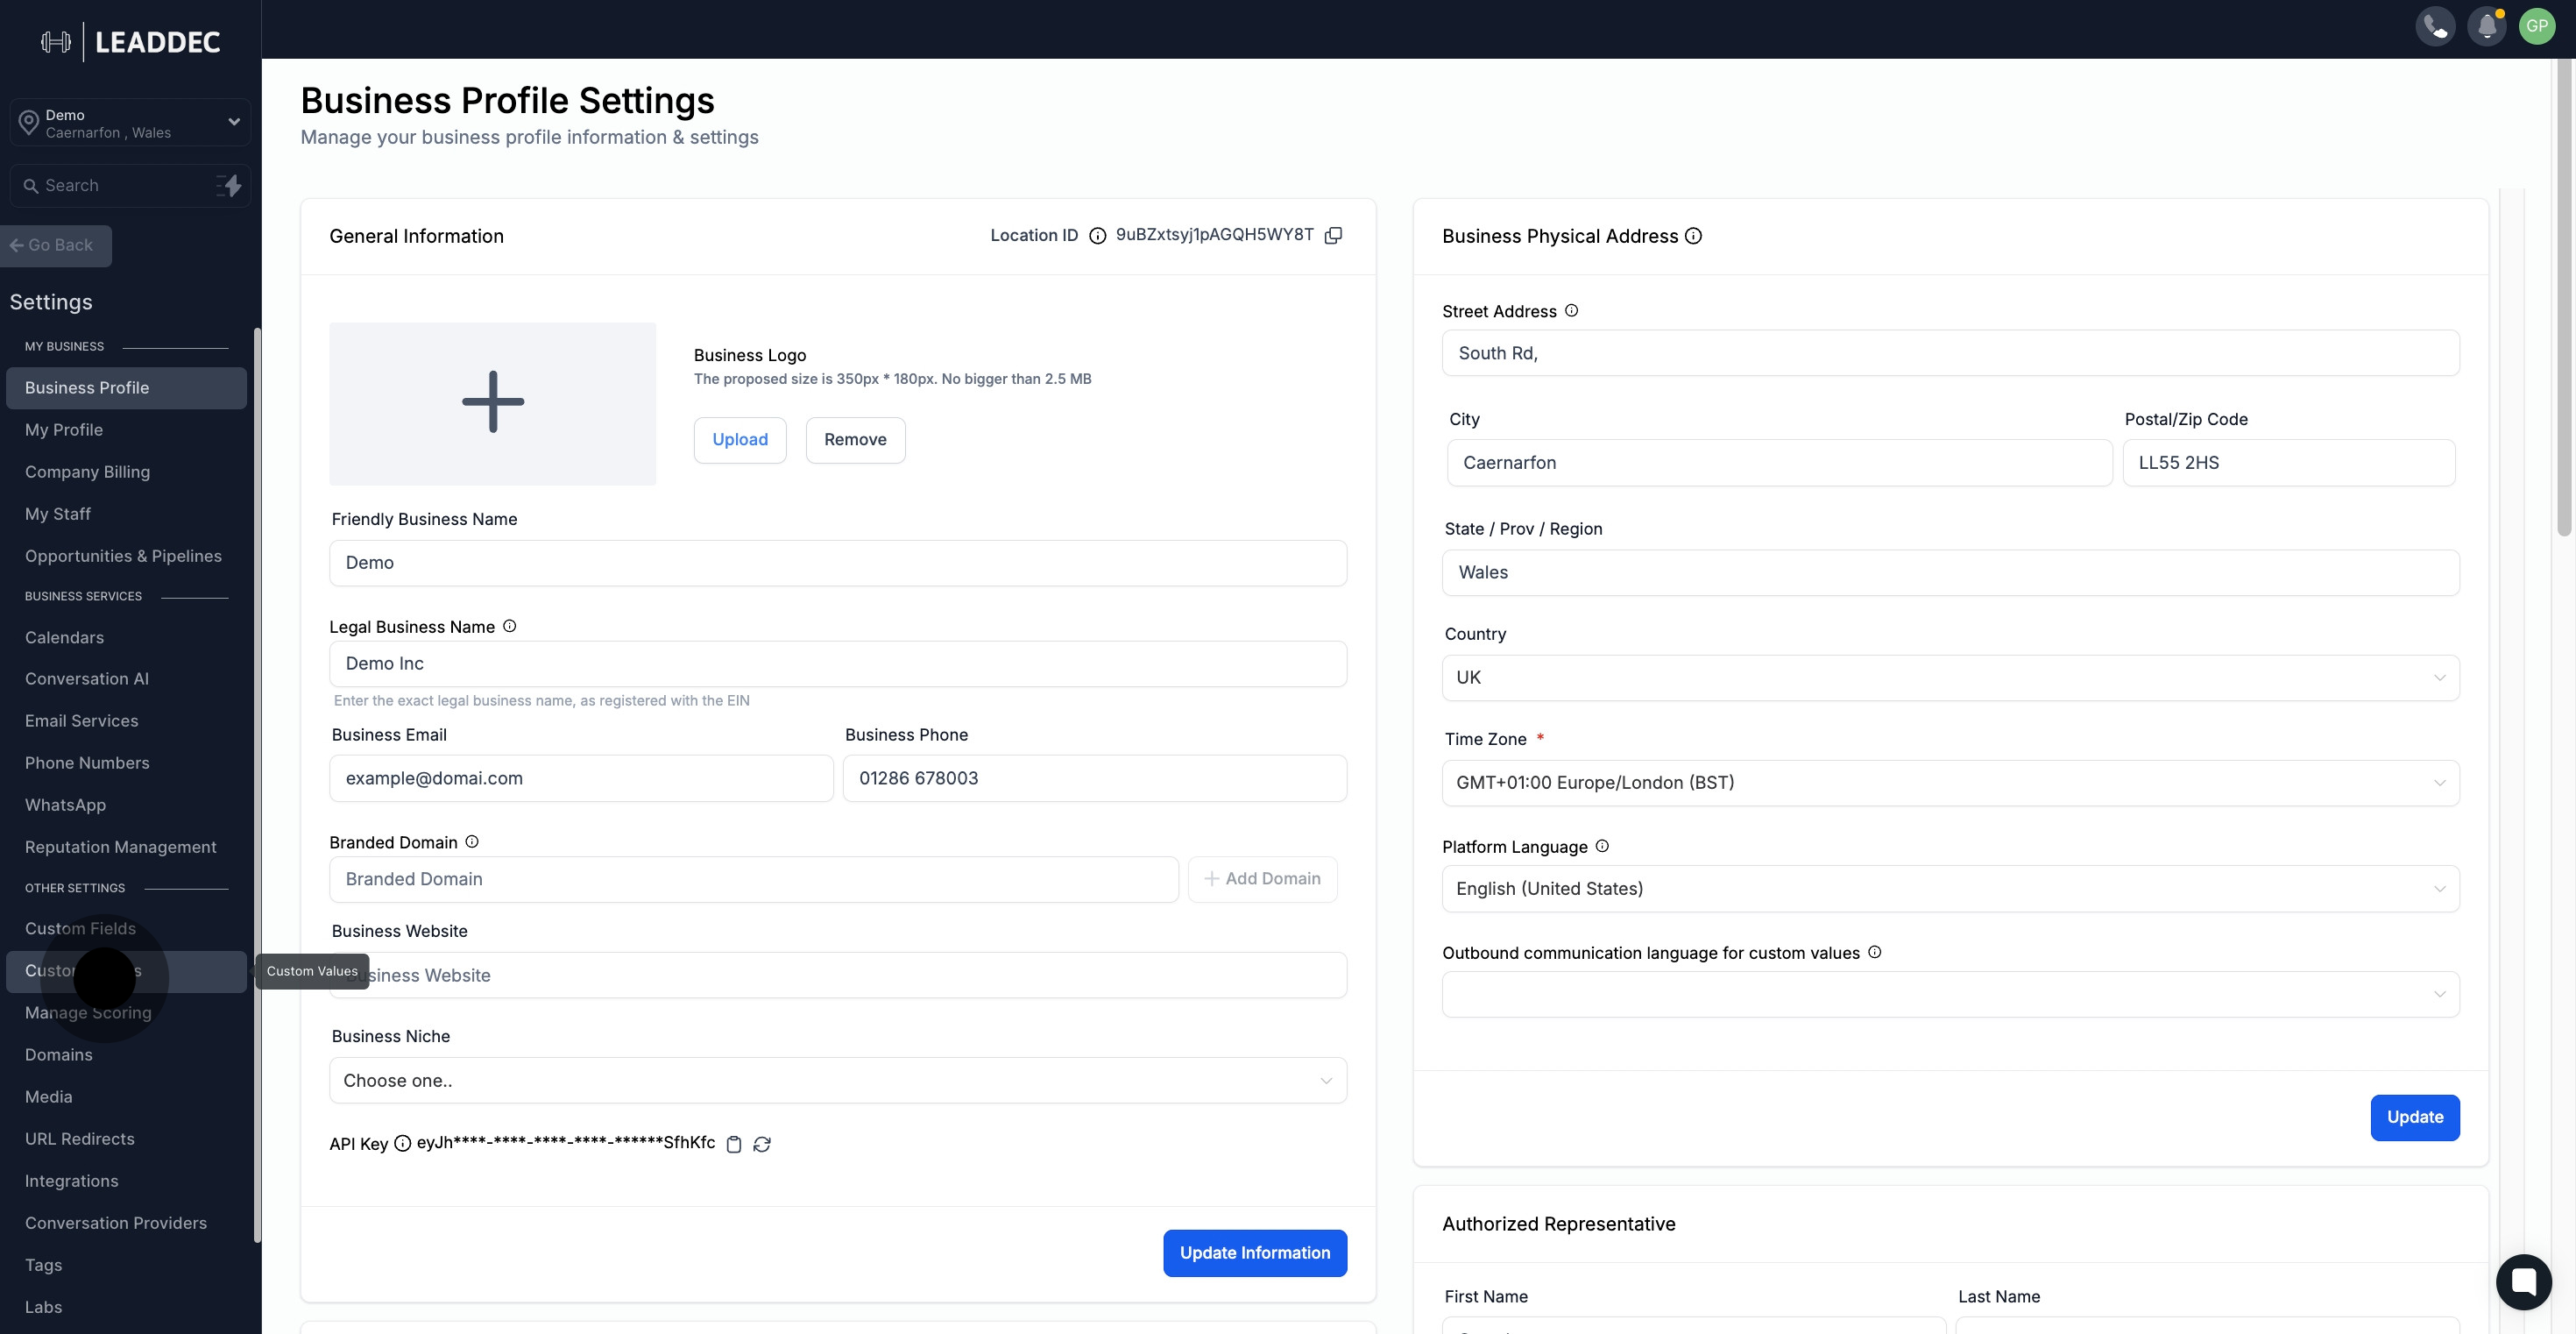
2 Next, click on "Custom Values".

3. Initiate the creation of a new custom value.
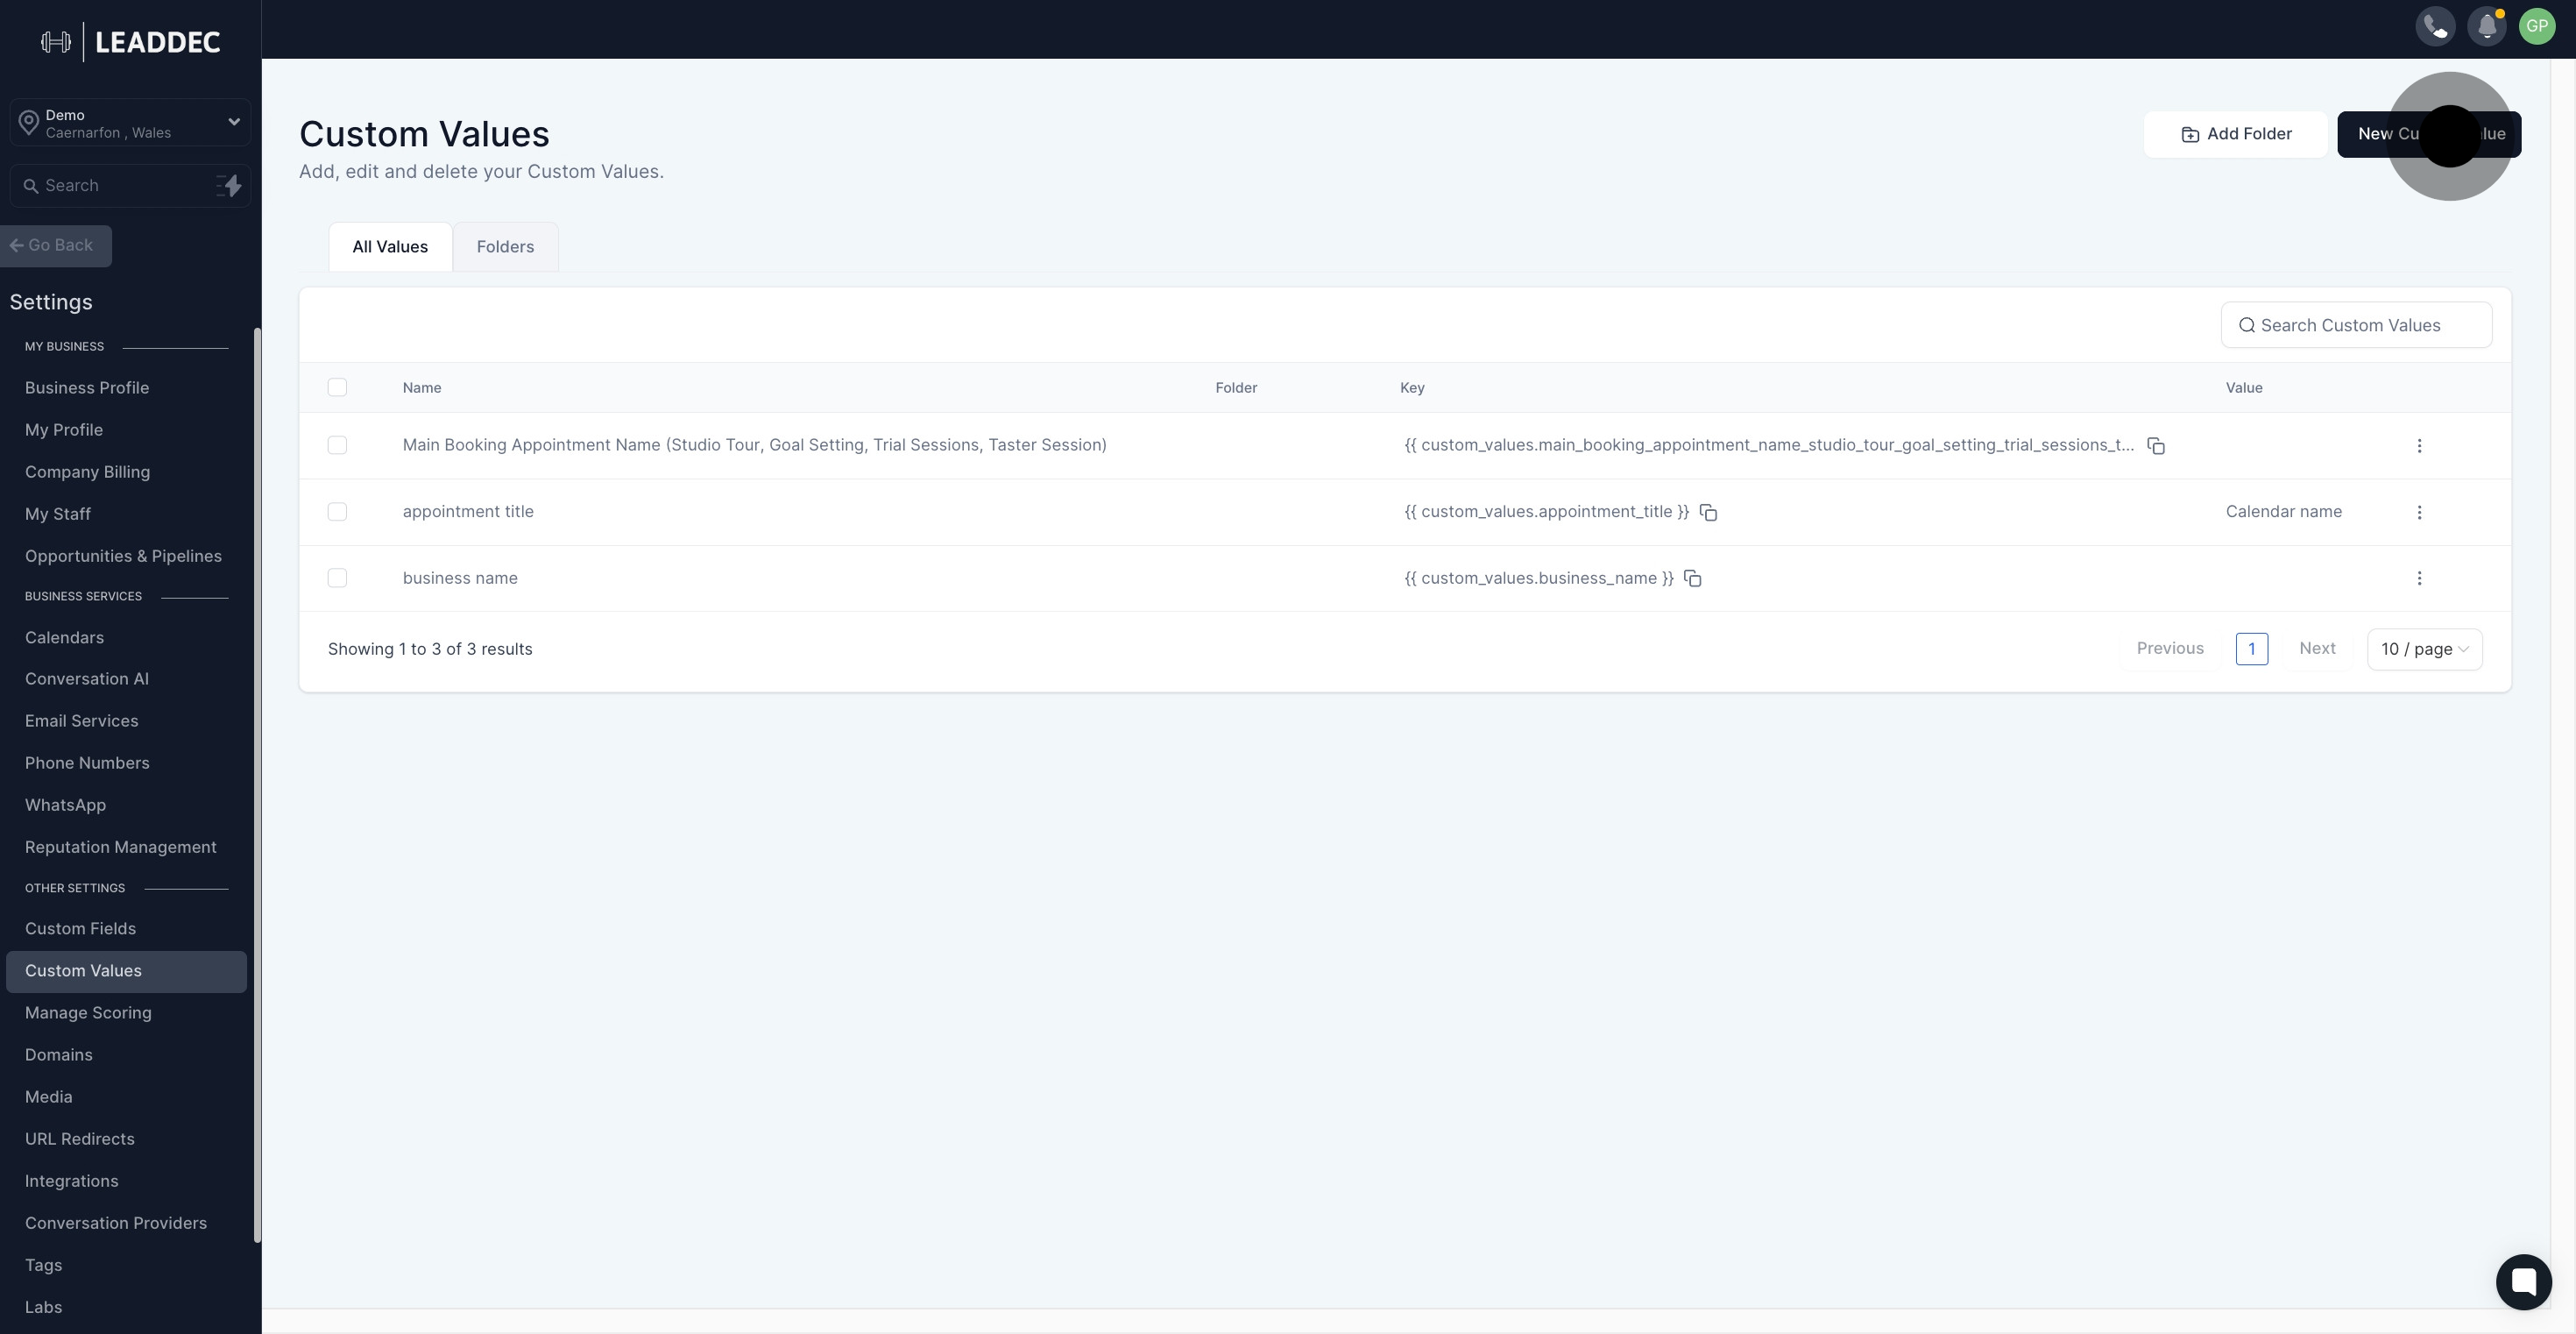
3 Click on "New Custom Value".

4. Enter the appropriate name for your new custom value.

4 Once that's done, click here.

5. Now, provide the corresponding value for your newly named field.

5 Click on the element.

6. Optionally, assign your custom value to a specific folder by selecting Select Folder.
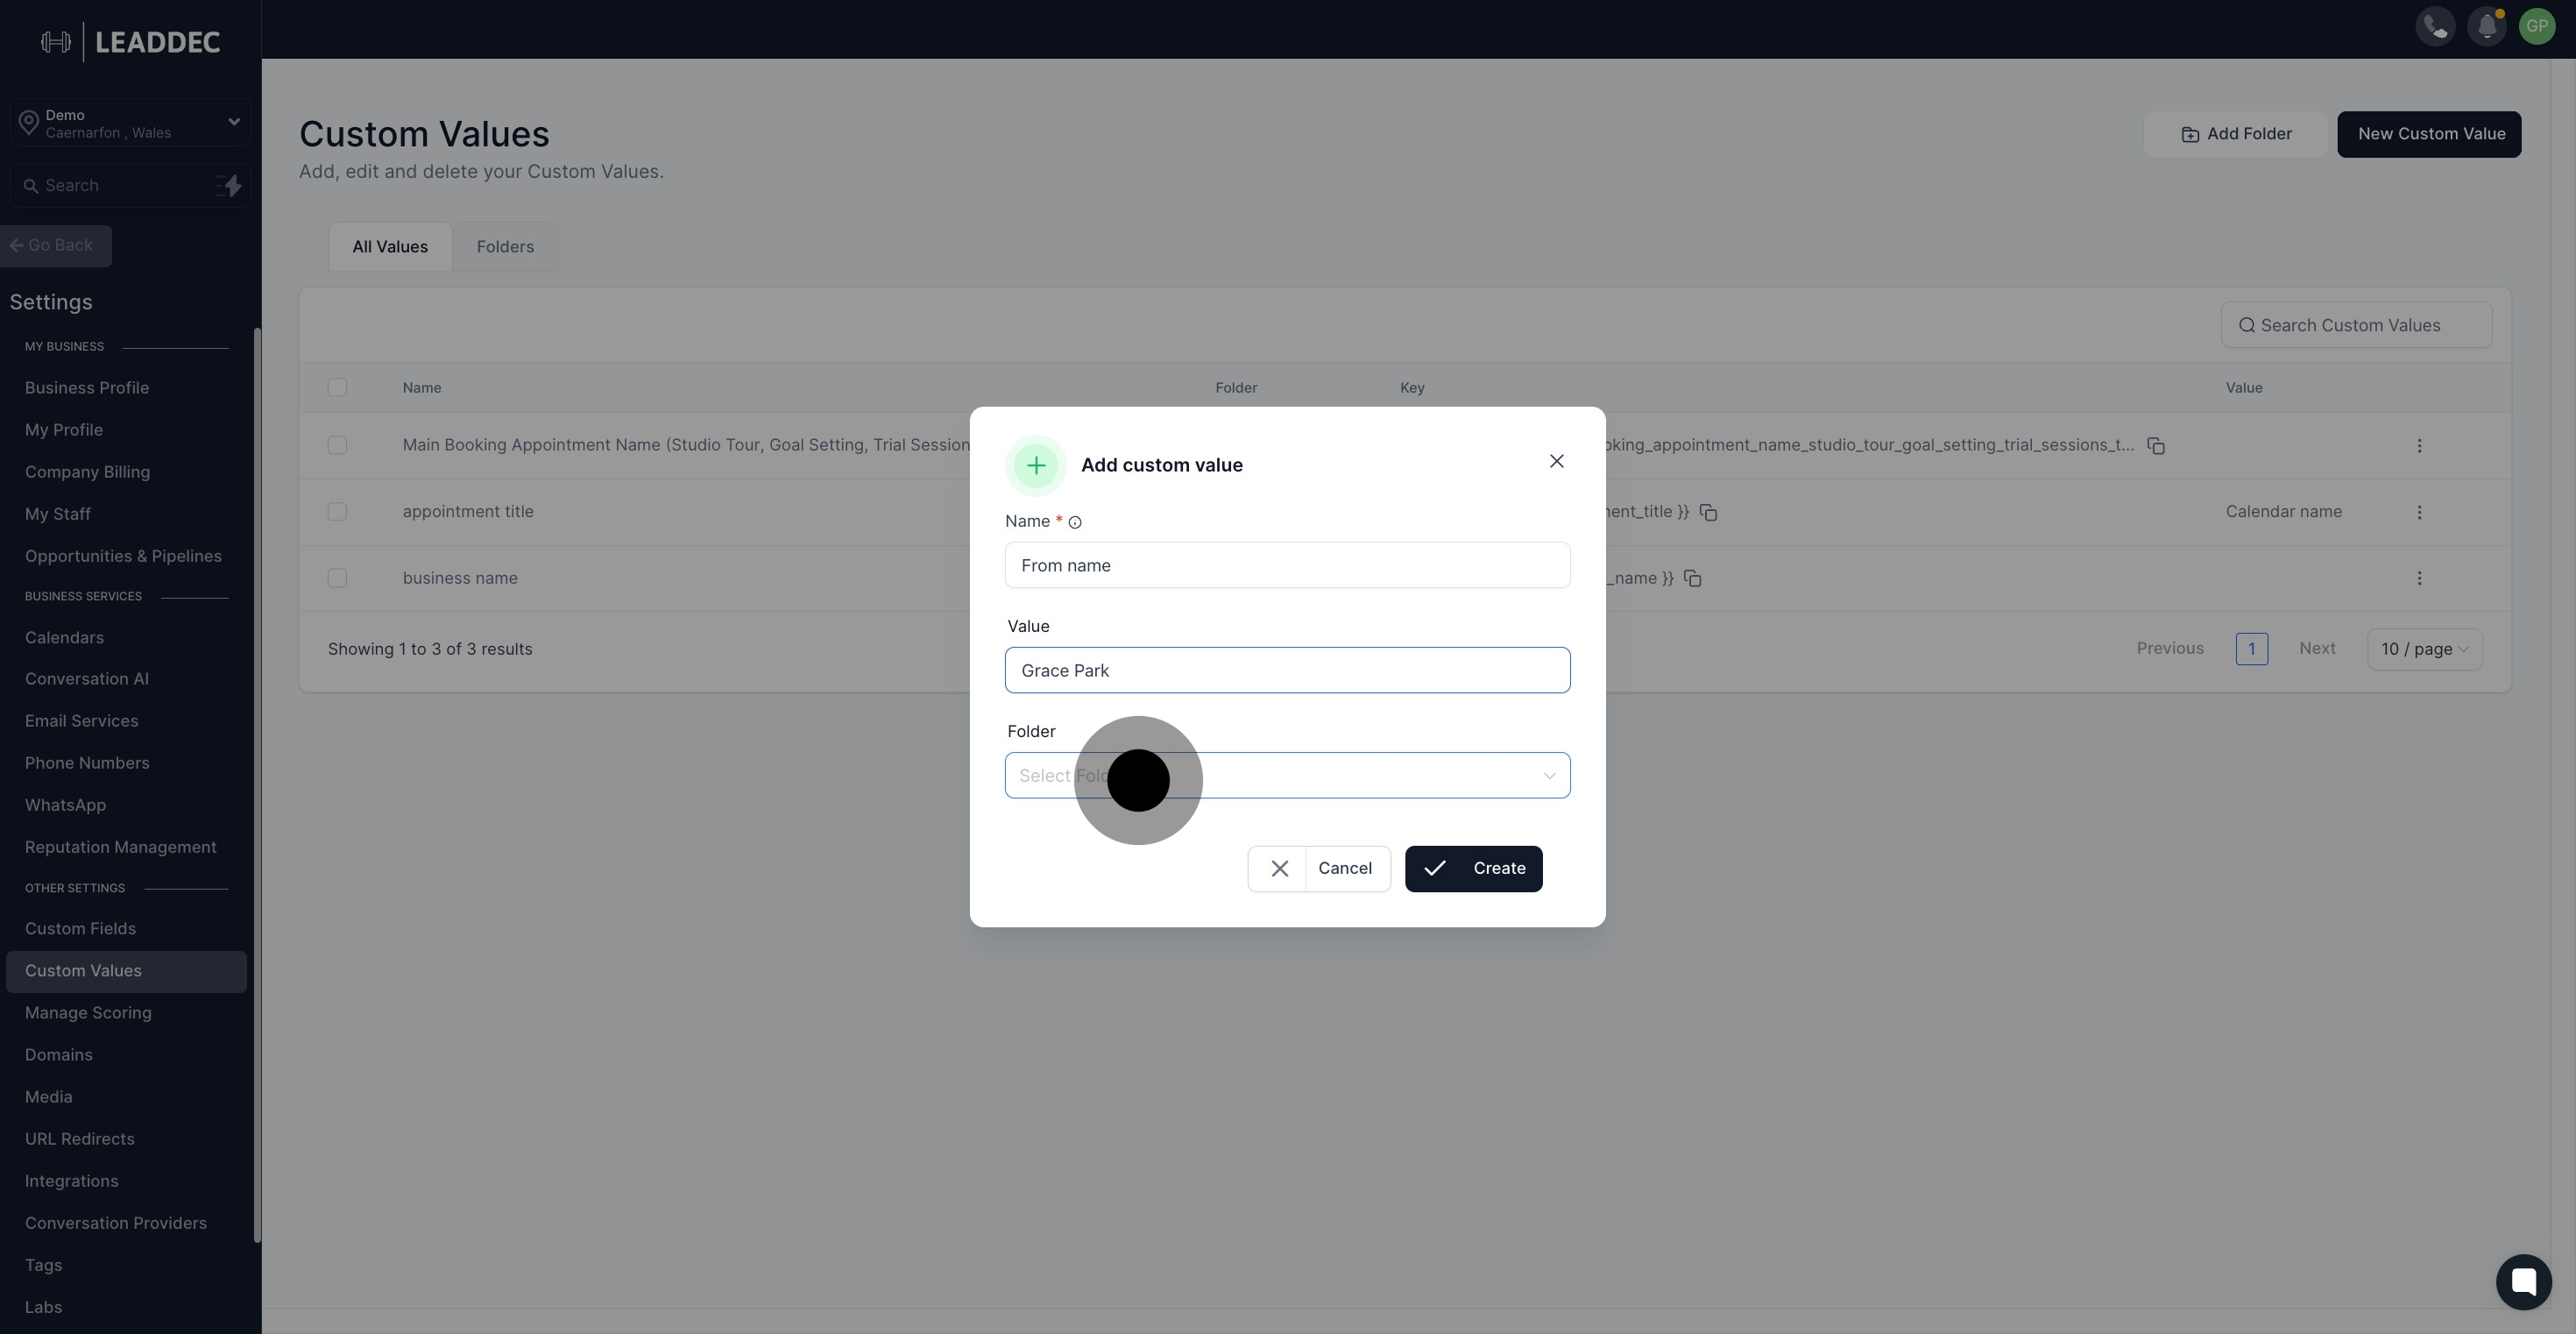
6 Next, click on "Select Folder".

7. Click Create to finalize and save your new custom value.
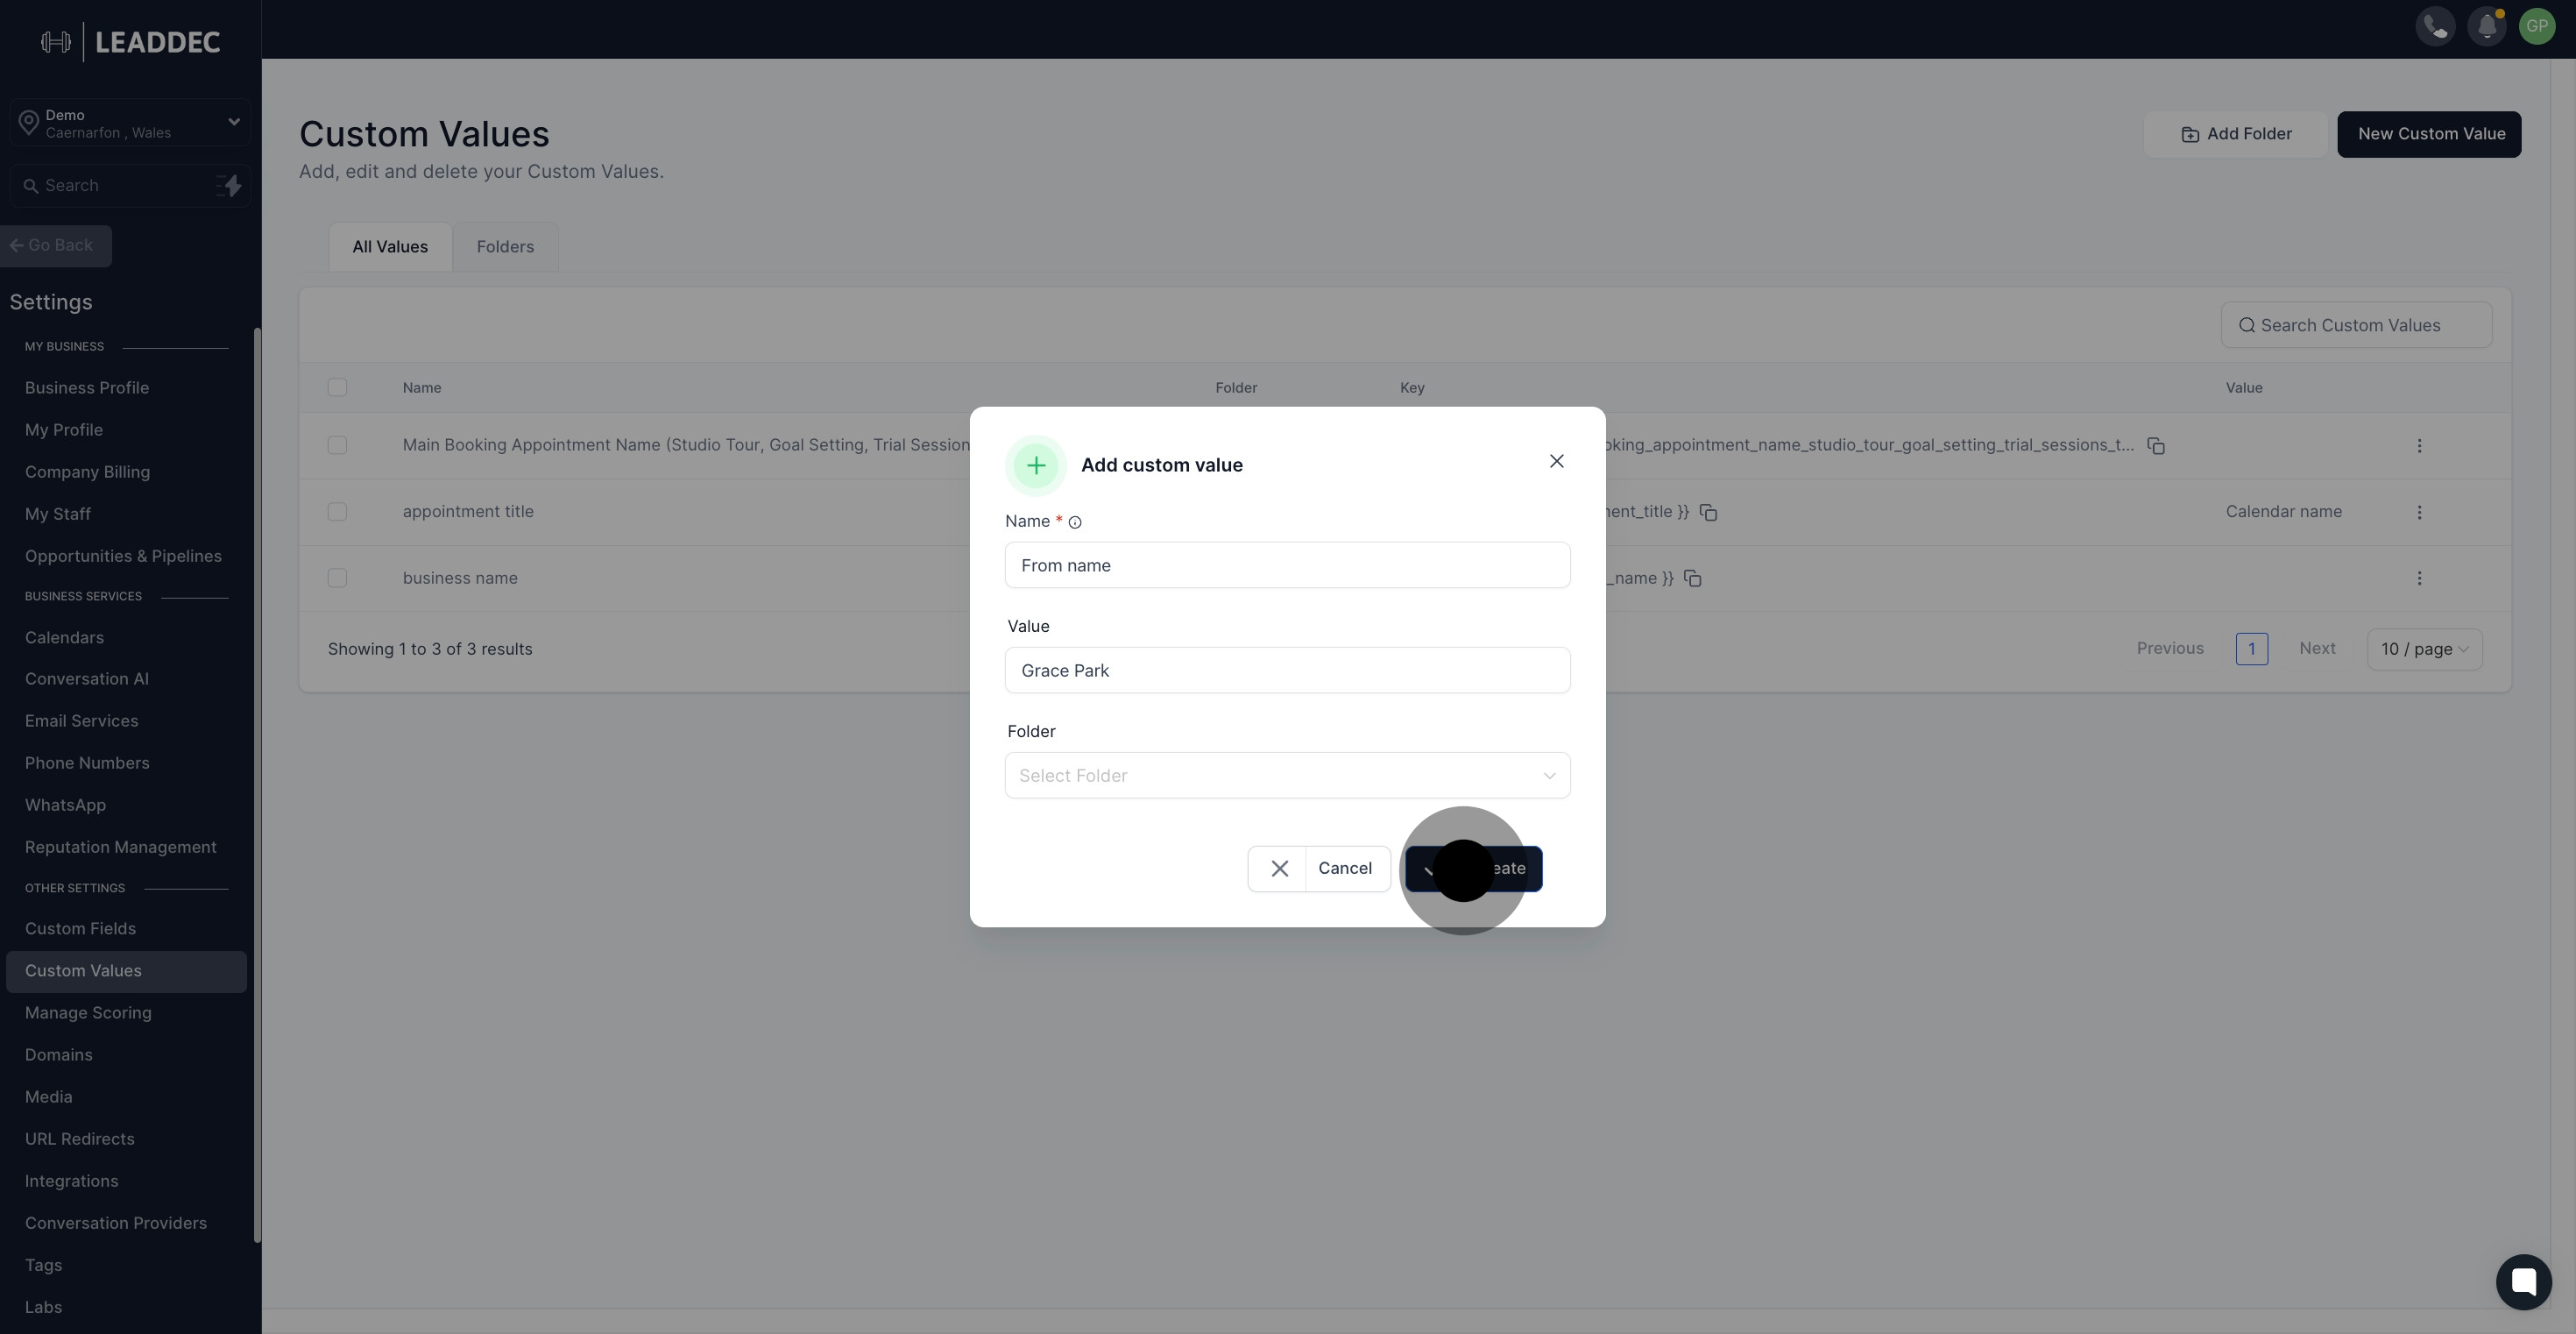
7 Now, click on "Create".

8. Congratulations, your custom value has been created successfully.

8 Click on "Custom Values".

Did this answer your question?
😞
😐
😁